

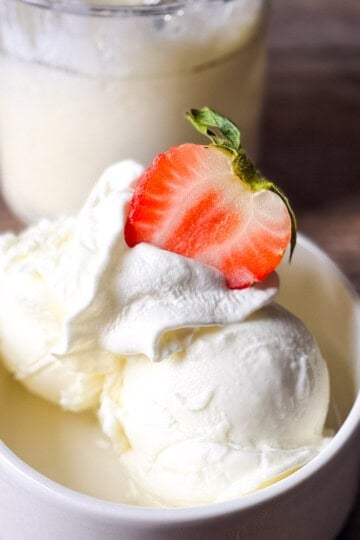
This Ninja Creami Vanilla Ice Cream recipe creates perfectly smooth, creamy ice cream without cream cheese and just four simple ingredients! No cooking required - just mix, freeze, and let your Ninja Creami work its magic!
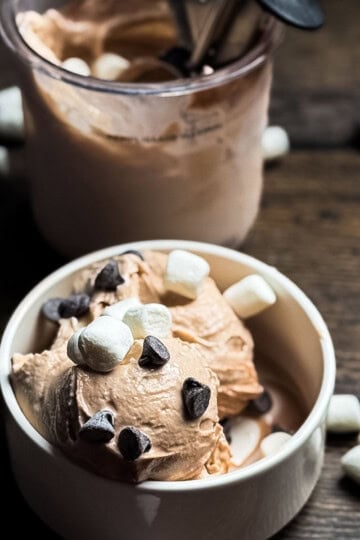
If you love this recipe, try my Ninja Creami Coffee Ice Cream or Ninja Creami Chocolate Ice Cream next!

Want to save this recipe?
Enter your email & I'll send it to your inbox. Plus, get great new recipes from me every week!
Editor's Note: This post was originally published on April 18, 2023. I recently updated it on January 19, 2025, with more information and helpful tips, but the recipe remains the same.
I have been making homemade ice cream for years, and now the Ninja Creami ice cream machine has made it much faster and easier.
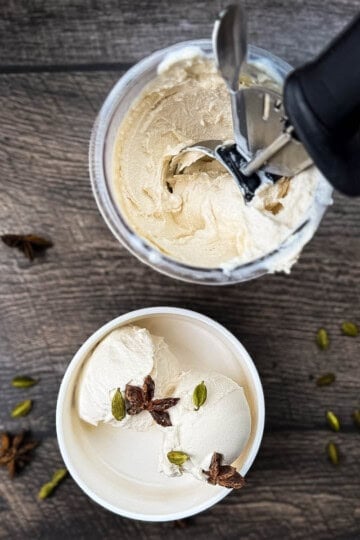
This vanilla ice cream base is also used for Ninja Creami Strawberry Ice Cream, Ninja Creami Chocolate Ice Cream, and Ninja Creami Coffee Ice Cream.
You can even use these ice cream flavors to make an ice cream sundae bar!
Jump to:
Why I love this recipe
- Silky smooth texture: Powdered sugar creates the perfect scoopable consistency.
- No cooking needed: Just mix and freeze - it couldn't be easier!
- Endless variations: Perfect base for mix-ins like cookies, fruit, chocolate chips, sprinkles, caramel sauce, or butterscotch sauce.
- Better than store-bought: Pure ingredients, no preservatives or additives.
- No thick coating in your mouth: By omitting cream cheese, you get a smooth and creamy texture without the thick coating that some ice creams can leave.
Recipe ingredients
All ingredients for this Ninja Creami classic vanilla ice cream recipe are shown in the picture below, and special notes are made in the bulleted list below to assist you.

- Heavy whipping cream: Creates that rich, creamy texture. Full-fat coconut milk or unsweetened coconut cream works for dairy-free!
- Whole milk: Balances the richness perfectly. You can also use unsweetened oat milk or almond milk.
- Vanilla extract: Pure vanilla extract or vanilla bean paste for the best flavor. (Try this homemade Vanilla Bean Paste Recipe).
- Powdered sugar: Dissolves completely for the smoothest texture. Sugar substitutes work, too.
See the printable recipe card below for the full list of ingredients and quantities.
How to make Ninja Creami vanilla ice cream
- Step 1: In a measuring cup or Ninja Creami pint container, whisk together ½ cup heavy cream, 1-¼ cups whole milk, ⅓ cup powdered sugar, and 1 teaspoon vanilla extract until the sugar dissolves completely. Note: A battery-powered milk frother works great!


- Step 2: Pour mixture into a clean Ninja Creami pint container if not already using one. Secure the lid tightly on the pint jar. Don't fill the ingredients past the MAX FILL line.
- Step 3: Place in freezer for 24 hours minimum until completely frozen. Note: The container must be level in the freezer.
- Step 4: After the 24-hour freezing period, remove the pint jar from the freezer and remove the lid.


- Step 5: Place the pint container in the outer bowl and lock on the outer bowl lid. Place the bowl assembly in the Ninja Creami machine and turn the handle to the right to raise the platform and lock it in place. Press the ICE CREAM button on the Ninja Creami control panel. Let the machine churn the ice cream, which takes about 2 minutes.


- Step 6: Once the ice cream is done churning, remove the pint jar from the machine. If the ice cream looks dry and crumbly, like the photo below, reattach the lid and select the RE-SPIN function on the Ninja Creami control panel to process the mixture again. Note: Add one tablespoon of milk before re-churning for extra creamy ice cream.


- Step 7: When done, scoop up the ice cream with an ice cream scoop and serve immediately.

Top tips
- Let the frozen container sit at room temperature for 1-2 minutes before processing.
- Stay below the "Max Fill" line for best results.
- Use "Re-spin" if needed - this is normal and makes it extra creamy!
- Wait until after the first spin, then use the "Mix-in" function to add mix-ins.
What to serve with Ninja Creami vanilla ice cream
Here are perfect ways to enjoy your homemade vanilla ice cream:
- Classic style: Serve in a waffle cone or make ice cream sandwiches with your favorite cookies (delicious with chocolate crinkle cookies).
- Warm & cold: Top Air Fryer Peach Cobbler, Air Fryer Peach Crisp, or pair with warm brownies.
- Sundae bar: Drizzle with hot fudge, caramel sauce, maple syrup, sliced strawberries or raspberries, whipped cream, sprinkles, and crushed nuts.
- Milkshake: Blend with milk for the ultimate shake, or try my Ninja Creami Chocolate Milkshake.
Variations
- Mix-ins: Add crushed cookies, candy pieces, or nuts after first spin.
- Flavor twists: Stir in peanut butter, caramel, or fruit preserves.
- Ninja Creami protein ice cream: Add some vanilla protein powder.
Recipe FAQs
The ice cream can be stored in the freezer for 2-3 weeks, although I recommend using it within the first week.
While I recommend powdered sugar, you can use a different sweetener, such as granulated sugar or honey.
The Ninja Creami Ice Cream Maker is a kitchen appliance that helps you create frozen treats like ice cream, gelato, smoothie bowls, and sorbet. It churns frozen ingredients to a smooth texture.

More Ninja Creami recipes you'll love
- Ninja Creami Vanilla Protein Ice Cream
- Ninja Creami Dole Whip
- Ninja Creami Strawberry Sorbet
- Ninja Creami Fairlife Chocolate Milk Ice Cream
- Ninja Creami Cookies and Cream Ice Cream (made with Oreos)
- Ninja Creami Mint Chocolate Chip Ice Cream
- Ninja Creami Maple Walnut Ice Cream
- Ninja Creami Apple Pie Ice Cream
Did you love this recipe?
Then please leave a 5-star rating and/or review below! You can also save it! Just tap the heart symbol ❤️ in the lower right corner of your screen, and the recipe will be stored in your own recipe box!📥
Printable Recipe

Ninja Creami Vanilla Ice Cream
Equipment
- Ninja Creami pint jar
- Ninja Creami Machine
Ingredients
- ½ cup heavy whipping cream
- 1¼ cups whole milk
- 1 teaspoon vanilla extract
- ⅓ cup powdered sugar
Instructions
- Combine the heavy whipping cream, whole milk, vanilla extract, and powdered sugar in the Ninja Creami pint jar. Mix the ingredients with a whisk or milk frother until the powdered sugar fully dissolves. Tip: Ensure the ingredients don't exceed the MAX FILL line. Once the ingredients are well-mixed, secure the plastic lid tightly on the pint jar.
- Place the pint jar in the freezer on a level surface. Freeze for at least 24 hours. After the 24-hour freezing period, remove the pint jar from the freezer and remove the lid.
- Place the pint container in the outer bowl and lock on the outer bowl lid. Place the bowl assembly onto the Ninja Creami motor base and turn the handle to the right to raise the platform and lock it in place. Press the "Ice Cream" button on the Ninja Creami control panel. Let the machine churn the ice cream, which takes about 2 minutes. Tip: The ice cream may look crumbly if your freezer is set to a very cold temperature. If this occurs, add a tablespoon of milk and select the RE-SPIN function on the Ninja Creami control panel to process the mixture until it becomes smooth and creamy. Once the ice cream is done churning, turn off the Ninja Creami, and remove the pint jar from the machine.
- Scoop up the ice cream with an ice cream scoop and serve immediately. Enjoy!
Save This Recipe 💌
Notes
- The pint container must stay level while freezing.
- Let sit 1-2 minutes at room temperature before churning.
- Use the "Re-Spin" function if needed for a smoother texture.
- Add mix-ins after the first spin using the "Mix-In" function.
- Keeps in freezer for up to 2 weeks.
Nutrition
The provided nutrition information is automatically calculated. Accuracy is not guaranteed.
This recipe was originally published on April 18, 2023. It was completely updated on January 19, 2025.

Comments
No Comments