

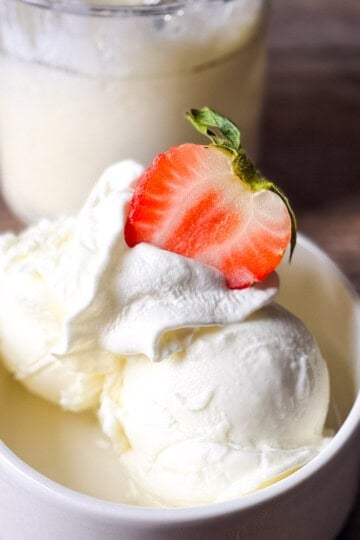
This Ninja Creami Strawberry Ice Cream recipe is smooth, creamy, and full of real strawberry flavor. It's made with fresh or frozen strawberries, cream, milk, powdered sugar, and vanilla - no egg yolks, no cream cheese, and no mystery ingredients.

Want to save this recipe?
Enter your email & I'll send it to your inbox. Plus, get great new recipes from me every week!
I've made quite a few Ninja Creami recipes, and this is one of those simple ones that proves you don't need a long ingredient list to make really good ice cream. Just add cream and a little sugar to some strawberries, then 24 hours in the freezer, and the Creami takes it from there. Serve it in a bowl, scoop it into a cone, or pair it with these Chocolate Covered Strawberry Cookies for an easy strawberry dessert combo.
Love your Ninja Creami machine? Try my Ninja Creami Blueberry Ice Cream and Ninja Creami Strawberry Cheesecake Ice Cream next.
Why You'll Love This Strawberry Ice Cream
- Real strawberry flavor: This recipe uses actual strawberries, not pudding mix or artificial flavoring.
- No cream cheese: I skip it here because I find it can leave a coating on the roof of your mouth. This version stays clean, creamy, and fresh.
- Easy to adjust: If your berries are tart, add a little extra powdered sugar. If they're super sweet, you can pull back slightly.
- Creamy after a re-spin: Like many Ninja Creami recipes, it may look crumbly after the first spin. A splash of milk or cream fixes it fast.

Ingredients + Substitutions
- Strawberries. Fresh strawberries give the best flavor when they're ripe and sweet, but frozen strawberries also work. Dice them small so they blend into the base evenly.
- Heavy whipping cream. For a lighter ice cream, use half-and-half instead. Unsweetened coconut cream can also be used if you prefer a non-dairy alternative.
- Whole milk. If you want to reduce the fat content, you can use lower-fat milk, almond milk, or coconut milk. ( I LOVE Fairlife milk - you can use either 2% or 3%).
- Powdered sugar. Dissolves easily and keeps things smooth. You can also use granulated sugar, honey, monk fruit, or agave.
- Vanilla extract. Or swap in vanilla bean paste.
See the printable recipe card for exact measurements and a full list of ingredients.
How to Make Ninja Creami Strawberry Ice Cream
This recipe makes one pint.
- Prep the strawberries. Wash, hull, and dice the strawberries into small chunks.
- Mix the base. Combine the heavy cream, milk, powdered sugar, and vanilla in a Ninja Creami pint jar or measuring cup. Stir well.


- Add the strawberries. Pour the mixture into the Ninja Creami pint jar, making sure not to exceed the MAX FILL line. Add the chopped strawberries to the mixture and gently stir to incorporate.


- Freeze. Securely attach the plastic lid to the pint jar. Place the pint jar in the freezer on a level surface and freeze for at least 24 hours.
- Spin. After the 24-hour freezing period, remove the pint jar from the freezer and remove the lid. Place the pint container in the outer bowl of the Ninja Creami ice cream machine. Lock the outer bowl lid and place the bowl assembly onto the Ninja Creami motor base. Turn the handle to the right to raise the platform and lock it in place. Select the ICE CREAM button on the Ninja Creami control panel and let the machine do its thing. In just a couple of minutes, you'll have creamy strawberry ice cream.


- Re-Spin if needed. Remove the pint jar from the machine. If the ice cream looks a little dry or crumbly after the first spin, add a tablespoon of milk, reattach the lid and select the RE-SPIN function on the control panel to process the mixture again.
- Serve. Serve the pint of homemade strawberry ice cream immediately and enjoy!


Variations
- Add mix-ins: After spinning, add white chocolate chips, crushed cookies, or graham cracker crumbs and use the MIX-IN function.
- Make it smooth: Blend the strawberries into the base before freezing if you don't want fruit pieces.
- Swap the fruit: Try raspberries, mango, or a berry mix.
- Make it dairy-free: Use coconut cream and almond milk.
Serving Ideas
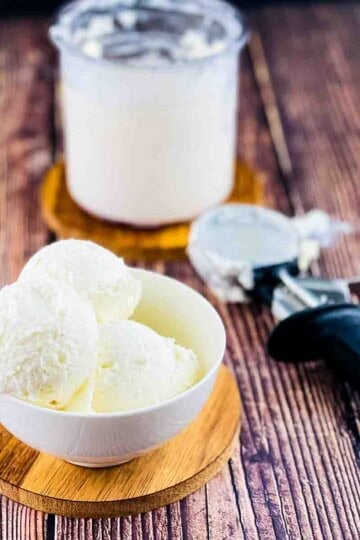
- Classic Bowl: Serve a scoop or two in a bowl or waffle cone.
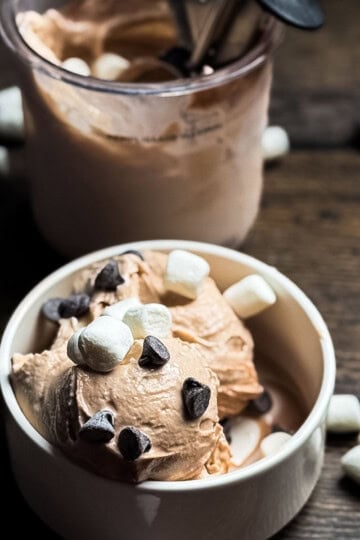
- Neapolitan: Pair it with Ninja Creami chocolate ice cream and Ninja Creami vanilla ice cream.
- Berry Parfait: Layer with granola and berries. Repeat the layers and top with whipped cream.
- Strawberry Sundae: Top with more strawberries, whipped cream, and chocolate sauce or caramel sauce.
- Strawberry Milkshake: Blend it with milk for the creamiest strawberry milkshake ever. Follow the same instructions for making my Ninja Creami Chocolate Milkshake.
Top Tips
- Use ripe strawberries. The sweeter the berries, the better the flavor. If they're a bit tart, just bump up the sugar.
- Chop small. Smaller chunks freeze and churn more evenly (plus you get bits of fruit in every bite).
- Freeze flat. Make sure the pint freezes level or the blade won't reach everything during the spin.
- Label your pints. Especially if you have more than one pint on the go.

Recipe FAQs
This usually happens when the base is very cold or slightly low in fat. Add 1 tablespoon of milk or heavy cream and use the Re-Spin function.
Yes. Start with a little less if your strawberries are very sweet. If they're tart, you may need the full amount.
Keep the ice cream in the Ninja Creami pint container with the lid on. Freeze for up to 2 weeks. Re-spin before serving if it freezes hard.


Want even more Ninja Creami Recipes?
- Fairlife Chocolate Milk Ninja Creami Ice Cream
- Ninja Creami Cookies and Cream
- Ninja Creami Vanilla Protein Ice Cream
- Ninja Creami Peanut Butter Ice Cream
- Ninja Creami Fresh Mango Ice Cream
- Ninja Creami Banana Ice Cream
- Ninja Creami Maple Walnut Ice Cream
You can also browse for more Ninja Creami Recipes.
If you try this Ninja Creami Strawberry Ice Cream recipe, leave a rating or comment below-it helps more than you know! 😊
Printable Recipe

Ninja Creami Strawberry Ice Cream
Ingredients
- 1¼ cups whole milk
- ½ cup heavy cream
- ⅓ cup powdered sugar
- 1 teaspoon vanilla extract
- ½ cup strawberries, washed and sliced (about 8 berries)
Instructions
- Mix the base: Combine whole milk, heavy cream, powdered sugar, and vanilla extract in a measuring cup or empty Ninja Creami pint container. Whisk until smooth.
- Add strawberries: Stir in sliced strawberries. Ensure the mixture doesn't go over the MAX FILL line. Seal with the lid.
- Freeze: Place the pint container upright on a level surface in your freezer. Freeze for at least 24 hours.
- Spin: Remove the lid and place the pint into the Ninja Creami outer bowl. Place the container in the outer bowl assembly and lock on the lid assembly. Place the bowl assembly onto the Ninja Creami motor base and turn the handle to the right to raise the platform and lock it in place. Press the ICE CREAM button. TIP: If the ice cream looks crumbly after the first spin, add a tablespoon of milk or cream and RE-SPIN to process the mixture again.
- Serve: Scoop and serve immediately - or use the MIX-IN function if adding extras like white chocolate chips or crushed cookies. Enjoy!
Save This Recipe 💌
Notes
- Chop the strawberries into small pieces so they freeze and blend evenly.
- Let the pint sit at room temperature for 5 minutes before spinning for the creamiest texture.
- Want it super smooth? Blend everything before freezing.
Nutrition
The provided nutrition information is automatically calculated. Accuracy is not guaranteed.

Comments
No Comments