

This Ninja Creami Vanilla Protein Ice Cream combines simple ingredients into a creamy, protein-packed frozen treat! Using Fairlife milk and your favorite protein powder, this healthier ice cream alternative has just 94 calories and 8 grams of protein per serving!
If you love Ninja Creami recipes, try my Ninja Creami Coffee Ice Cream, Ninja Creami Vanilla Ice Cream, or Ninja Creami Chocolate Ice Cream next!

Want to save this recipe?
Enter your email & I'll send it to your inbox. Plus, get great new recipes from me every week!
I'm so excited to share this Ninja Creami vanilla protein ice cream recipe with you! I have had many emails from readers asking me to make healthier Ninja Ice Cream recipes. So, after lots of testing (and lots of taste testing!), I'm happy to say I've perfected this vanilla protein version.
This protein ice cream has a creamy consistency and tastes like real vanilla ice cream without using any pudding mix!! It's the perfect dessert or snack anytime you need to quiet that sweet tooth! For an extra creamy treat, try my Ninja Creami Banana Ice Cream and Ninja Creami Frozen Vanilla Yogurt next!
How to Make Ninja Creami Vanilla Protein Ice Cream
Quick Overview
- Whisk ingredients until smooth.
- Freeze in a pint container.
- Process in Ninja Creami.
- Respin for the perfect texture.
Step by step instructions

- Step 1: In a Ninja Creami pint jar, whisk together 1½ cups Fairlife 2% milk, 1 scoop vanilla protein powder, 2-3 tablespoons agave nectar (depending on protein powder sweetness), and 1 teaspoon vanilla extract.

- Step 2: Mix until completely smooth. Make sure no protein powder clumps are remaining. Cover tightly with the lid and place upright on a level surface in the freezer. Freeze for 24 hours or until completely solid.

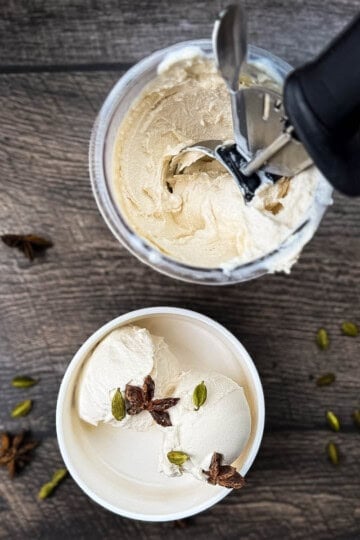
- Step 3: Remove the frozen container from the freezer and remove the lid. Place into the Ninja Creami outer bowl. Secure the outer bowl lid and press the Lite Ice Cream button.

- Step 4: Remove the pint jar from the Ninja Creami machine and use a spoon to create a well down the center of the container.

- Step 5: Add 1 tablespoon of Fairlife milk and return to the machine. Process again on the Respin setting. Note: This re-spin step will give you a perfectly creamy texture.

- Step 6: Scoop and serve immediately with your favorite toppings. Enjoy!
Pro Tip: Use a handheld milk frother or immersion blender to quickly blend your protein powder mixture - it's the fastest way to get rid of any clumps!
Recipe Ingredients
You can make this creamy, protein-packed ice cream with just a few simple ingredients from your kitchen!

- Fairlife Milk. I always use 2% Fairlife milk because it has a high protein content and is ultra-filtered to create the perfect creamy texture. I've tried regular milk, but Fairlife really makes a difference in the final result. Whole Fairlife milk works great too if you want it even richer!
- Protein Powder. Any vanilla protein powder you love will work here. I've tested this recipe with whey, casein, and plant-based options - they all work! Just note that the sweetness level of your protein powder will determine how much agave you'll need to add.
- Agave Nectar. This is my secret ingredient for perfectly smooth ice cream! It prevents those annoying ice crystals and adds just the right sweetness. If your protein powder is already sweetened, use 2 tablespoons. For unsweetened powder, bump it up to 3 tablespoons.
- Vanilla Extract. Don't skip this! Even though we're using vanilla protein powder, a teaspoon of pure vanilla extract really enhances that classic ice cream flavor.
See the printable recipe card below for quantities and a full list of ingredients.
Expert Tips
- Use Fairlife milk. Regular milk works, but Fairlife's higher protein content and filtered process create the creamiest texture.
- Mix thoroughly. Use a milk frother or blender to mix in the protein powder completely.
- Watch the freeze. Your pint container must be completely level in the freezer and frozen for a full 24 hours.
- The respin matters. Don't skip the respin step with the extra tablespoon of milk. This breaks up any ice crystals and creates that perfect creamy texture. If you find your ice cream still isn't creamy enough after one respin, you can always respin again.
Variations
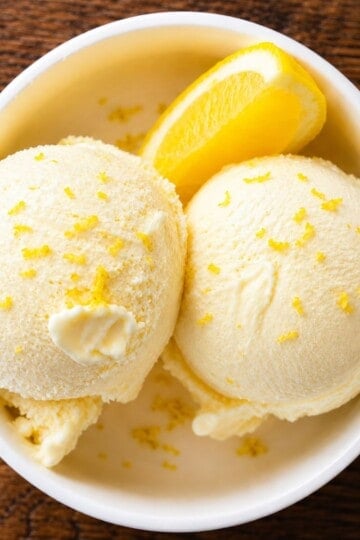
- Chocolate - Use one scoop of chocolate protein powder instead for chocolate protein ice cream.
- Peanut Butter - Use one scoop of peanut butter protein powder instead of vanilla.
- Sugar-Free - Use monk fruit syrup, stevia, or allulose instead of agave.
- Mix-Ins - Add cookie pieces (I love Oreos), chocolate chips, or crushed nuts after processing using the Mix-in function.
Storage Tips
Fresh Scooped: For the best texture, enjoy your protein ice cream right after processing. The Ninja Creami makes it perfectly scoopable!
Freezer: Store in the Ninja Creami pint container for up to 2 weeks. When ready to eat, let thaw for 1-2 minutes at room temperature, then re-process on the Lite Ice Cream setting for the best texture.

Recipe FAQs
Fairlife works best due to its higher protein content and creamier texture.
Yes, you can use your favorite sweetener.


Still Craving More?
... check out these recipes:
Printable Recipe

Ninja Creami Vanilla Protein Ice Cream
Ingredients
- 1½ cups Fairlife 2% milk
- 1 scoop vanilla protein powder
- 2-3 tablespoons agave syrup depending on protein powder sweetness
- 1 teaspoon vanilla extract
- 1 tablespoon Fairlife 2% milk for respin
Instructions
- In a Ninja Creami pint jar, combine 1½ cups Fairlife 2% milk, 1 scoop vanilla protein powder, 2-3 tablespoons agave nectar (depending on protein powder sweetness), and 1 teaspoon vanilla extract. Whisk until completely smooth with no protein powder clumps remaining. A milk frother works great for this step. Ensure the mixture does not exceed the MAX FILL line.
- Cover tightly with the lid and place in the freezer. Make sure the container is sitting completely level. Freeze for 24 hours until solid.
- After 24 hours, remove the frozen container from the freezer and take off the lid. Place the container into the Ninja Creami outer bowl and secure the outer bowl lid. Process on the LITE ICE CREAM setting until the program completes (about 2-3 minutes).
- Remove the pint container from the machine. Remove the lid and use a spoon to create a deep well down the center of the ice cream. Add 1 tablespoon of Fairlife milk directly into the well. Secure the lid, return the container to the machine, and process again on the RESPIN setting.
- Once the second spin is complete, your ice cream is ready to serve! Enjoy!
Video
Save This Recipe 💌
Notes
- Depending on your protein powder, start with 2 tablespoons of agave syrup. If you like things sweeter, add 3 tablespoons.
- If storing it in the freezer, always keep it in the original pint container. When ready to eat, let thaw for 1-2 minutes, then re-process on the LITE ICE CREAM setting.
- The first spin will result in a crumbly texture. Add 1 tablespoon of Fairlife milk and run the RESPIN cycle for a creamier consistency.
- Chocolate chips, nuts, or broken-up cookies can be added after the first spin using the MIX-IN setting.
- Fairlife milk is ultra-filtered and high in protein, giving the best texture. Regular milk may result in an icier consistency.
Nutrition
The provided nutrition information is automatically calculated. Accuracy is not guaranteed.
Jeri Walker says
This Ninja Creami vanilla protein ice cream turned out so creamy and delicious! The texture is perfect after the respin, and I love that it’s a healthier alternative to regular ice cream!