

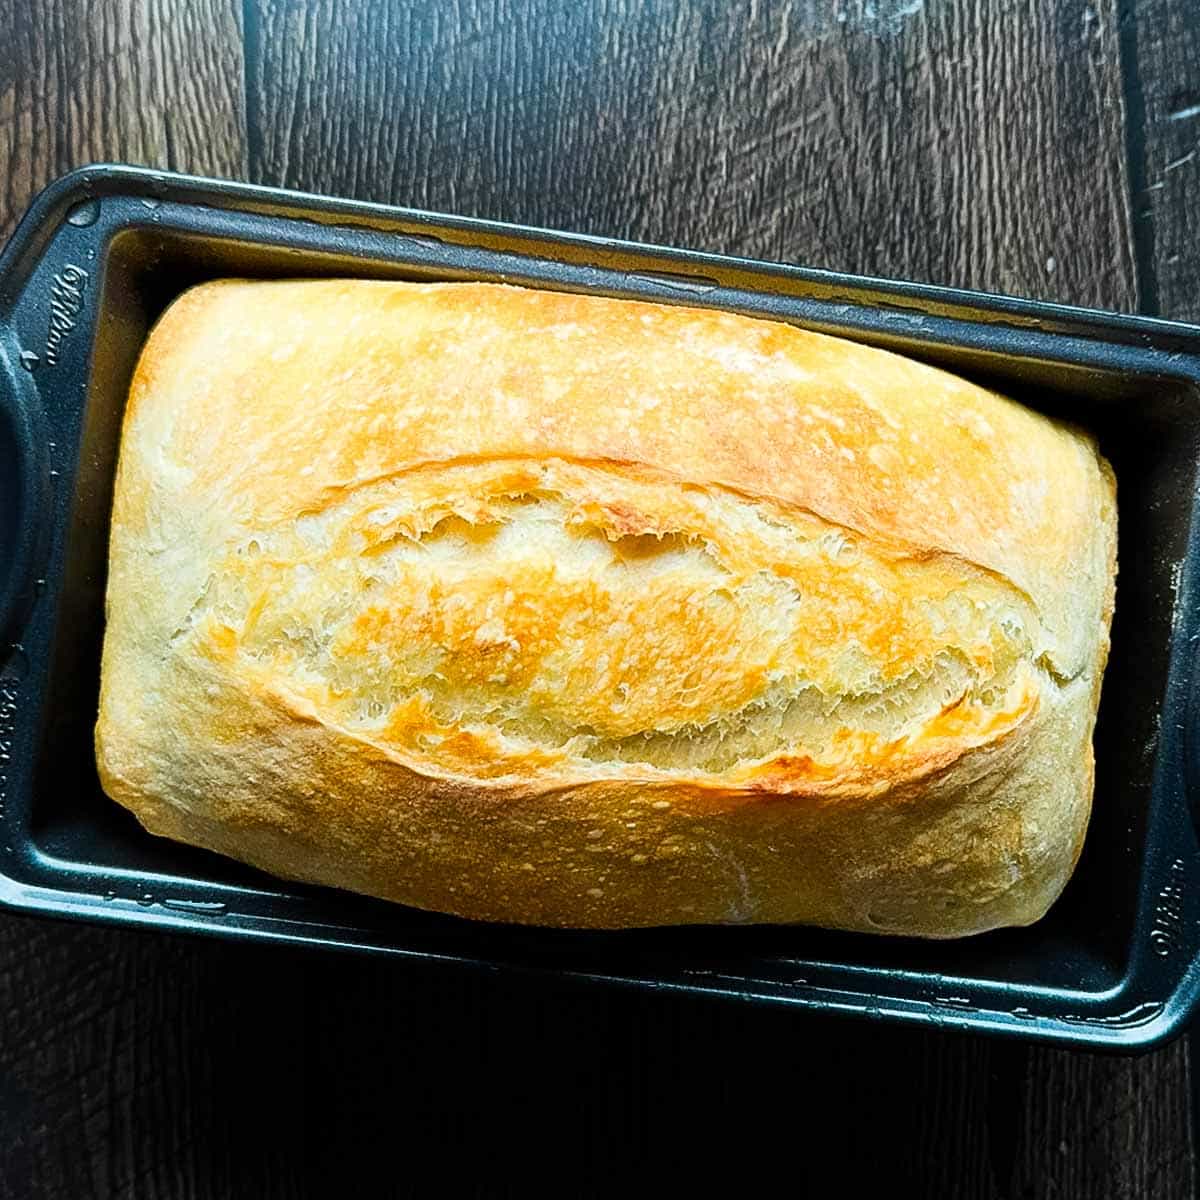
This No Knead Sourdough Sandwich Bread recipe is the easiest way to make fluffy sandwich bread - all without stretch and folds and almost no hands-on time. This soft, chewy bread has a mild tang that makes the BEST toast and sandwiches!
This sourdough sandwich bread uses the same technique as my reader-favorite, five-star No-Knead Sourdough Bread Recipe, so it's easy to fit into your busy schedule.
Want to save this recipe?
Enter your email & I'll send it to your inbox. Plus, get great new recipes from me every week!
Between recipes like Old-Fashioned Air Buns, No-Knead Whole Wheat Flour Sourdough Bread, Irish Soda Bread, and Easy Sourdough Discard Bread, I really can't remember the last time I purchased a loaf of bread at my local grocery store.
I bake different loaves depending on what time of year it is, my recipes for the week, and what ingredients I currently have in my kitchen. But this sourdough sandwich bread recipe is one I make every. single. week.
It only requires a few simple ingredients and is easy enough for breakfast or lunches on the go. Plus, without any added sugars or preservatives, this tastes WAY better than store-bought bread and it saves you money too!
Recipe at a Glance
- Method: No-knead sourdough sandwich bread
- Total Time: About 10-12 hours (most of it hands-off)
- Active Time: About 15 minutes
- Difficulty: Easy/perfect for beginners!
- Yield: 1 sandwich loaf
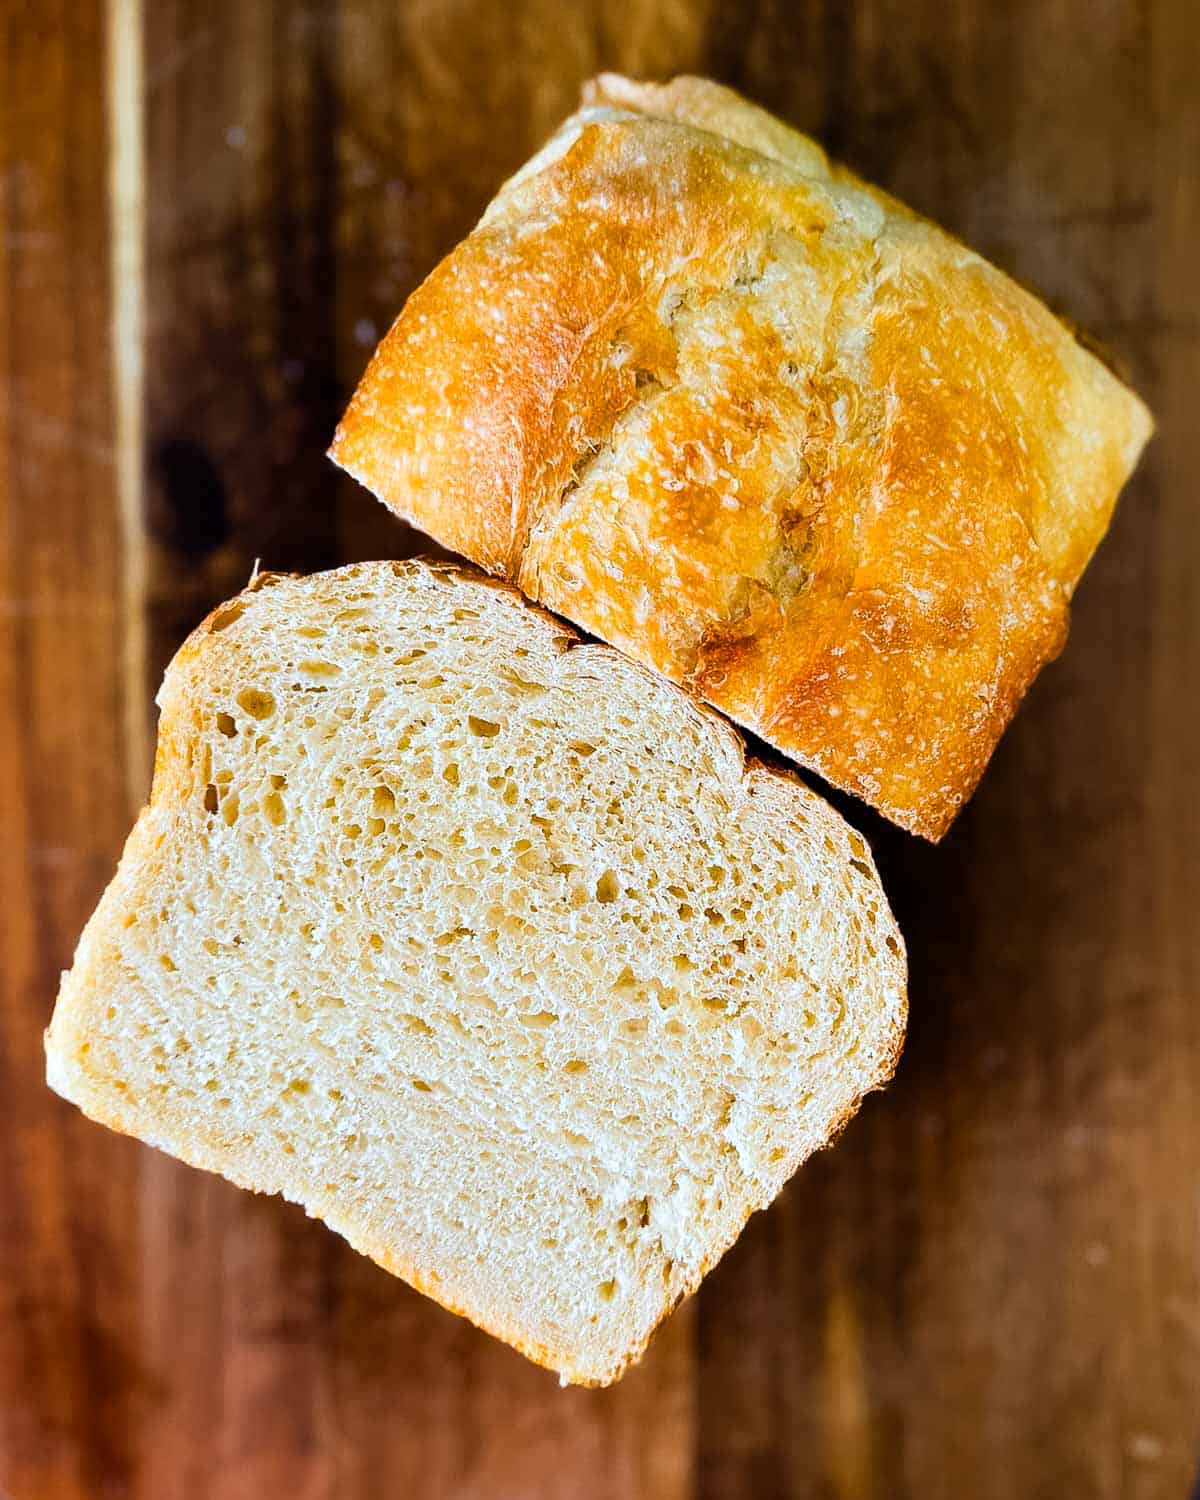
- Texture: Soft, tender crumb with light chew
- Flavor: Mild sourdough tang
- Great For: Toast, sandwiches, meal prep
Jump to:
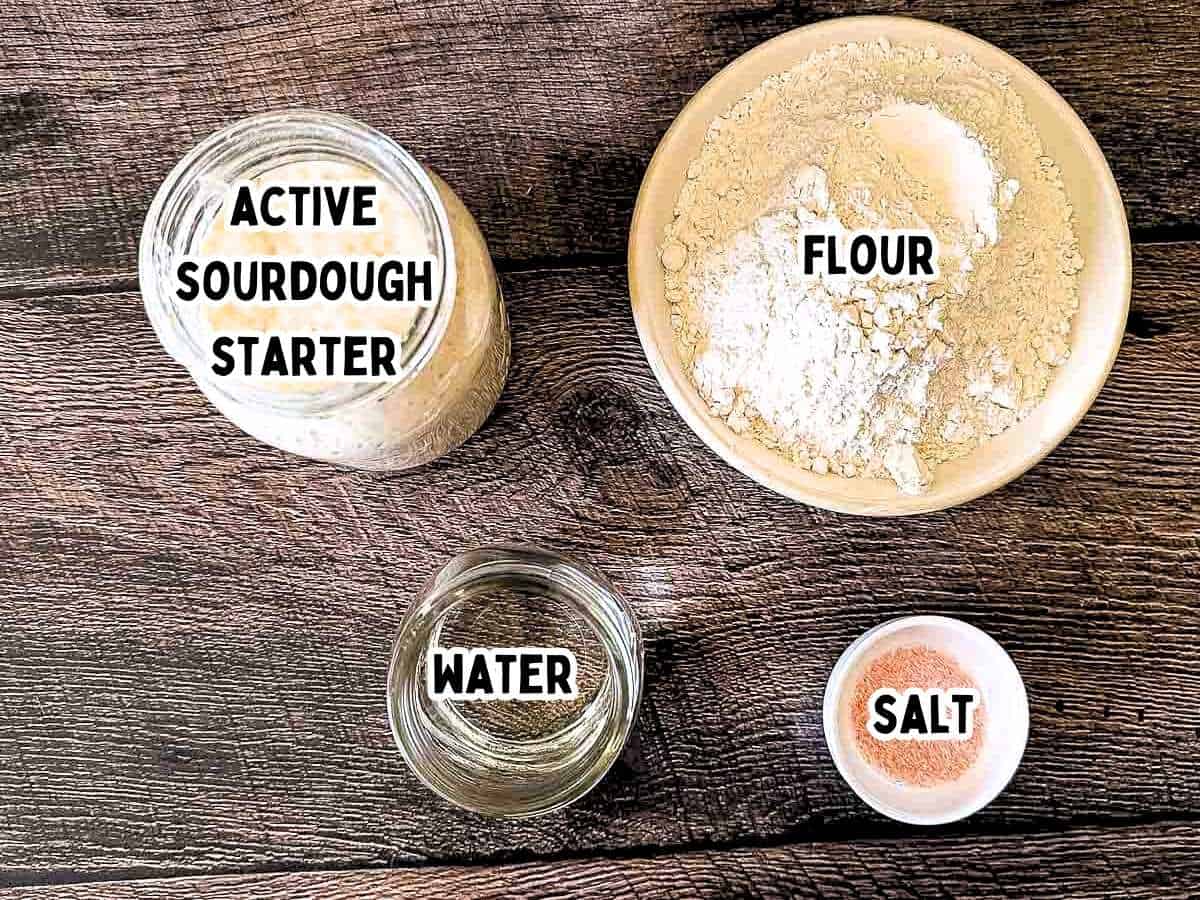
Ingredients You'll Need
- Active Sourdough Starter: You can't make a sourdough recipe without sourdough starter. This magical ingredient is what creates natural leavening and that signature tangy taste. You can make Homemade Sourdough Starter from scratch, which will take a couple of weeks. Or, if you're impatient and can't wait, order some active sourdough starter from Amazon.
- Flour: I like to use unbleached bread flour for better structure since it has a higher protein content. But you can also use all-purpose flour if that's all you have on hand.
- Filtered Water: Use warm water, heated to 90°F.
- Sea Salt: Salt brings out flavor and controls fermentation.
See the recipe card below for full information on ingredients and quantities.
Sample Baking Timeline
Planning Your Day: Sourdough baking is all about timing! Since this recipe is no-knead, most of the work takes place while you are busy doing other things around your house. So plan your day using a sample schedule like below:
| Time | Action | Notes |
| 8:00 PM (Night Before) | Build Starter | Mix together your 25g sourdough starter, flour and water. Cover and let sit overnight. |
| 8:00 AM | Mix the Dough | Combine starter, water, flour, and salt. Cover for the first rise. |
| 1:30 PM | Shape and Pan | Gently shape your puffy dough and place into greased loaf pan. |
| 4:00 PM | Preheat and Bake | Score the top of the dough. Cover with the second loaf pan, and bake! |
| 4:45 PM | Cool | Remove from pan and place on cooling rack. |
| 6:00 PM | Slice and Eat! | Great timing for dinner sandwiches or tomorrow's lunches. |
How to Make No-Knead Sourdough Sandwich Bread
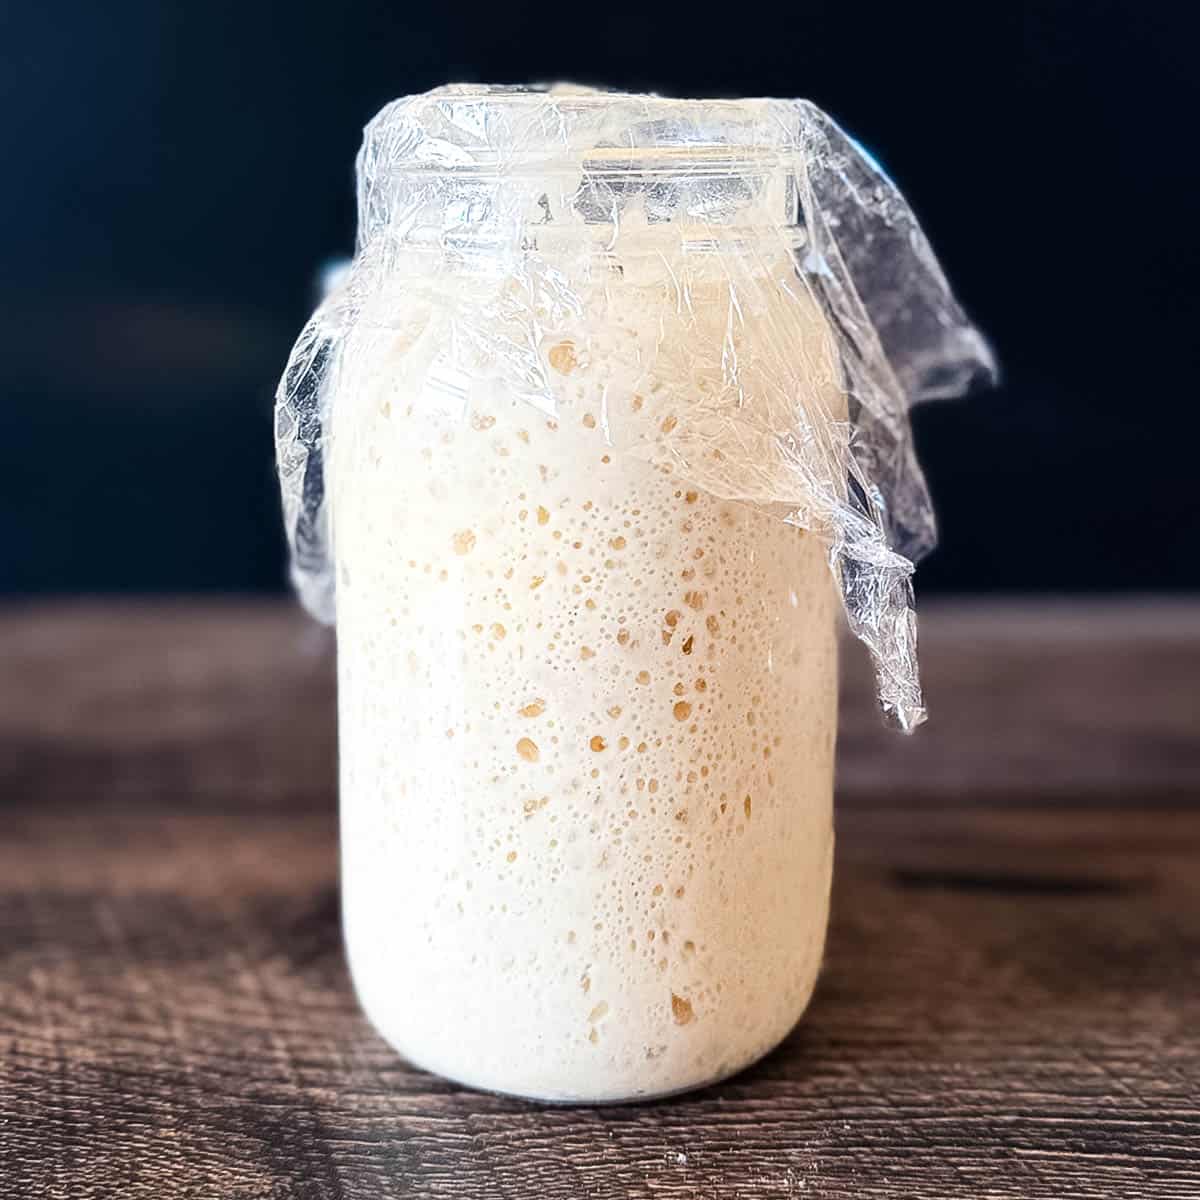
Build Your Starter (Night Before Baking)
Building your starter helps ensure you have a strong and active starter. A strong starter is key to giving your bread the best lift and flavor!
Add 25 grams of starter, 75 grams of flour, and 75 grams of water to a clean jar. Stir until no dry flour remains and cover loosely. Let it rest overnight at room temperature between 65-75°F for 8-12 hours. It should double in size and be bubbly with a pleasant, tangy aroma.
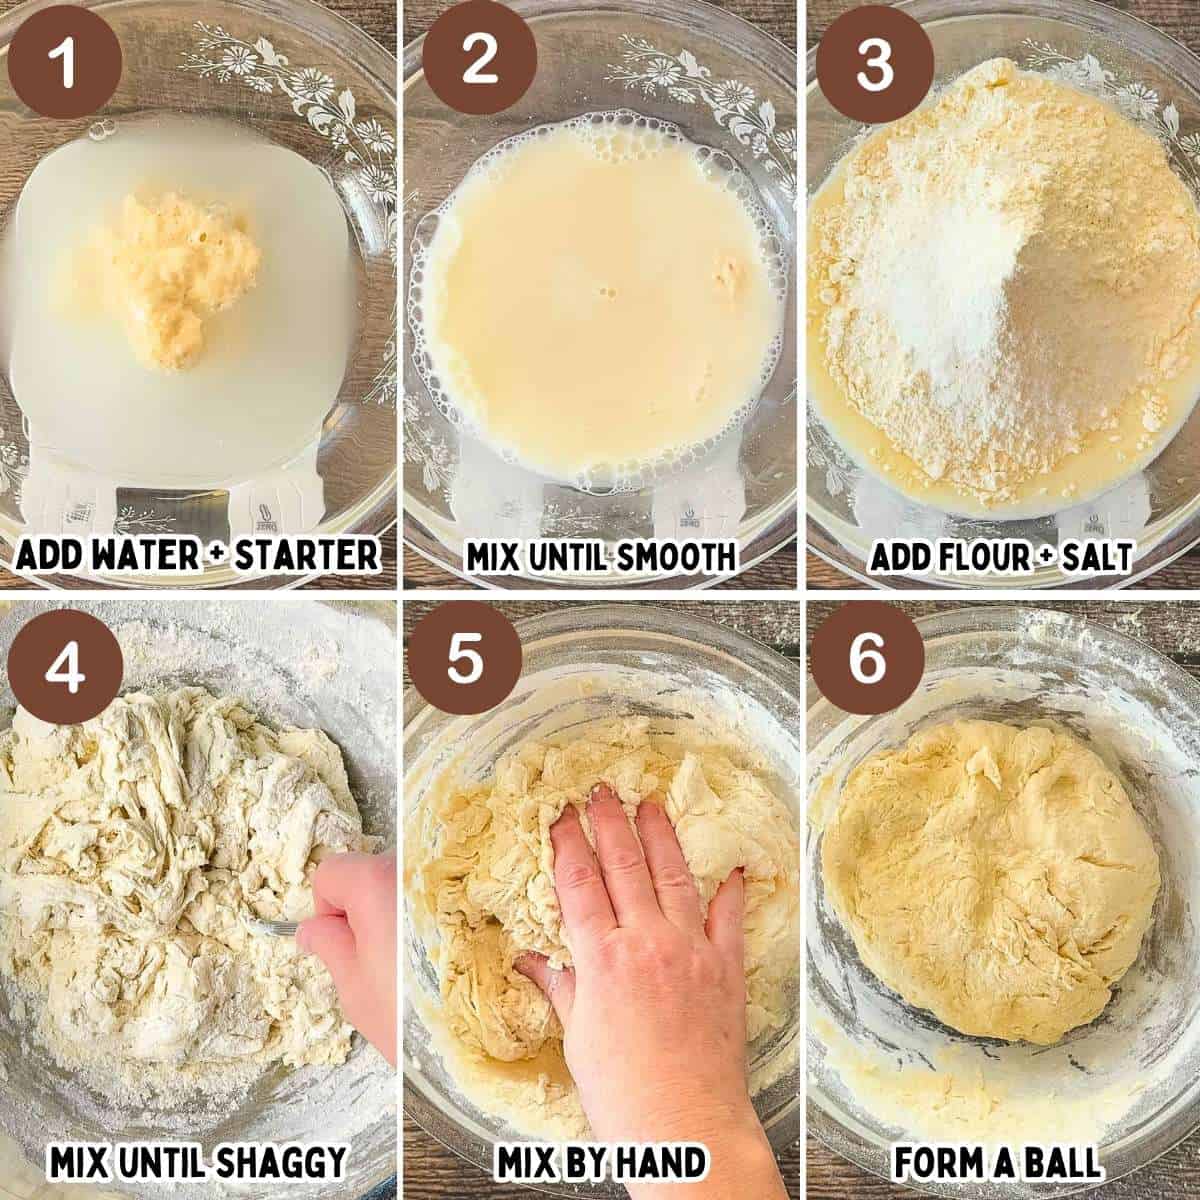
Mix the Dough (Next Morning/Next Day)
Mix 100 grams of ripe starter and 300 grams of warm water in a large mixing bowl. Stir until mostly dissolved. TIP: Save leftover starter to make another batch of bread, and store any extra starter (sourdough discard) in a jar in the fridge for up to 2 weeks. Use the discard to make Sourdough Chocolate Chip Cookies, Sourdough Discard Banana Bread, Sourdough Discard Pancakes, and Sourdough Discard Waffles.
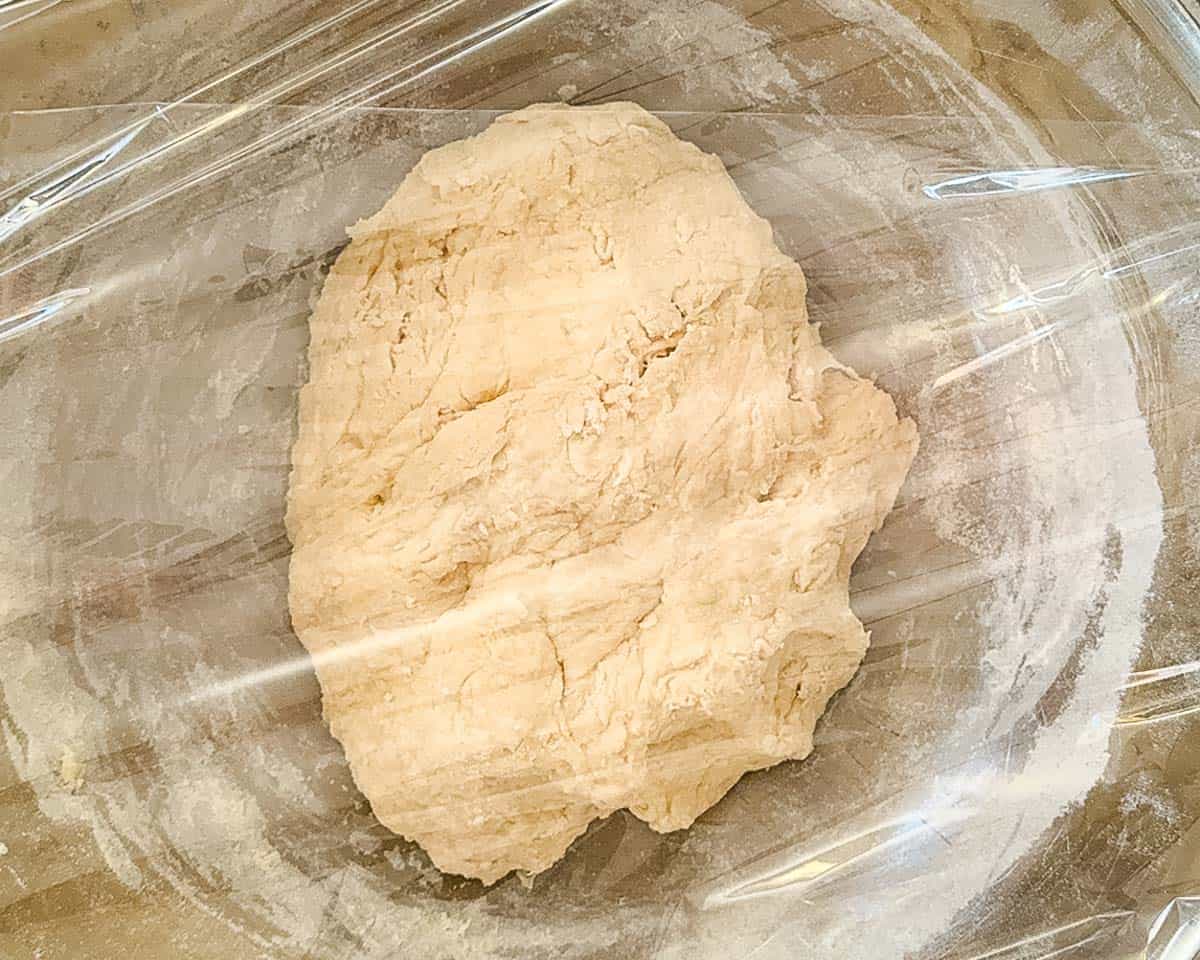
Add 500 grams of bread flour (or all-purpose flour) and 10 grams of salt. Mix with a spoon until a shaggy bread dough forms. Then, use your hands to shape the dough into a sticky ball. NOTE: The dough will be sticky at this point. Do NOT knead or add extra flour! It will look like a shaggy mess at first, but time and the first rise will do the work of smoothing it out for you.
First Rise (5-6 Hours)
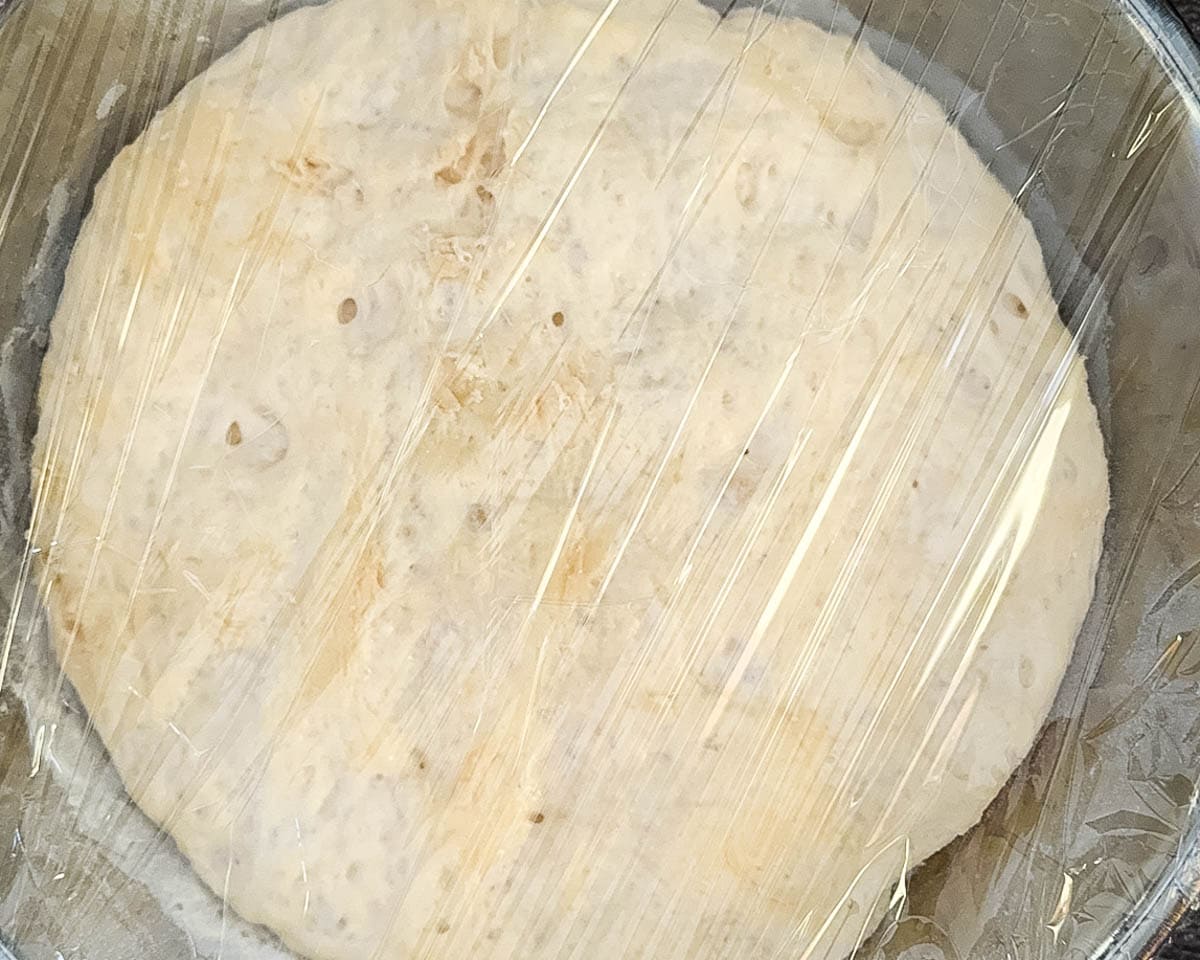
Cover the bowl with plastic wrap or a tea towel and let the dough rest in a warm place. I like to place mine in my oven with only the oven light turned on. Let rise for 5-6 hours or until the dough is puffy and has roughly doubled in size. TIP: When you gently shake the bowl, the dough should wiggle/jiggle slightly.
Tip: Oven Light Trick to Help Dough Rise: Oven lights vary by manufacturer and wattage but with the light on, your oven should be barely warm (about 80-85°F). If, after an hour, your hand is uncomfortable touching the bowl, then crack your oven door open or turn the light off. You don't want your sourdough to over-proof!
Shape and Pan the Dough (10 Minutes)
- Generously grease a loaf pan on the bottom and sides.
- Turn the dough onto a lightly floured surface.
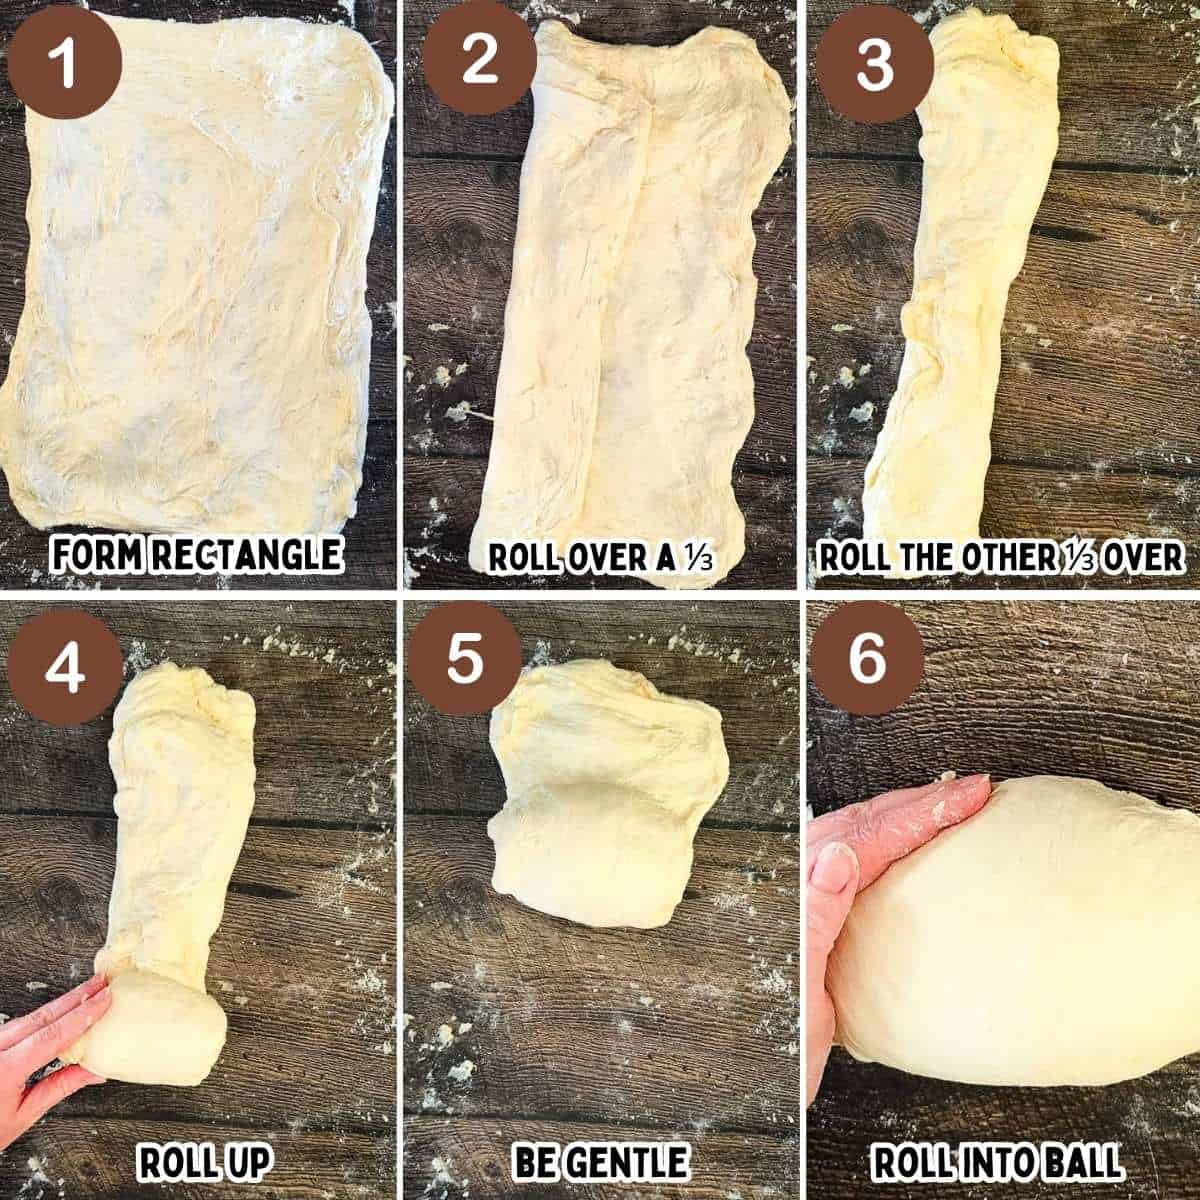
- Gently pull the dough into a rectangle about 10 x 14 inches.
- Fold the dough in thirds by starting with the left side and pulling it toward the middle. Then fold the right side over the middle.
- Roll the dough into a log, starting at the short end.
- Pinch the seams on the sides closed.
- Use cupped hands to gently pull the dough toward you. Gently rotate the dough in quarter turns until it looks smooth and tight.
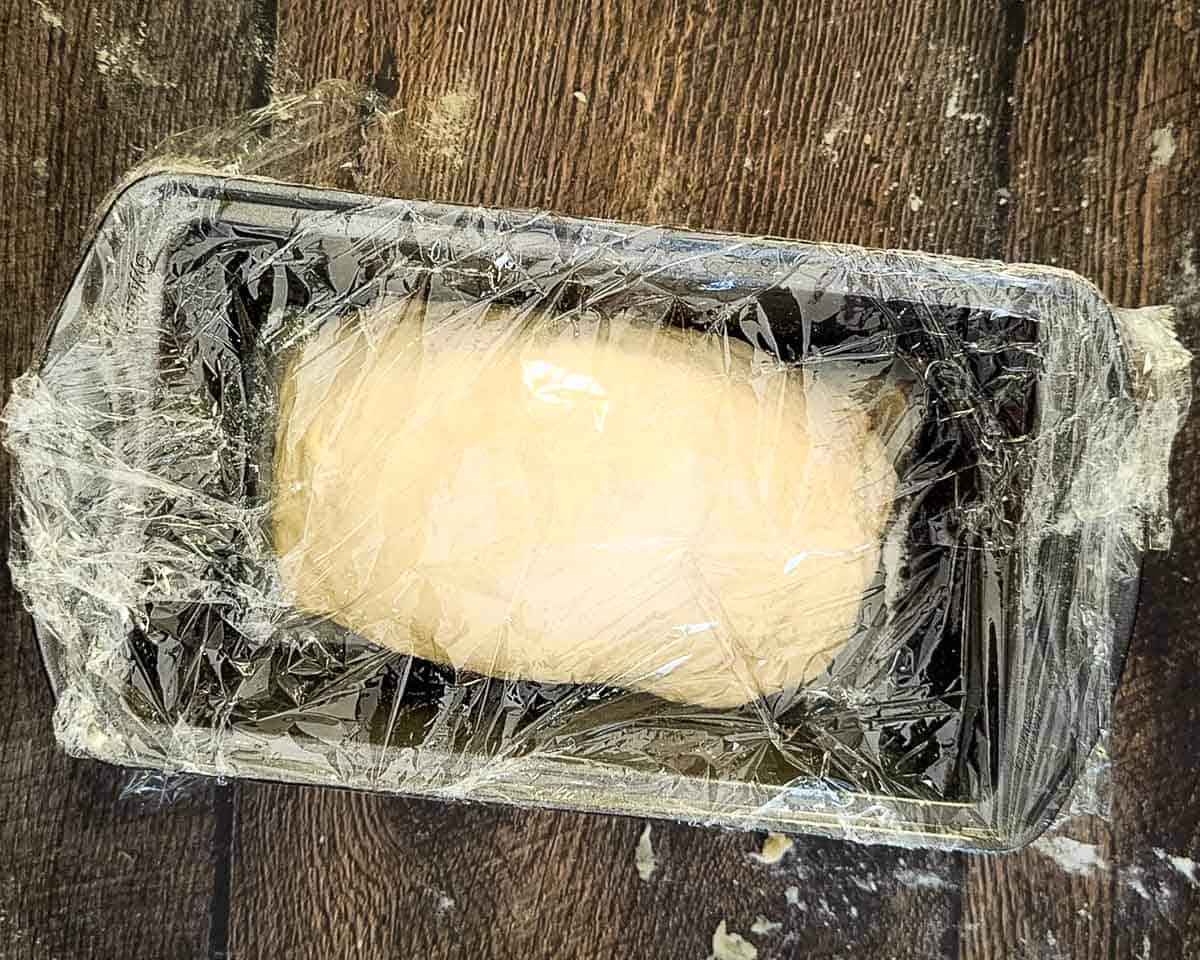
- Transfer the dough to the greased loaf pan.
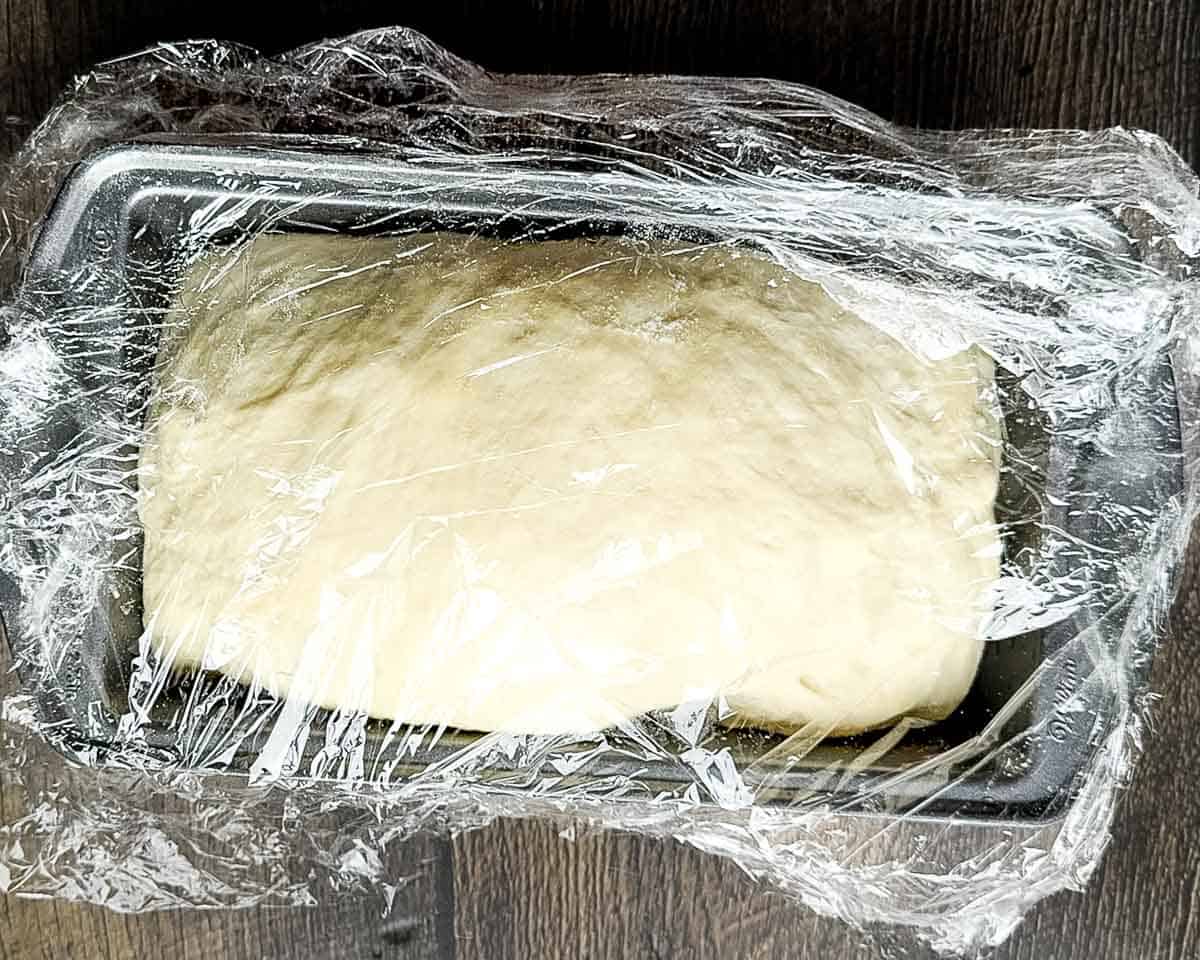
- Cover the pan loosely with a tea towel or plastic wrap and return it to the warm spot for the second rise.
Tip: The dough will be sticky when pulling it around. If it becomes too sticky to handle, dust your hands with a small amount of flour.
Second Rise (2-3 Hours)
Rest the dough until it rises enough to crown just above the rim of the pan. TIP: It should look light and airy.
Score and Bake (35 Minutes)
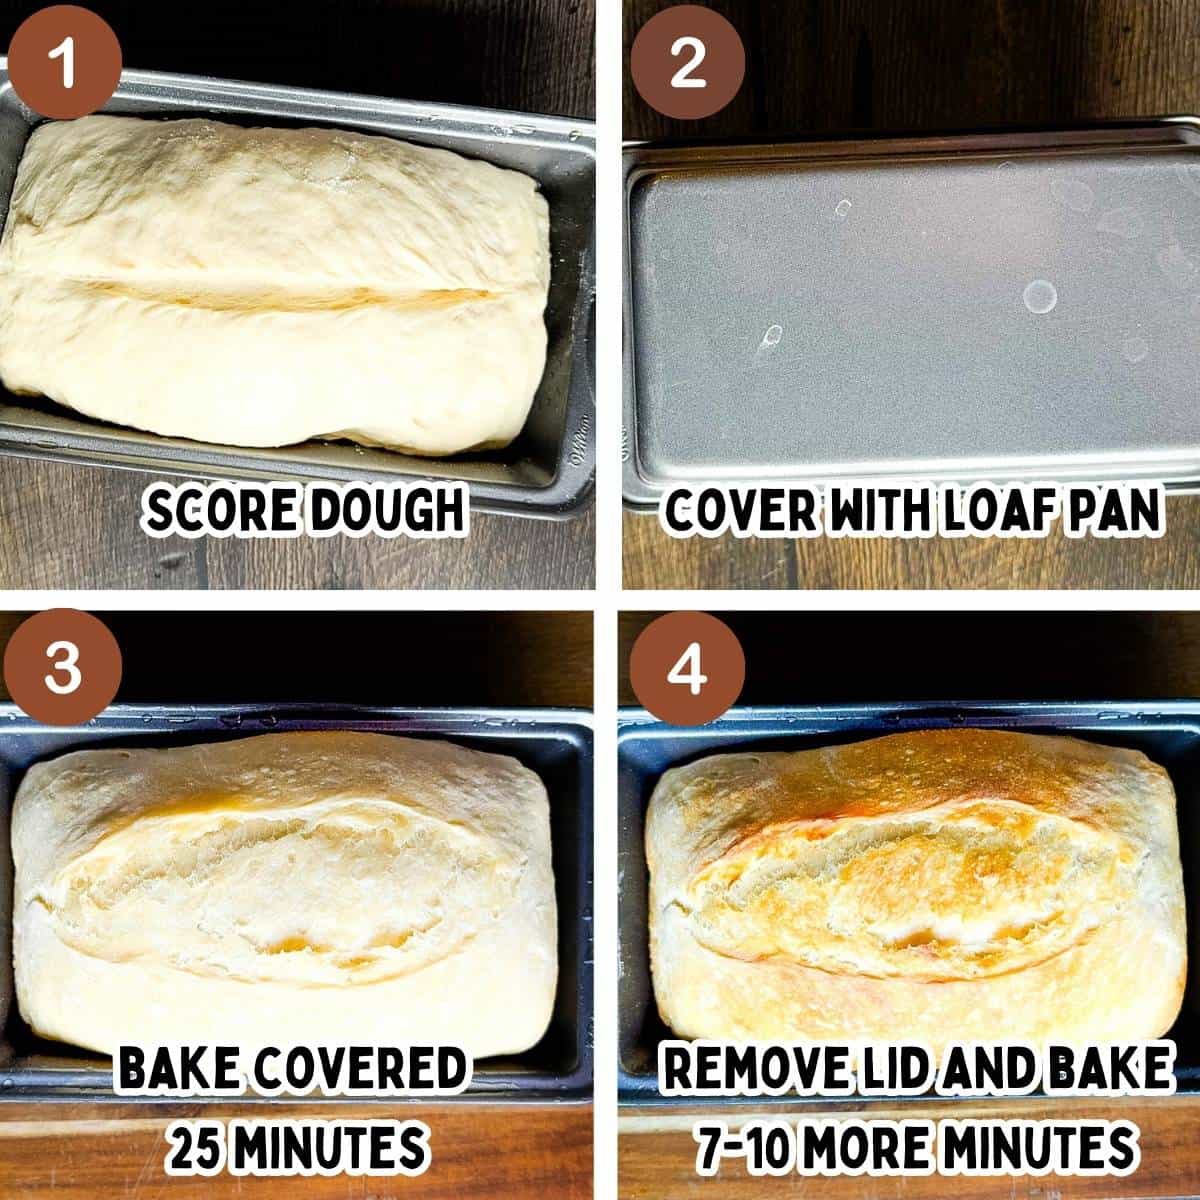
- Using a sharp knife or lame, score the bread by making one long slash down the center of the loaf. Cut approximately ¼-½ inch deep.
- Preheat the oven to 390°F. While waiting for the oven to preheat, grease the bottom and sides of a second loaf pan.
- Place the second loaf pan upside down over the dough to create a lid. This mimics baking sourdough in a Dutch oven by trapping steam and allowing the bread to rise higher before the crust hardens.
- Bake with the pan on for 25 minutes. Remove the top pan and bake uncovered for an additional 7-10 minutes until lightly golden brown and the internal temperature reaches 200°F.
- Cool the bread completely on a wire cooling rack for 1-2 hours before slicing. Enjoy!
Jeri's Top Tips
- Use Active, Bubbly Starter: Before you begin, test the starter by dropping a small amount in water. It should float!
- Control Your Temperatures: Keeping your water at 90°F and using your oven light for warmth will help your dough rise.
- Don't Fear the Score: Be decisive with this step. The more you hesitate the worse your loaf will expand. Sharp cut equals beautiful bread.
- Use Weight Measurements: I highly recommend using a kitchen scale to weigh your ingredients. This will ensure your recipe turns out perfectly every time, especially for flour and starter.
- Work Gently: When shaping the dough be firm enough to create surface tension, but gentle enough not to pop all of those little air bubbles.
- Focus on The Dough, Not the Clock: I cannot stress this enough! Depending on the temperature of your kitchen and the strength of your starter, your sourdough may take much longer or less time than I outline in my recipe. If your kitchen is on the cool side, it may take longer for your first and second rise to complete. The dough should look relaxed and puffy, and even a little jiggly.
- Cool Before Cutting: Again, I know it's hard! When the whole house smells like freshly baked bread you want to dive right in. BUT, if you cut into the bread too soon it will be gummy. Letting it cool completely will produce the BEST texture.
How to Store
Store bread at room temperature covered in a paper bag, bread bag, or wrapped in a kitchen towel for up to 3 days.
Slice and freeze leftover sourdough sandwich bread in an air-tight container or freezer bag for up to 3 months. Reheat straight from frozen in your toaster!
Ways to Use Sourdough Sandwich Bread
We use this bread daily for sandwiches including turkey sandwiches, ham sandwiches, an Air Fryer Reuben Sandwich, Smoked Grilled Cheese, and Leftover Smoked Brisket Sandwiches.
It's also delicious toasted and served with butter, honey, Homemade Peach Jam, Low-Sugar Strawberry Freezer Jam, Homemade Raspberry Freezer Jam, or peanut butter.
And sometimes I even serve this as a side to entrees like Slow Cooker Three Bean Turkey Chili, Smoked Sausage and Potato Soup, or Smoked Turkey and White Bean Soup.
Why Didn't My Sourdough Sandwich Bread Rise?
There are several reasons why sourdough sandwich bread didn't rise for you:
- Inactive starter: If your starter isn't active and bubbly it will not have enough gas to make your bread rise. Be sure your starter doubles (or triples!) in size before using.
- Cool environment: Sourdough likes a warm place to rise. If your kitchen is cold, it may take your dough much longer to rise.
- Under-proofed: Meaning your dough didn't rise enough before baking. The dough should rise until puffy and crown just above the pan.
- Too much flour: I know it's tempting to add more flour so your dough isn't so sticky. But adding too much flour while mixing or shaping your dough will weigh it down and make it hard to rise.
When in doubt, let the dough rise longer and watch the texture rather than the clock.

More Sourdough Recipes to Try
- Sourdough French Toast - Restaurant quality french toast with crispy edges and a soft, custardy center with just a hint of sweet flavor.
- Sourdough Pizza Dough - This artisan pizza dough tastes like it came from the pizzeria! No commercial yeast needed!
- No Knead Jalapeño Sourdough Bread - Soft, fluffy bread with that signature sourdough tang layered with gooey cheese and sliced jalapeños in every bite!
- Smoked Sourdough Bread on Pellet Grill - Give your sourdough bread more flavor by adding incredible smoke flavor with a pellet grill or smoker!
Printable Recipe
No Knead Sourdough Sandwich Bread
Ingredients
Starter Build (Night Before)
- 25 grams mature sourdough starter (about 2 tablespoons)
- 75 grams bread flour or all-purpose flour (½ cup + 1 teaspoon)
- 75 grams water (room temperature up to 90℉) (⅓ cup)
For the Dough
- 100 grams ripe sourdough starter (heaping ⅓ cup)
- 300 grams warm water (90℉) (1¼ cups + 1 tablespoon)
- 500 grams bread flour (or all-purpose flour) (3½ cups + ½ teaspoon)
- 10 grams sea salt (2⅛ teaspoons)
Instructions
- The night before, combine 25g of starter, 75g flour, and 75g water in a clean jar until no dry flour remains. Cover loosely and let rest at room temperature (65-75°F) for 8-12 hours. By morning, the starter should be doubled, bubbly, and smell pleasantly tangy.
- The next morning, stir together 100g ripe starter and 300g warm water in a large bowl until mostly dissolved. Add 500g of flour and 10g of salt. Mix with a spoon until a shaggy dough forms. Use your hands to bring the dough into a sticky ball. Do not knead or add extra flour. Cover the bowl and place it somewhere warm, such as the oven with just the light on.
- Let the dough rise until noticeably puffy and roughly doubled in size (about 5-6 hours in a warm kitchen). When you gently shake the bowl, the dough should jiggle slightly.
- Grease a standard 9x5-inch loaf pan on the bottom and sides. Turn the dough onto a lightly floured surface and gently pull it into a rectangle about 10 x 14 inches (the long side should be just a bit longer than the length of your loaf pan). Fold one of the long sides over into the center, then take the other long side and pull it over everything. Starting at the short end, very gently roll the dough into a log, being careful not to squeeze out the air bubbles. Pinch the side seams closed. Use cupped hands to gently pull the dough toward you, then rotate it in quarter turns, continuing to pull it toward you until it looks smooth and tight. This builds surface tension. Place the dough into the greased loaf pan. Cover loosely and return to a warm spot.
- Let the dough rise for 2-3 hours, until the dough crowns just above the rim of the pan and looks light and airy.
- Once the dough has finished its second rise, use a sharp knife or bread lame to score one long slash down the center of the loaf, about ¼-½ inch deep.
- Preheat your oven to 390°F. Lightly grease the bottom and sides of a second loaf pan and invert it over the dough to create a lid and trap steam. Bake covered for 25 minutes. Carefully remove the top pan and continue baking uncovered for 7-10 minutes, until the top is lightly golden and the internal temperature reaches 200°F.
- Remove the bread from the pan and cool completely on a wire rack for at least 1-2 hours before slicing. This sets the crumb and prevents gumminess.
Save This Recipe 💌
Notes
- This bread uses the same dough and timing as my viral No-Knead Sourdough Bread - only the shaping and baking method change.
- Baking with an inverted loaf pan traps steam, helping the bread rise higher before the crust sets.
- If your kitchen runs cool, both rises may take a bit longer - watch the dough, not the clock.
- Slice only after fully cooled for clean, even sandwich slices.
- Storage: Store at room temperature in a bread bag or wrapped in a clean towel for up to 3 days. Slice and freeze in an airtight container for up to 3 months. Toast straight from frozen.
Nutrition
The provided nutrition information is automatically calculated. Accuracy is not guaranteed.
Did you love this recipe?
Then please leave a 5-star rating and/or review below! You can also save it! Just tap the heart symbol ❤️ in the lower right corner of your screen, and the recipe will be stored in your own recipe box!📥


Comments
No Comments