

Learn to make your own sourdough starter at home with this EASY Sourdough Starter Recipe. All you need is flour, water, and time. I'll walk you through each day with step-by-step instructions, specific measurements, what's normal, what's not, and what to do if it goes off course.
After about 7-14 days, you'll have your own homemade active starter you can use for my viral No Knead Sourdough Bread, as well as my No Knead Jalapeño Cheddar Sourdough, No Knead Sourdough Sandwich Bread, Sourdough Pizza Dough, Sourdough Focaccia, and everything in between.
Want to save this recipe?
Enter your email & I'll send it to your inbox. Plus, get great new recipes from me every week!
What Is Sourdough Starter?
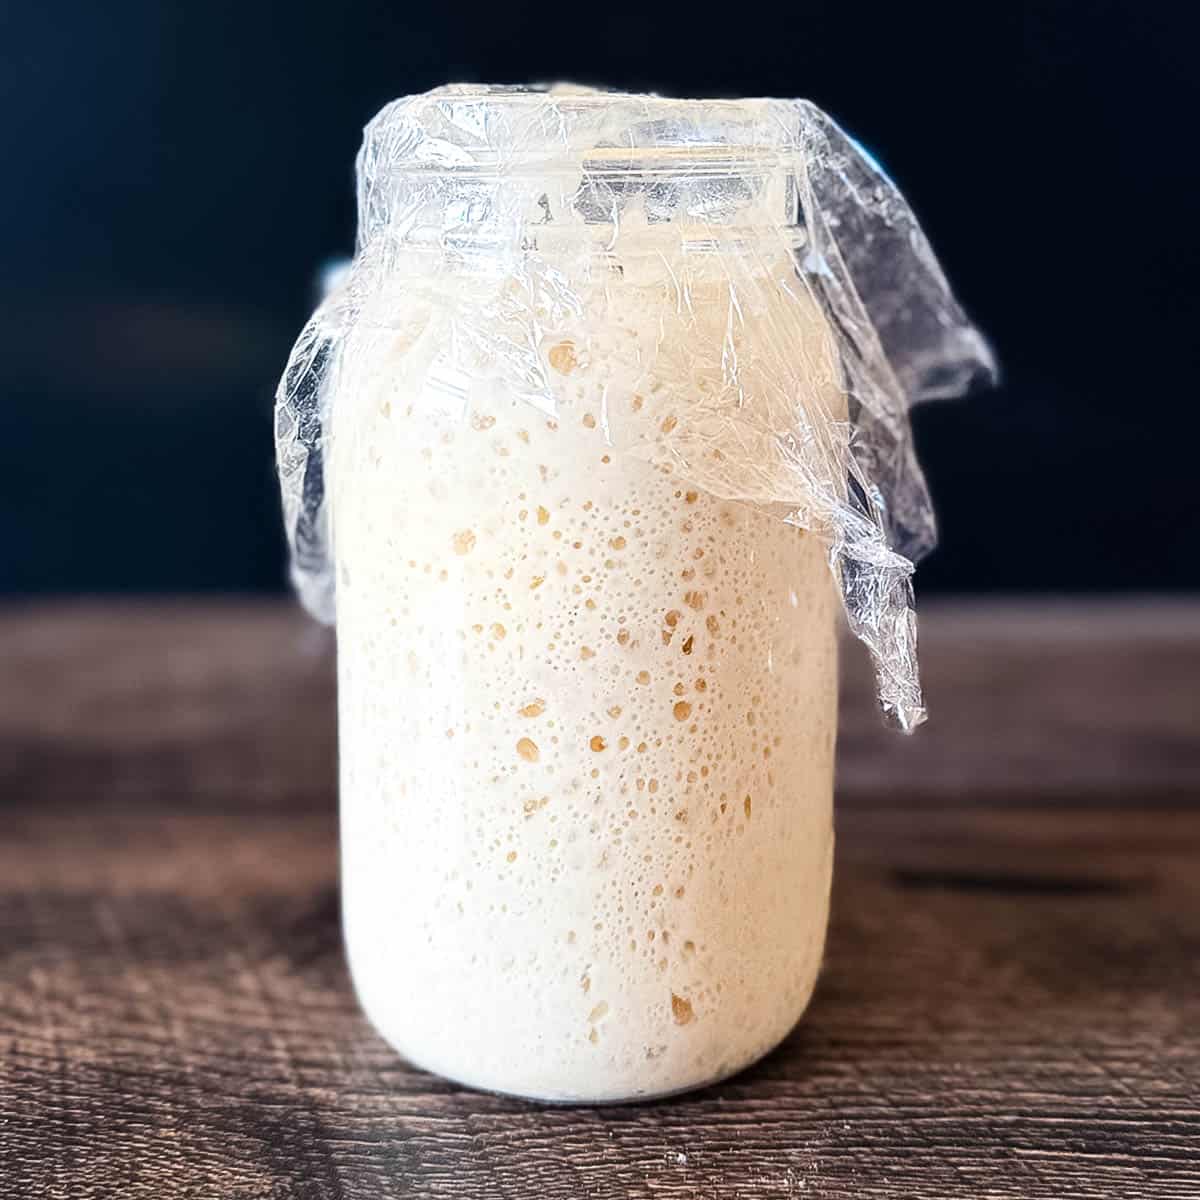
Sourdough starter is a living culture made from nothing more than flour and water. It takes a few days for the wild yeast and friendly bacteria that are naturally present in the flour (and your kitchen) to move in, colonize, start fermenting, and turn that flour-and-water paste into something bubbly and active.
You'll use a portion of that starter to leaven (raise) your bread instead of commercial yeast. This slow, natural fermentation process is what gives your bread flavor, strength, and that classic sourdough tang.
How Long Does It Take?
This is not an overnight process. A realistic timeline is:
- Minimum: 7 days
- Very common: 10-14 days
- Occasionally: a bit longer (especially in cool kitchens)
You might see bubbles in your starter very early in the process, but "bubbly" does not equal "strong enough to bake bread." A mature starter should reliably double in size in 4-6 hours after feeding and continue to do that.
Quick Overview: How This Method Works
This method is designed so even nervous first-timers feel confident:
- Day 1: Begin with whole wheat flour to kick-start fermentation.
- Day 2: Wait, stir, and let the microbes settle in.
- Days 3-6: Daily feedings with flour and water.
- Day 7+ onward: Starter may be mature and ready for bread if it's doubling reliably. If not, keep feeding. It can sometimes take up to 14 days or even longer.
- Starting at Day 7, the discard is usually acidic and stable enough to use in cooked or baked recipes.
Tools You'll Need
If you do any online searching, you will see people recommending certain jars for sourdough starters and warmers. You do not need any of it. It's just a waste of money. You only really need a:
- Jar: Use a glass jar that will hold about 2 cups (a pint jar works great). You can mix the starter in a bowl first if you like, then scrape it into the jar. While glass is ideal, a clean plastic container with straight sides works too.
- Digital scale: This keeps things accurate and removes the guesswork.
- Spoon or small spatula: To mix and scrape down the sides.
- Cover: Loose lid, coffee filter, clean cloth, or a sandwich bag.
- Rubber band, tape, or marker: To mark the starter's height so you can see how much it's rising.
- Thermometer (optional but helpful): To check water temperature. I love my Thermapen ONE (paid link).
Ingredients
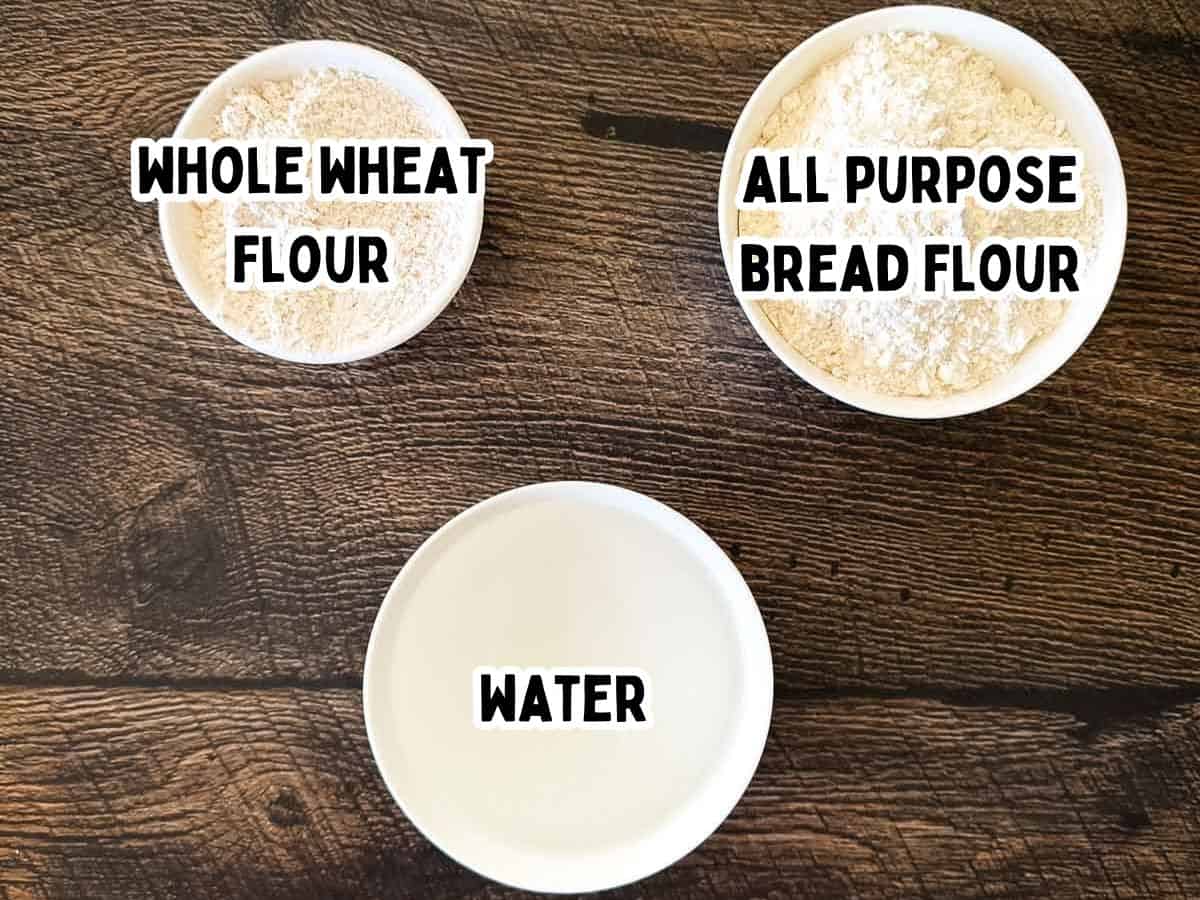
Believe it or not, you only need 3 simple ingredients to make active sourdough starter completely from scratch:
- Whole Wheat Flour. We start with whole wheat flour because it contains more natural yeasts and bacteria thanks to the bran and germ, where wild yeast tends to live. You only need ½ cup of whole wheat flour.
- All-Purpose Bread Flour (Unbleached). Always start with fresh flour. Bread flour is slightly "thirstier" and higher in protein than all-purpose flour. It helps your starter rise more dramatically. You will need about a 5-pound bag of flour, but you won't use the whole bag. This ensures you don't run out halfway through.
- Water. I recommend using water at 90°F. This is warm enough to support fermentation but not so hot that it harms the wild yeast. Cooler water slows fermentation, and hot water (anything over 95°F) can kill the yeast. And if your tap water has a strong chlorine smell, use filtered water.
Where to Keep Your Starter
Fermentation is very temperature sensitive. For best results, try to keep the starter in a warm environment that's around 70-75°F. My favorite places are:
- Near (but not on top of) the stove.
- On top of the fridge.
- On the kitchen counter in a warmer area of your kitchen.
- In a turned-off microwave with the door slightly open and a cup of hot water beside the jar.
- If you own a proofing box, you can absolutely use it-just set it to a warm spot around 75°F (but this is not essential).
- If your house is cold, wrap the jar in a towel.
Avoid direct sun, drafty windows, and hot appliances that might spike the temperature.
Step-by-Step Instructions
For each feeding, use 60 grams of flour (about ½ cup) and 60 grams of water at 90°F (about ¼ cup).
Day-By-Day Sourdough Starter Schedule
Every day is spelled out, with what's normal and what's not.
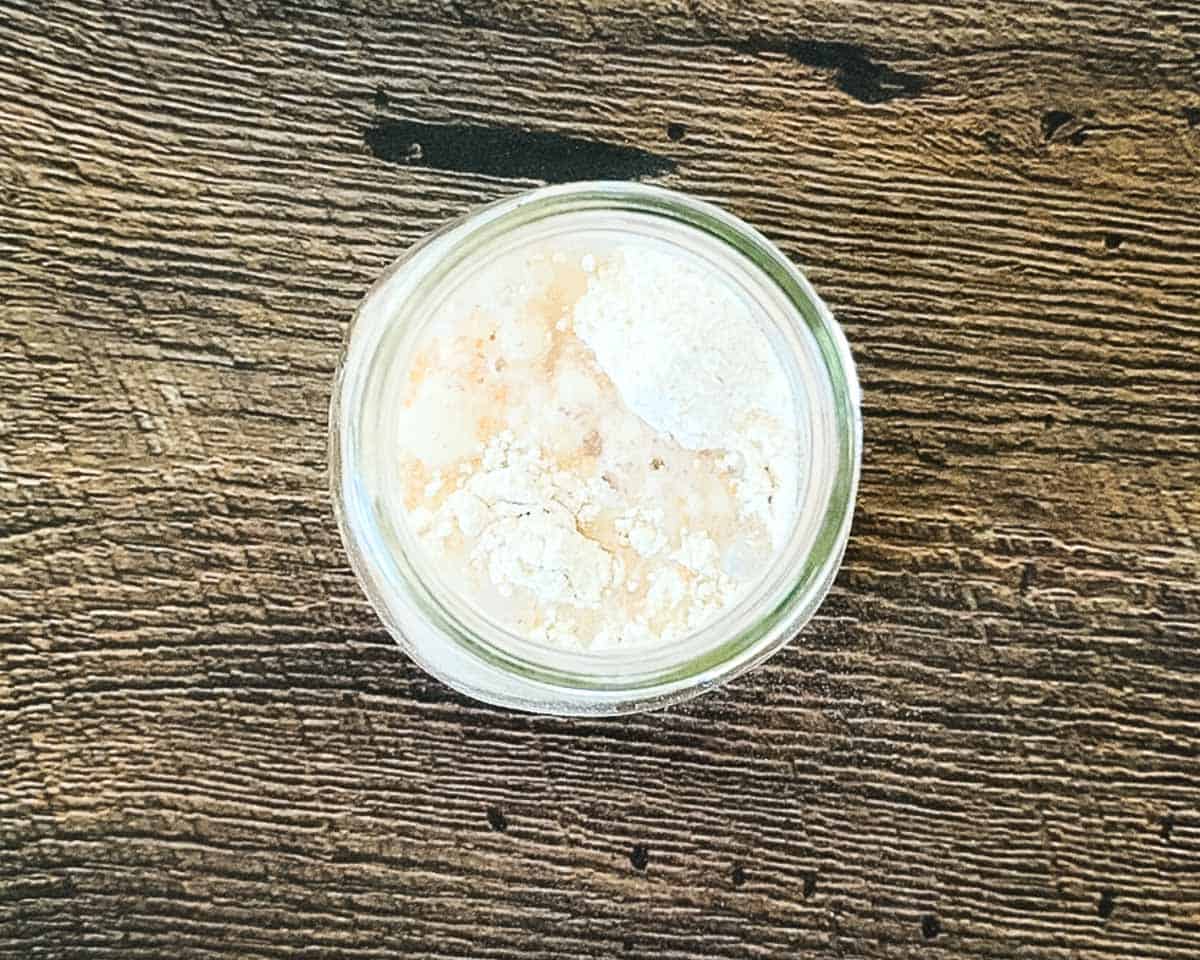
Day 1: Mix Up the Starter
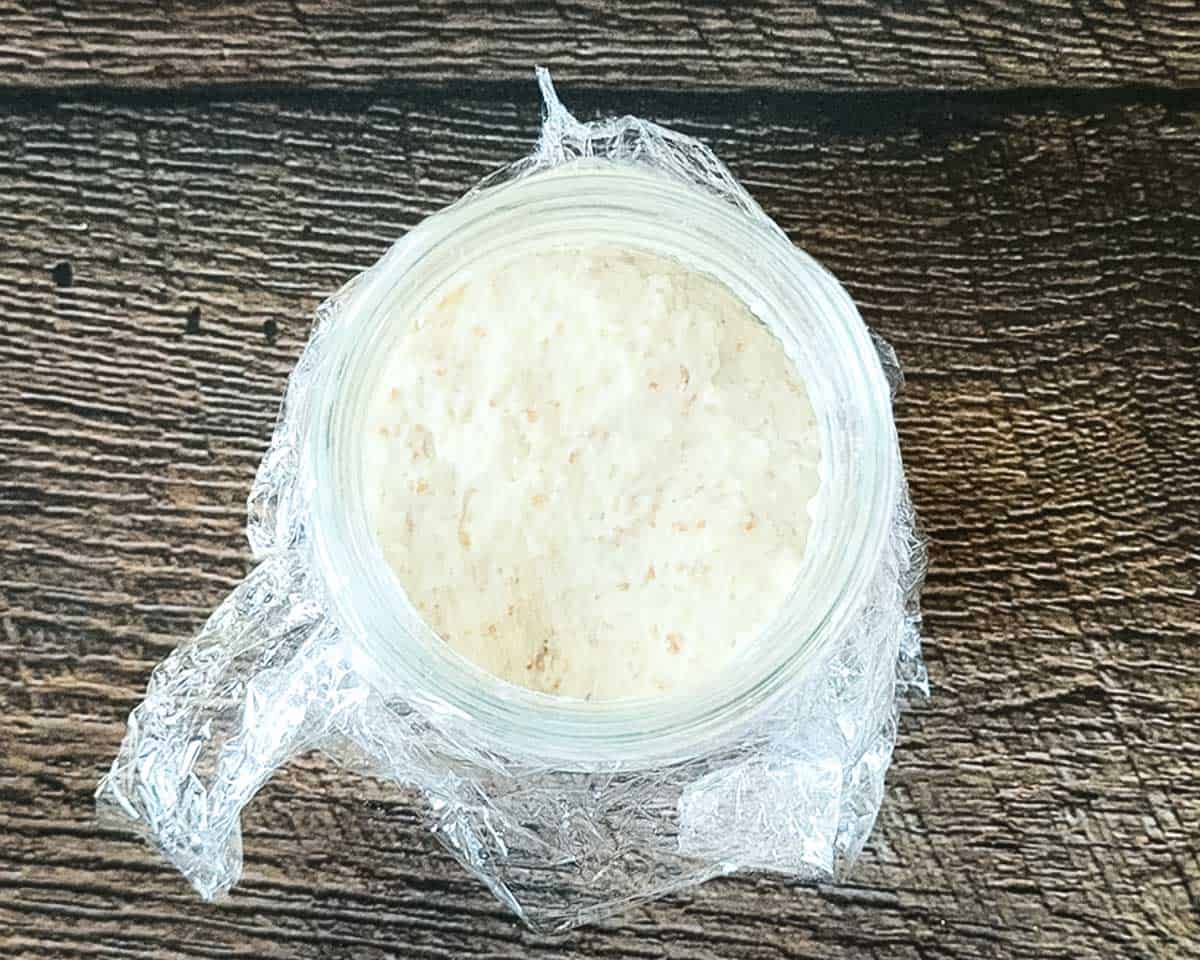
In a clean jar or container, combine 60 g whole wheat flour and 60 g water at 90°F. Stir until everything is hydrated and no dry flour remains. The consistency should be like thick pancake batter. If the mixture seems lumpy, that's fine. Scrape down the sides of the container, level the top lightly, and cover loosely with a lid, a coffee filter, a cloth, or a plastic sandwich bag or plastic wrap. Let it sit undisturbed for 24 hours.
What you should see:
- Maybe a few tiny bubbles.
- Maybe nothing visible at all.
- Both are fine.
Normal smells: Flour, wet grain, maybe very faint yogurt or wheat aroma.
Not normal: Bright pink, orange, or red streaks; fuzzy mold (green/black/blue); rotten or garbage smell. If you see any of these (very rare this early), discard it and start over.
Day 2: Check for Bubbles (No Feeding Yet)
Today is a "look and wait" day. Check the top and sides of the jar for small bubbles. It might have puffed slightly; it might not. You can stir it once or twice to add oxygen, but you don't need to feed it yet. Let it rest another 24 hours at 70-75°F.
What's totally normal:
- A few bubbles that come and go
- Slightly looser texture
- A hint of tangy or fruity smell

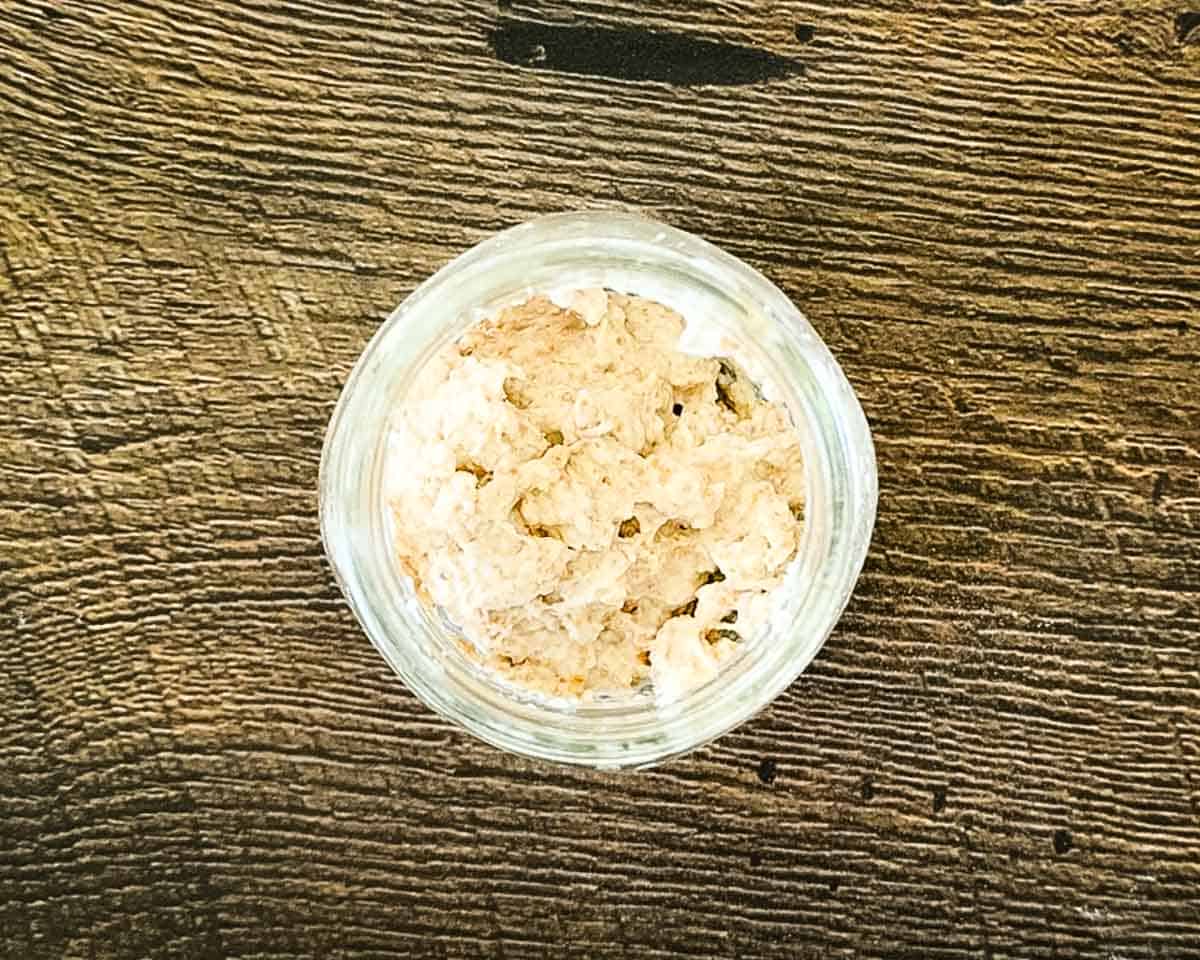
Day 3: First Feeding (Start a Routine)
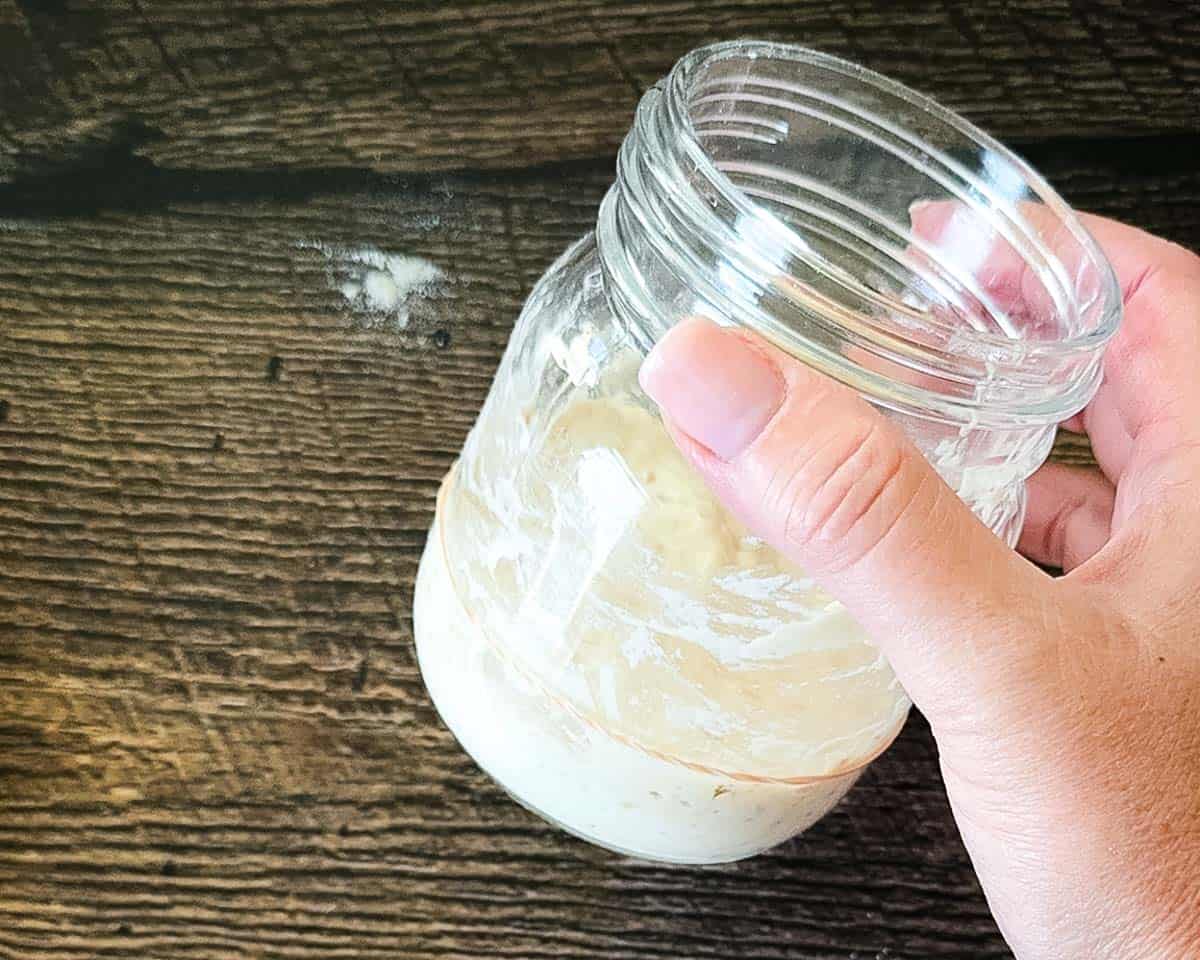
Now it's time to begin daily feedings. Try to feed at the same time every day. Stir your starter to even out the texture. Remove and discard all but 60 g of starter. You can weigh the 60 g into a clean jar or keep it in the same one. I always found it easiest to put it into a clean jar. To the 60 g starter, add 60 g of flour and 60 g of water at 90°F. Mix until smooth, scrape down the sides of the container so you can clearly track the rise. Put a rubber band around the jar at the height of the mixture. Cover loosely and rest for 24 hours.
Texture now should be thick, sticky, stretchy, and a bit gluey. That's normal.
What you might see by the end of Day 3:
- More consistent bubbles
- Some rise above the rubber band
- A slightly tangy aroma
If yours looks a bit quieter, that's still fine. The early days can be dramatic or boring.

Days 4-6: Feed Again (And Don't Panic)
Repeat exactly what you did on Day 3. Keep 60 g of starter and discard the rest. Add 60 g of flour and 60 g of water (90°F). Mix, scrape, mark the level, cover, and rest for 24 hours.
What you may see:
- Some starters look super active on Days 2-3 and then slow way down now. Others are just getting going. Both are normal.
- More bubbles throughout the jar.
- A stronger, tangy aroma (like yogurt or buttermilk).
- Some rise above the band and collapse later.
- If you see little to no activity yet, don't give up! Some starters are slower. Temperature and flour can make a big difference.
This is often the "rollercoaster phase":
- It might smell more tangy or slightly "weird" (fermented, not rotten).
- It might rise a little and then collapse.
- It might do almost nothing visible.
- As long as there's no mold or rotten odor, keep going.
- This dip is completely normal. The early bubbles come from bacteria, but the yeast is still developing.

Tip
I recommend not using discard from Days 1-6. It can be smelly, discolored, and the acidity isn't established yet. From Day 7 onward, it is generally safe to use in cooked or baked recipes only.
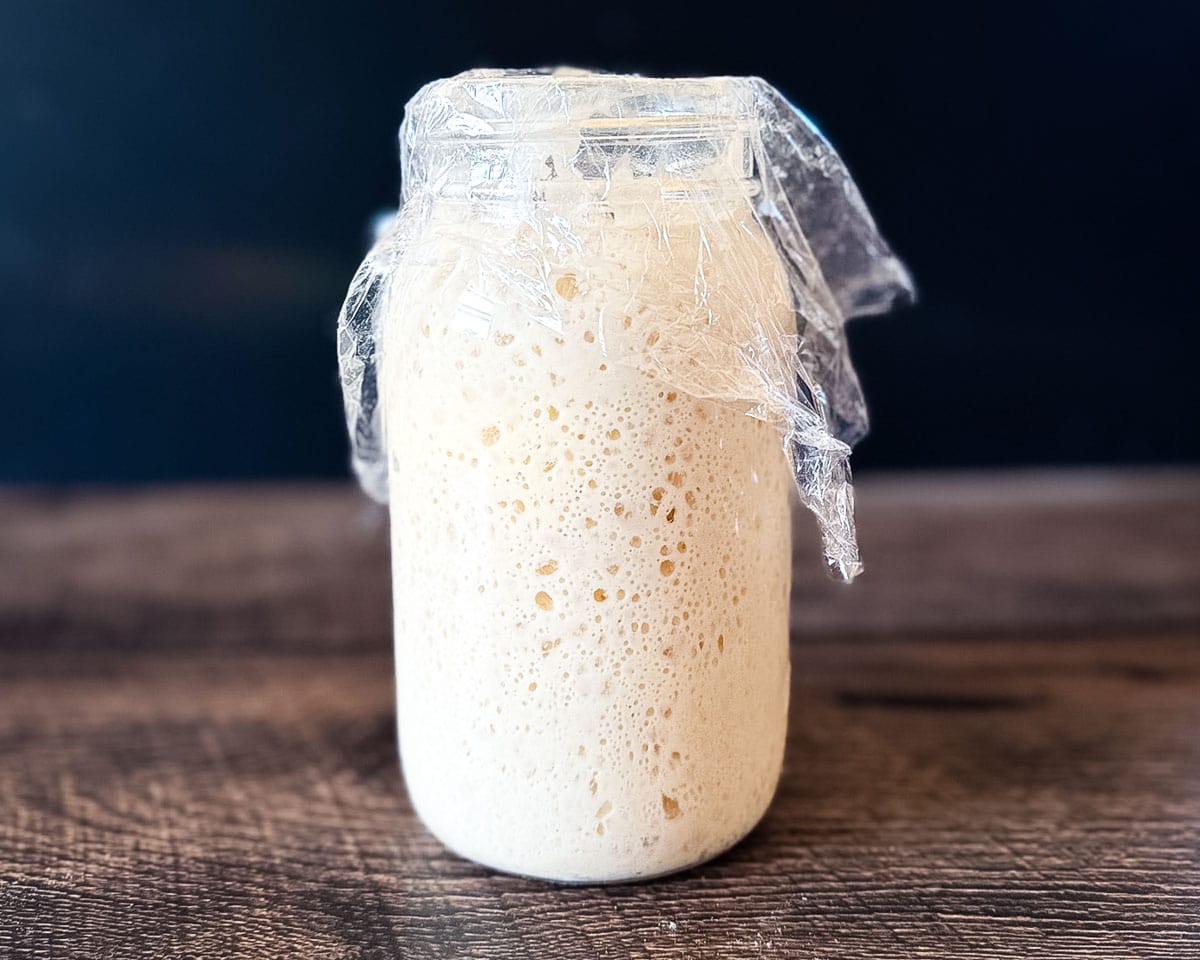
Day 7 and Beyond: When Is My Starter Ready?
For your starter to be mature enough for bread, I'd look for:
- Doubling in volume in about 4-6 hours after a feeding.
- Bubbles all the way through the jar, not just on the surface.
- A spongy, web-like texture or a "melted marshmallow" look when you scoop some out.
- A smell that's tangy, slightly fruity, or yogurt-like. Not sharp, vinegary, or rotten.
- The same rise-peak-fall pattern is happening for 2-3 days in a row.
- Passes the float test (optional). This is a quick way to see if your starter has trapped enough gas to make a small spoonful buoyant in water.
If your starter sinks but checks every other box - doubling, bubbles, good aroma - trust the behavior, not the float test. In that case, it's ready to bake with.
If not, keep feeding once a day and be patient. Some starters absolutely need 10-14 days, sometimes longer, to settle into a strong rhythm, especially if your house is cooler.
How to Perform the Float Test
- Feed your starter.
- Let it rise to its full height (and don't disturb it).
- Scoop 1 teaspoon of starter gently from the top of the jar (without stirring it down).
- Drop it into a glass of cool water (about 70°F).
- If it floats, the usual result is that your starter is sufficiently airy and active to leaven bread.
However, this test is not a sure sign because a starter can sink and still be strong enough for bread. If it's passed all the other "done" checks (doubling on time, bubbles from top to bottom, nice aroma), it will absolutely work.
Can I Speed It Up by Feeding Twice a Day?
Once you're past Day 5, if your starter is rising and falling quickly but not yet doubling, you can certainly try:
- Feeding every 12 hours instead of every 24 hours.
- Keeping it a smidge warmer (toward 75°F).
- Making sure you're actually discarding enough so it gets a good "refresh" each time. This gives the yeast more frequent fresh food and can help it strengthen faster.
How to Use and Store Your Mature Starter
Once your starter is mature (doubles in size with lots of bubbles throughout) it is now ready to use.
To Bake:
- Take it out (or keep it at room temp if that's where it lives).
- For all of my sourdough recipes, I feed it the night before. I always feed 25 g of starter with 75 g of water and 75 g of bread flour. Stir with a small spoon or spatula until no dry flour remains. Level off the top and cover loosely.
- Let it rise until it doubles and is bubbly (usually 8-12 hours).
- Measure out what you need for your recipe.
- Make sure you save at least 25 g to keep feeding.
To Store:
Room Temperature (if you bake often): Feed once a day. Great if you bake several times a week.
Fridge (if you bake less often): Store in the refrigerator with a loose lid. Feed it about once a week. Take it out, keep 25 g starter, add 75 g flour + 75 g water, let it get a bit bubbly, then refrigerate again. Before baking, give it 1-2 feedings at room temperature so it's really active.
Why the Feeding Ratios Change After Day 7
Your starter doesn't need the same amount of food once it's mature. During Days 1-7, we're building the yeast population, which requires a balanced 1:1:1 ratio. Once the starter is established, it becomes more predictable and stable. That's when I switch to a maintenance feeding of 25 g starter + 75 g water + 75 g flour - the same ratio I use for all of my sourdough recipes. This keeps your starter strong, easy to manage, and far less wasteful.
Troubleshooting: Common Problems & Fixes
- "It smells like nail polish remover." That sharp smell is often a by-product called hooch; your starter is probably hungry. Solution: Feed more regularly, or increase the amount of flour at each feeding slightly.
- "There's brown or gray liquid on top." That's hooch, again a sign it's very hungry. Solution: Pour it off (or mix it in if there isn't much), then feed as usual. If it happens often, feed more frequently.
- "It was bubbly and now it's quiet." Totally normal in the middle days. Early bubbles are often from bacteria; yeast takes longer to establish. As long as there's no mold or horrible smell, keep feeding.
- "It's really thick / really thin." Too thick: Add 5-10 g more water next feeding. Too thin: Add 5-10 g more flour next feeding. You're aiming for something like thick pancake batter or Greek yogurt.
- "There are pink, orange, or fuzzy spots." That's likely mold. Solution: Unfortunately, this batch is done. Toss it, scrub the jar well, and start over.
- "It's been 10 days and still not doubling." This is frustrating but not uncommon. Try moving it to a warmer spot (toward 75°F), feeding twice a day for a few days, or switching one feeding back to whole wheat flour for a little "boost." If it smells tangy and not rotten, there's still hope. Many slow starters become rock-solid and dependable once they finally get going.
When Can I Start Using Discard?
To keep things beginner-friendly and food-safe:
Days 1-6: Throw it out or compost it. Don't use it.
Day 7 onward: You can use it in cooked recipes as long as it looks and smells normal; tangy is fine, rotten is not. Save it in a separate container in the fridge and use it up over a week or two. I love to use it to make:
Frequently Asked Questions
Can I use all-purpose flour instead of bread flour? Yes. Bread flour gives a stronger, easier-to-read rise, but all-purpose flour works too; however, because it has slightly less protein, it may produce a starter that rises more slowly at first.
Can I feed it with whole wheat all the time? You can. Whole wheat absorbs more water, so you might need slightly more water to keep the texture like thick batter.
Can I use bleached flour? You can, but the chemicals can interfere with fermentation. Unbleached is more dependable.
Do I have to name my starter? Is it mandatory? No. Will it make you weirdly more attached to that bubbly jar and therefore more consistent about feeding it? Probably yes.
Easy Sourdough Recipes You'll Love
You have waited so long, and the time has finally arrived to try out your starter. What should you make first? Give these a try:


Printable Recipe

Beginner Sourdough Starter Recipe (From Scratch)
Equipment
- 1 pint-size glass jar (or similar container)
- spoon or small spatula
- loose lid, coffee filter, cloth, or plastic wrap
- rubber band, tape, or marker (to mark the height)
- digital kitchen scale (optional but helpful)
- digital thermometer (optional but helpful to hit 90°F water)
Ingredients
This is everything you'll need for the first week:
- 60 grams whole wheat flour (about ½ cup) - for Day 1 only
- 480-600 grams unbleached bread flour or all-purpose flour, divided (about 4 cups; I recommend having a 5 lb bag on hand so you don't run out)
- 600-720 grams water at about 90℉, divided (about 2½ cups; warm to the touch but not hot)
Instructions
Before You Begin
- Pick a feeding time. Choose a time you can stick with every day (morning works well).
- Pick a warm spot to keep your starter. It will be happiest at 70-75°F. You can keep it beside (not on) the stove; on top of the fridge; in a turned-off microwave with the door cracked and a cup of hot water beside the jar; or in a proofing box set to 75°F. If your house is chilly, wrap the jar in a towel.
Day 1 - Mix the Starter
- In a clean jar, combine 60 g of whole wheat flour (½ cup) and 60 g water at 90°F (¼ cup).
- Stir until no dry flour remains. The mixture will be thick, like heavy pancake batter. Lumps are fine.
- Scrape down the sides and lightly level the top.
- Cover loosely and let rest in a warm spot (70-75°F) for 24 hours.
- Tip: If you need a warmer spot, place the jar on a baking sheet in the oven (turned off) with the light on for 1-2 hours, then move it back to the counter. Don't forget it in there.
Day 2 - Watch and Wait (No Feeding)
- Peek at the top and sides for small bubbles. It might have puffed slightly, or not at all.
- You can stir once or twice to add oxygen, but do not feed yet.
- Cover loosely and let rest another 24 hours at 70-75°F.
- Totally normal today: Slightly looser texture, mild tangy or fruity smell.
- Tip (about hooch): At any point during this process, you might see a gray, thin liquid on top that smells like rubbing alcohol or gym socks. That's called hooch - a sign your starter is hungry. It's normal. Just pour it off and keep going.
Day 3 - First Feeding
- Give the mixture a quick stir.
- Remove and discard all but 60 g of starter. Scoop it with a spoon or pour into a bowl to weigh. (Discarding controls the acidity and gives the natural yeasts fresh food.)
- To the 60 g starter, add 60 g bread flour or all-purpose flour (½ cup) and 60 g water at 90°F (¼ cup).
- Mix with a fork or spoon until smooth. It should look like thick pancake batter.
- Scrape down the sides, put a rubber band around the jar at the height of the mixture, cover loosely, and let rest 24 hours at 70-75°F.
Day 4 - Second Feeding
- Remove and discard all but 60 g of starter in the jar.
- To the remaining starter in the jar, add 60 g flour (½ cup) and 60 g water at 90°F (¼ cup).
- Mix well, scrape down the sides, place your rubber band, cover, and rest at 70-75°F for 24 hours.
- Note: Around Days 3-4, many starters appear to slow down or even "stall" after that first burst of activity. This is very normal. The yeast is still building its strength. Keep feeding and resist the urge to give up.
Day 5
- Remove and discard all but 60 g of starter.
- To the jar, add 60 g flour (½ cup) and 60 g water at 90°F (¼ cup).
- Mix until smooth, scrape down the sides, place your rubber band, cover, and rest in a warm spot for 24 hours.
- The smell may get sharper or "funky" today - that's normal fermentation, not spoilage.
Day 6
- Remove and discard all but 60 g of starter in the jar.
- To the jar, add 60 g flour (½ cup) and 60 g water at 90°F (¼ cup).
- Mix well, scrape down the sides, place your rubber band, cover, and rest at 70-75°F for 24 hours.
Day 7
- Remove and discard all but 60 g of starter.
- Feed again with 60 g flour (½ cup) and 60 g water at 90°F (¼ cup).
- Mix, scrape down, place a rubber band, cover, and rest at 70-75°F for 24 hours.
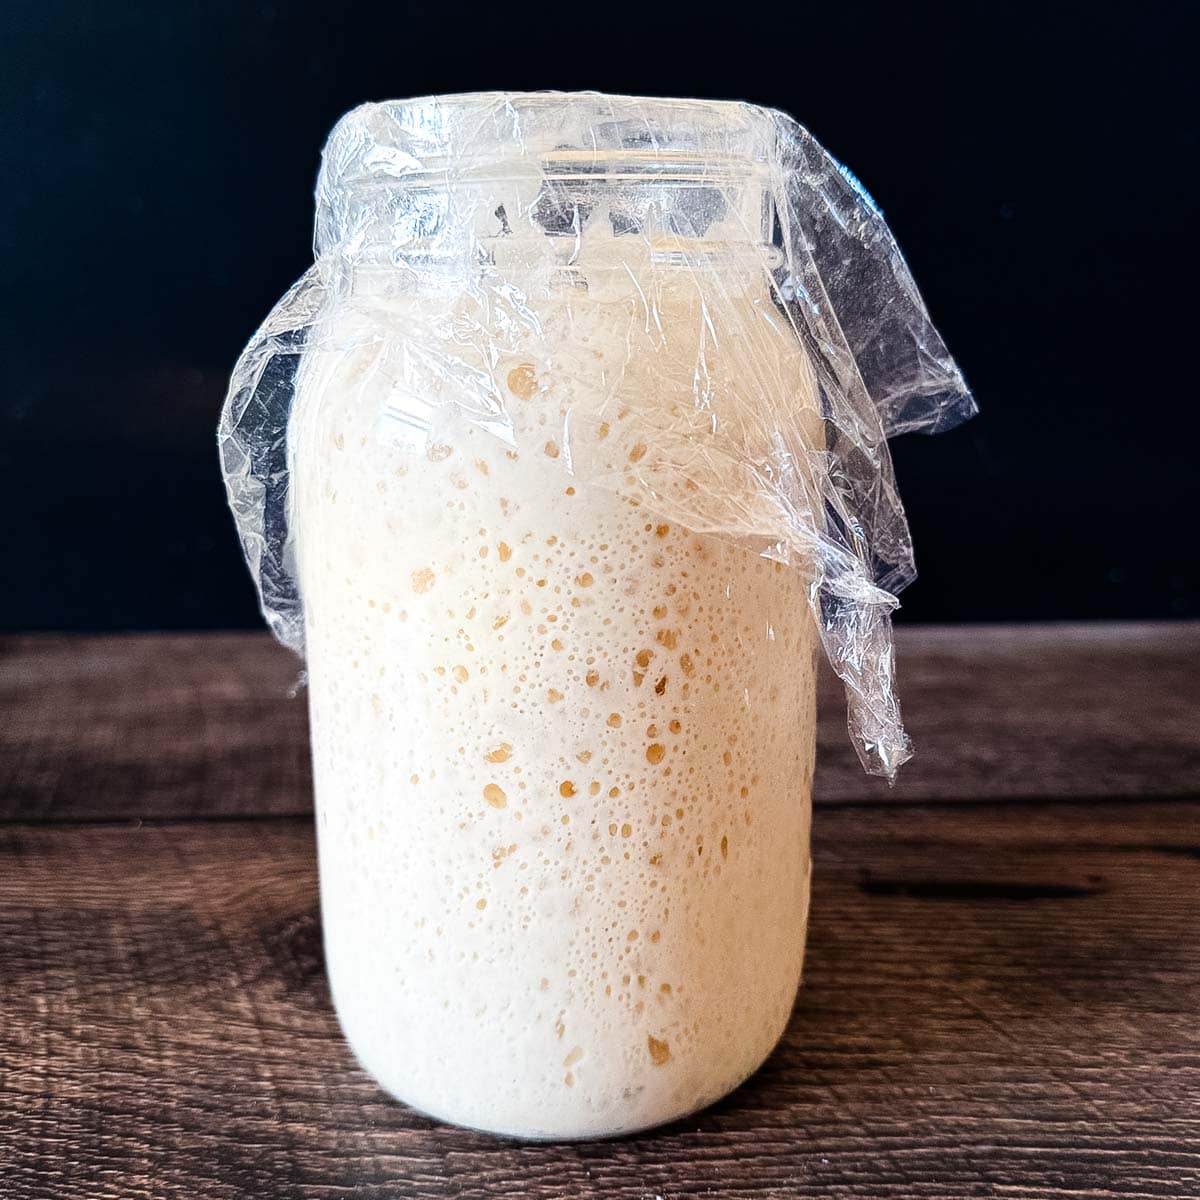
Day 8 and Beyond - Is It Ready?
- By now, many starters are fully active. Look for:-Doubling in size in 4-6 hours after a feeding.-Lots of bubbles, large and small, throughout the jar.-A spongy, fluffy texture-like a melted marshmallow.-A pleasant, tangy smell (no harsh, nail-polish, or rotten odors).
- If your starter ticks those boxes, it's active and ready to use in sourdough recipes.
- Optional float test: Scoop 1 teaspoon of starter from the top and drop it in cool water. If it floats, it's airy and ready. If it sinks but still doubles in 4-6 hours, trust the rise, not the float test.
- If it's not quite there yet (very common if your kitchen runs cool), just keep feeding once a day at the same 60 g starter, 60 g flour, 60 g water ratio for another 1-2 weeks. Many "slow" starters end up being the most reliable once they hit their stride.
After Your Starter Is Established
- Once your starter is mature and predictable, you can switch to my maintenance feeding: -Keep 25 g starter (discard the rest).-Feed with 75 g water and 75 g bread flour. Let it double and use it in my recipes, making sure you save 25 g to feed again. This feeding keeps the starter lively and happy.
- If you loved this recipe, please leave a 5-star rating and review below!
Save This Recipe 💌
Notes
- Timeline: Most starters take 7-14 days to become strong and reliable at 70-75°F. Cooler kitchens can take longer.
- Early bubbles don't mean "ready": A mature starter should double in 4-6 hours after a feeding and do that consistently for several days.
- The "rollercoaster phase": It's very normal for the starter to look active early on and then go quiet around Days 3-5. That's not failure-it's just the yeast and bacteria finding their balance.
- Weights vs cups: "Equal parts" means equal weight, not volume. Example: 60 g flour = ½ cup, 60 g water = ¼ cup. Same weight, different cup measure. For best results, stick with grams once you start.
- Discard safety: For food safety, do not use discard from Days 1-6. From Day 7 on, cooked/baked recipes are fine as long as the starter smells pleasantly tangy, not rotten.
- Room Temperature (bake often): Keep the starter on the counter and feed it once a day (or twice if it's rising and falling very quickly).
- Refrigerator (bake occasionally): Store with a loose lid in the fridge and feed about once a week. To feed: Keep 25 g starter, add 75 g water and 75 g flour, let it get a bit bubbly at room temp, then pop it back in the fridge. Before baking, give it 1-2 room-temperature feedings so it's nice and active.
The provided nutrition information is automatically calculated. Accuracy is not guaranteed.


Comments
No Comments