

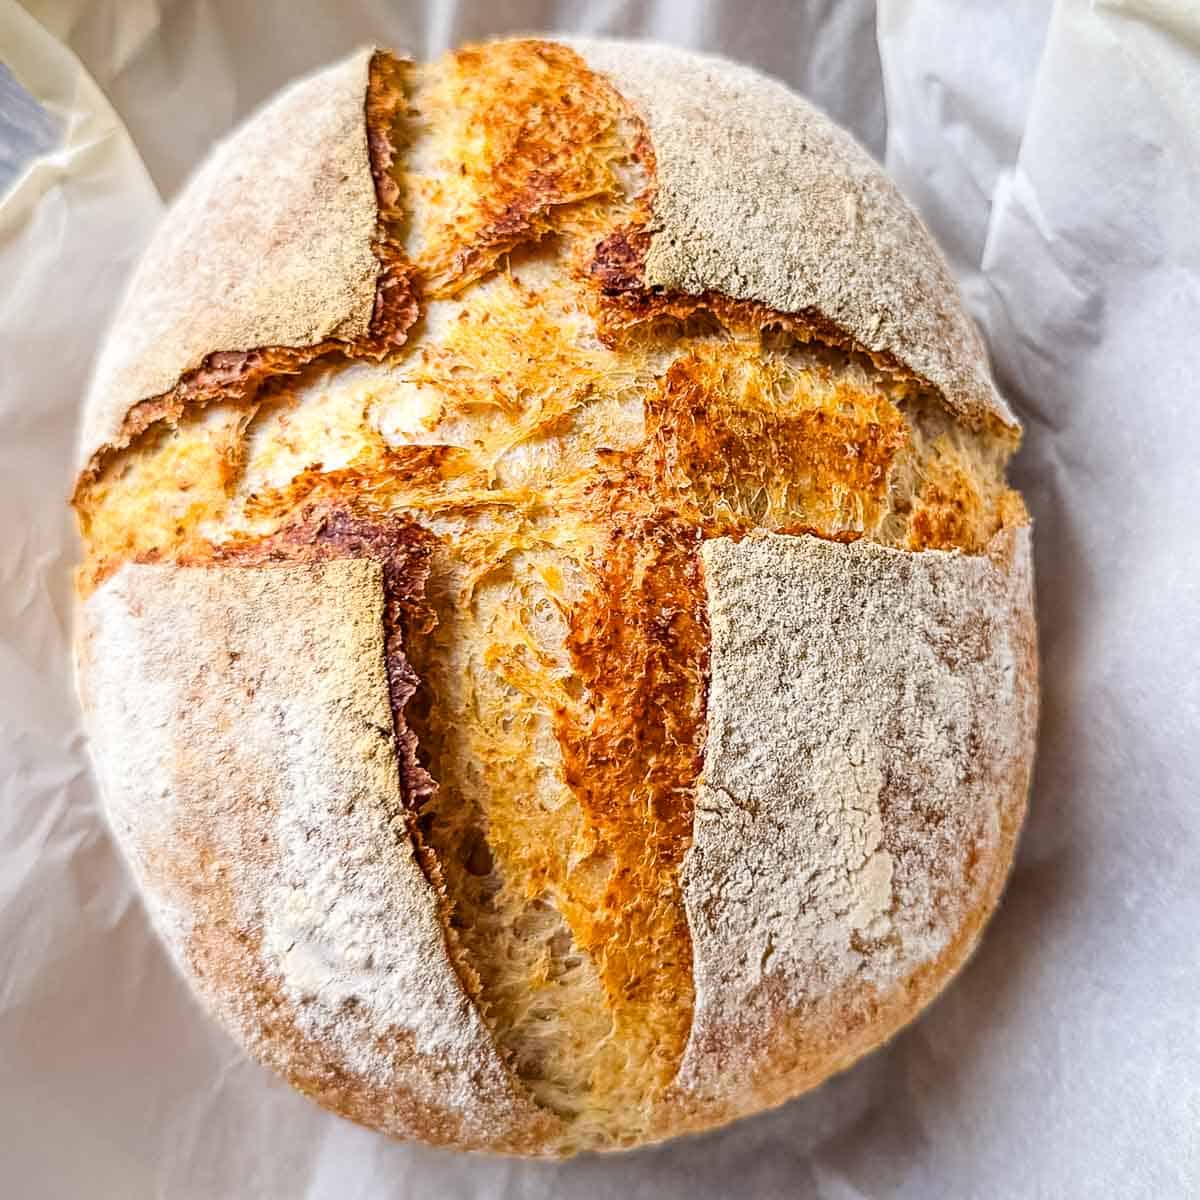
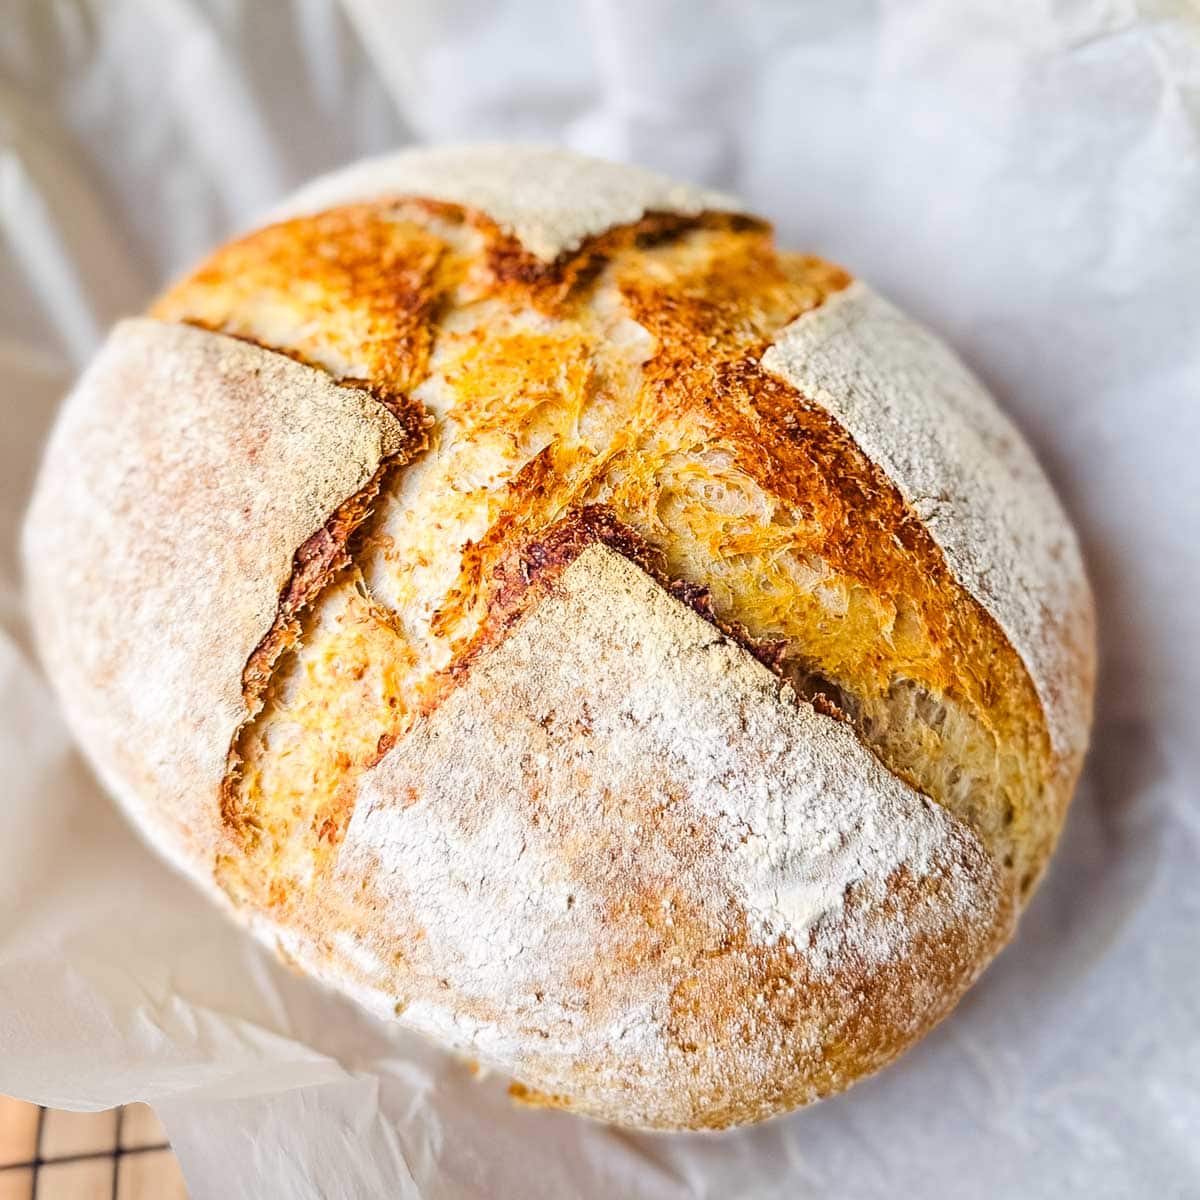
This Easy No-Knead Whole Wheat Sourdough Bread is soft, hearty, and incredibly simple to make. With just a few ingredients and almost no hands-on work, you'll get a beautiful artisan-style loaf with a crisp crust and tender crumb - perfect for toast, sandwiches, or eating warm with butter.
Want to save this recipe?
Enter your email & I'll send it to your inbox. Plus, get great new recipes from me every week!
If you love easy Sourdough Recipes as much as I do, make sure to try my No Knead Sourdough Sandwich Bread, Sourdough Pizza Dough, Smoked Sourdough Bread, and Sourdough Discard Banana Bread; all are reader favorites for a reason.
Jump to:
No-Knead Whole Wheat Sourdough Bread Recipe
This recipe actually started with a message from a reader (thanks, Valerie) who wanted a simple, hearty sourdough loaf like my No-Knead Sourdough Bread. Challenge accepted. After a few test batches, plenty of flour on my sweatshirt, and one very patient mature starter later… voila. It's rustic, perfectly golden, and the flavor? Just what I hoped. Nutty, tangy, and downright delicious.
After the final loaf cooled, my husband wandered through the kitchen, sliced off a piece, and immediately asked if I could "keep a steady supply of this in the house." That means this recipe is a keeper.

Why You'll Love It
- No yeast, no kneading. Your starter does all the work for you.
- Beginner-friendly. This is a super easy introduction to baking whole wheat sourdough.
- Nutty flavor and soft crumb. The whole wheat flour adds flavor without weighing it down too much.
- Flexible schedule. Build the starter in the evening and bake the next day.
Ingredient Notes
- Sourdough Starter: Use a bubbly, active starter. It should be at least doubled in size from when you fed it. You can Make Your Own Sourdough Starter, or buy it from Amazon. If you don't have a mature starter yet, you can use your discard to make my Sourdough Discard Bread.
- Whole Wheat Flour: I like using whole wheat bread flour; I find it makes the loaf less heavy.
- Bread Flour: Makes the bread a little bit lighter and fluffier.
- Water: Warm (around 90°F) to activate the starter.
- Salt: I like using fine sea salt.

How To Make It
Build the Starter (Night Before)
In a small jar or container, mix:
- 25 g active sourdough starter
- 75 g bread flour
- 75 g warm water
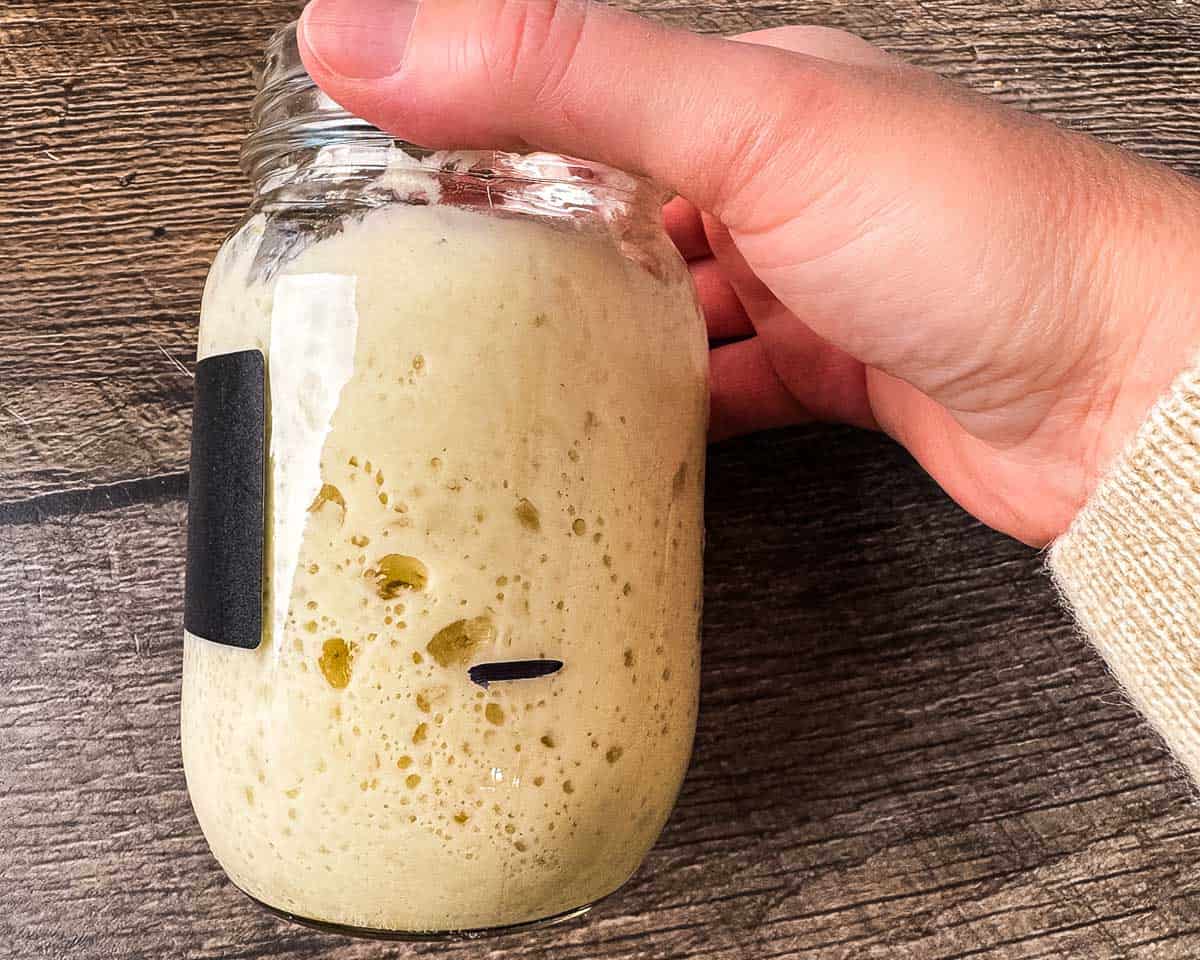
Stir to combine and loosely cover the container with plastic wrap or a plastic bag. Let it sit at room temperature for 8-10 hours, or until the starter has doubled in size and is airy, with small bubbles. Tip: You'll know the levain is ready when a small spoonful floats in water.
Mix the Dough (The Next Morning)
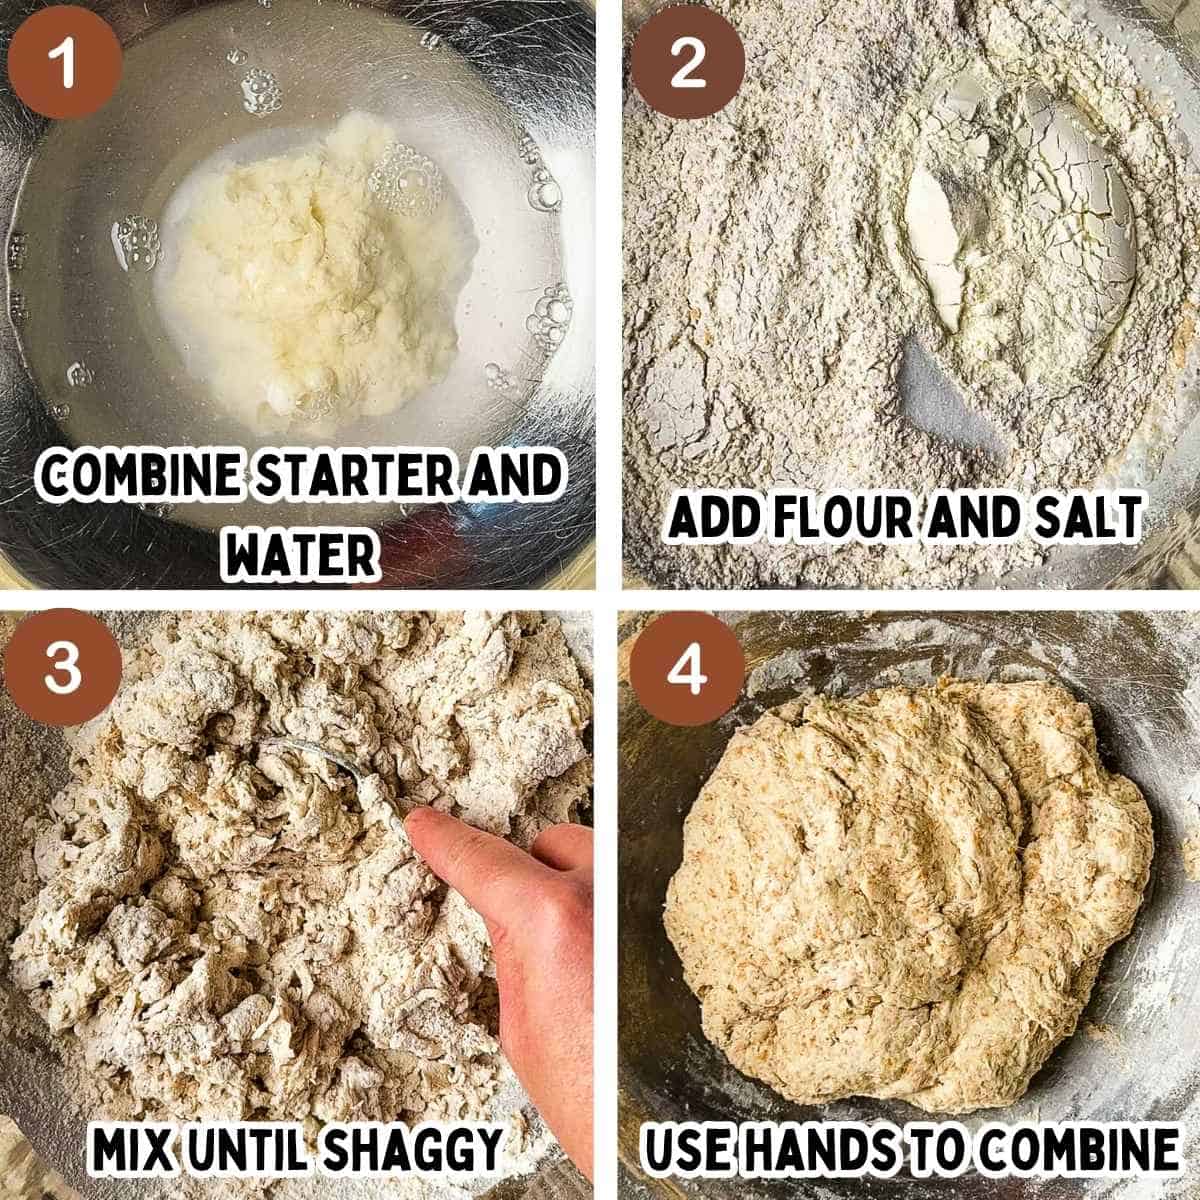
In a large bowl, whisk together 100 g ripe starter and 320 g warm water. Stir until the starter dissolves completely; it should appear milky. Add 400 g whole wheat flour, 100 g bread flour, and 10 g sea salt.
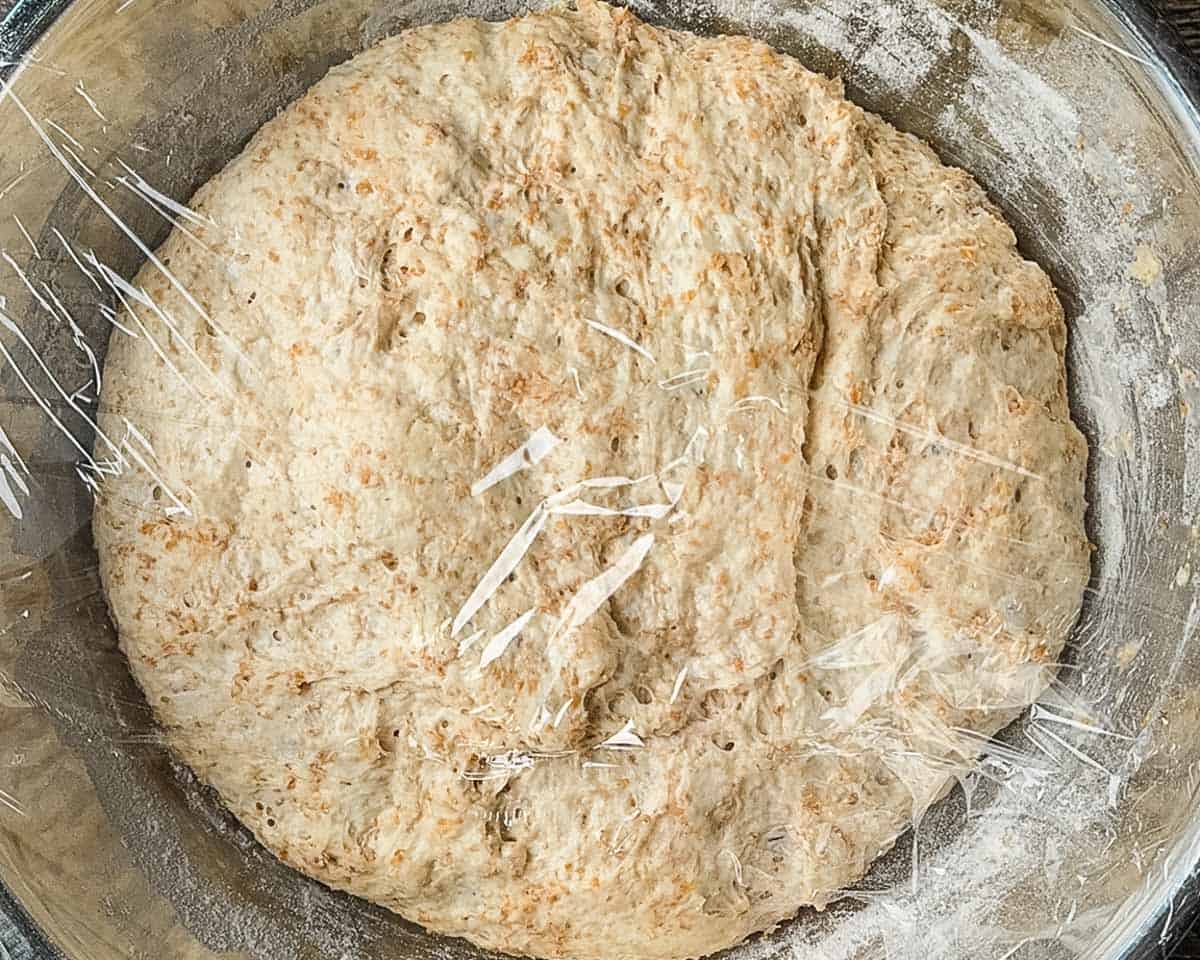
Mix with a wooden spoon or dough whisk until it comes together into a shaggy mass. It will look rough - that's what you want. Use damp hands to form the dough into a loose ball. Cover the bowl with plastic wrap or a damp towel. Tip: Mixing the dough in one bowl = no cleaning up a messy counter. Easy peasy.
Bulk Fermentation (First Rise)
Let the dough rest in a warm place (75-80°F) for 5-6 hours, or until it roughly doubles in size and is puffy. You'll know the dough is ready when the surface slightly jiggles when you move the bowl.

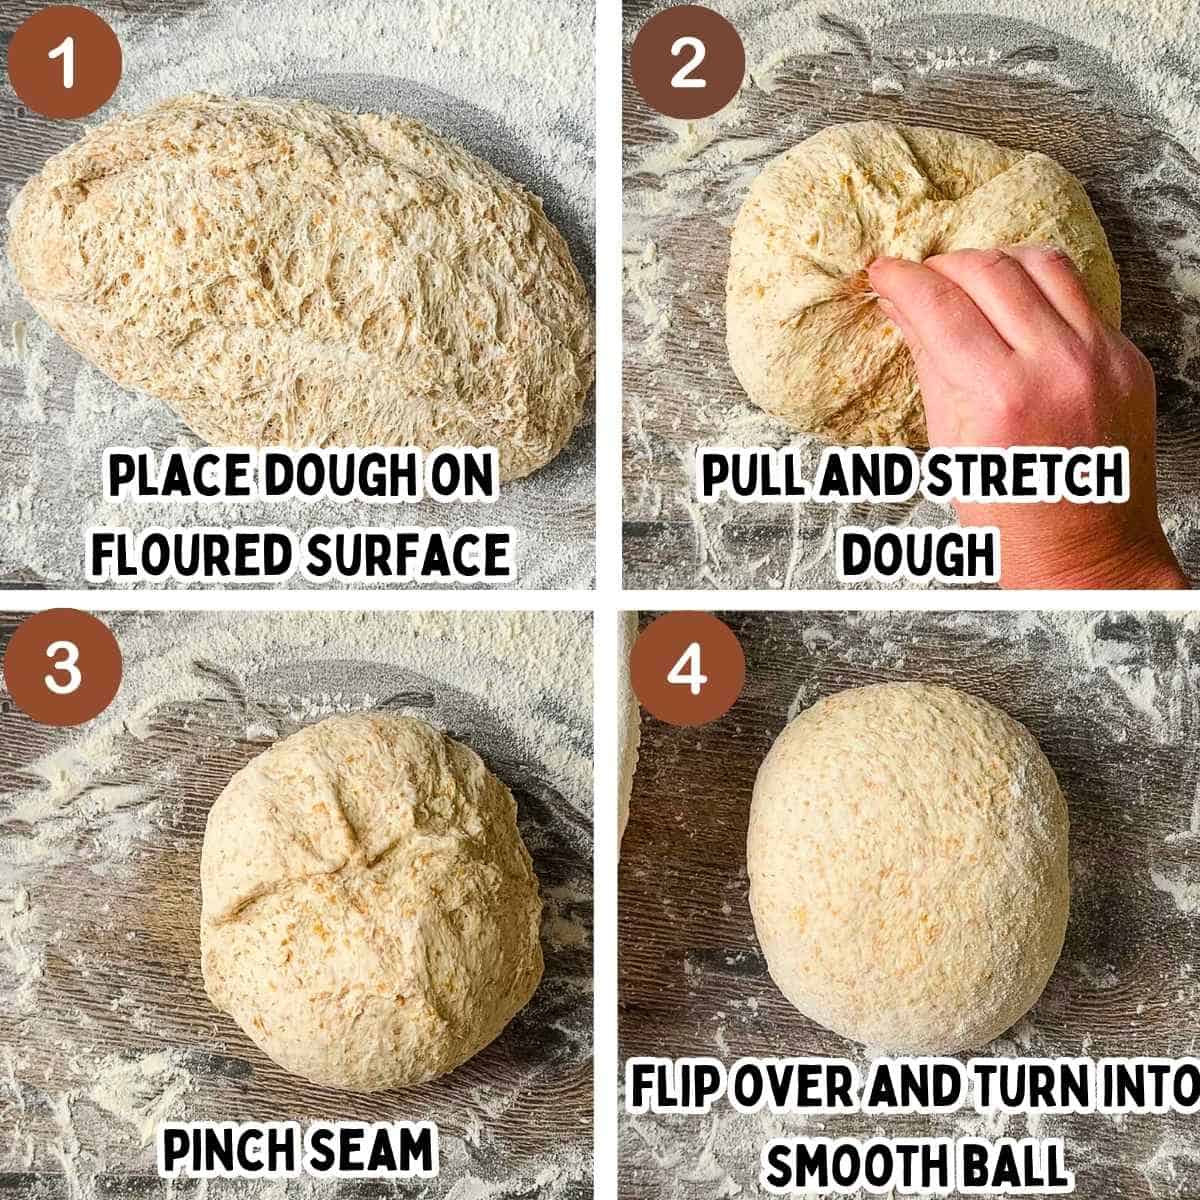
Shape the Dough
Lightly flour your counter. Turn the bread dough out on the floured surface, smooth-side down. Starting from the top edge, stretch the dough up and fold it toward the center. Repeat with the bottom, left, and right sides. This builds surface tension.
Pinch the seams closed, then flip the dough seam-side down. Gently tighten it by rotating and pulling it toward you with cupped hands until it forms a smooth, tight ball. Pro tip: Don't use too much flour or it will hinder building the smooth surface that gives the loaf structure. A little friction is fine.
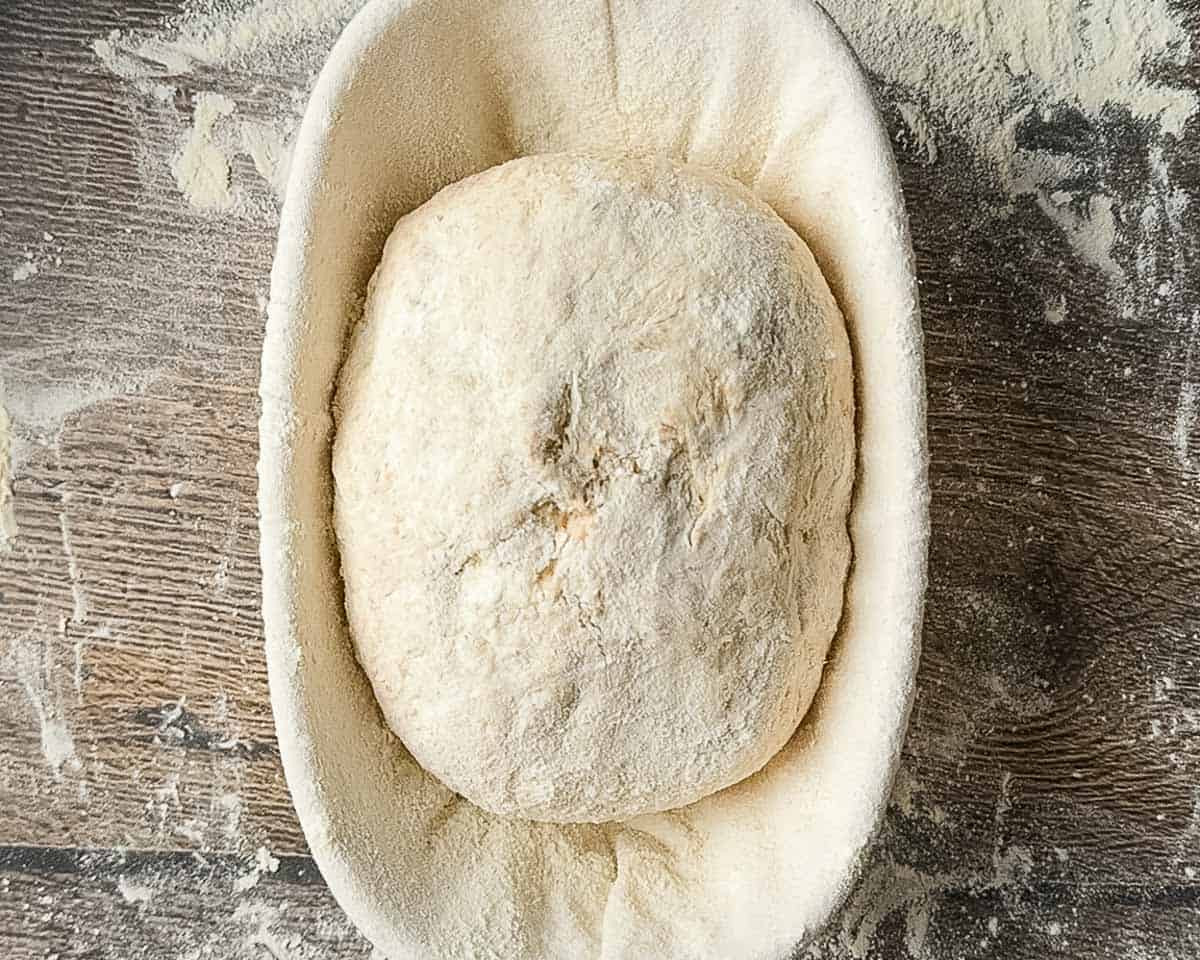
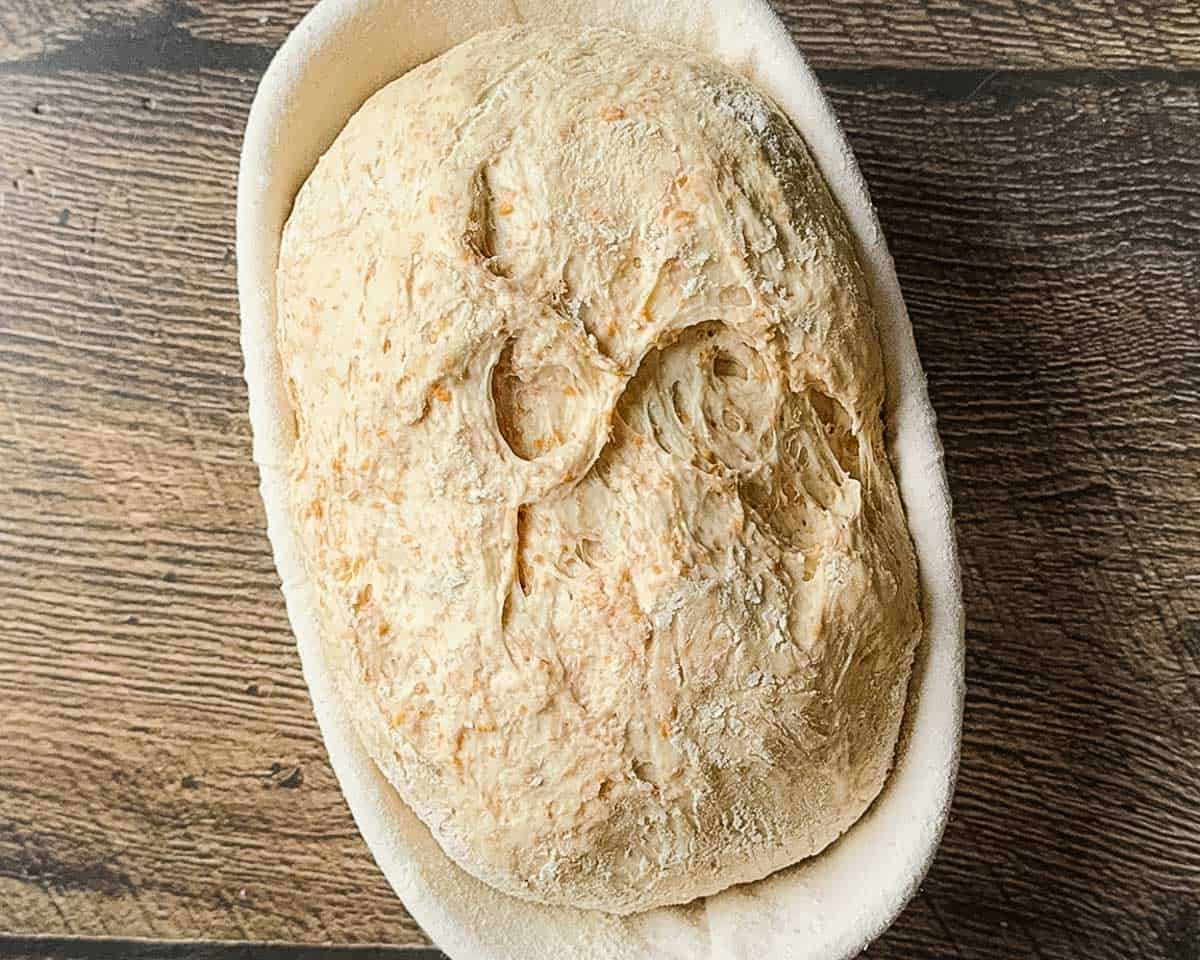
Second Rise
Flour a banneton or medium bowl that has been lined with a tea towel. Place the dough seam-side up. Dust lightly with flour, including the side of the dough, and cover the bowl with plastic wrap or a damp towel. Let rise in a warm spot for 2-3 hours, or until it has doubled in size.
To test that it's ready, gently press your fingertip into the dough - it should spring back slowly and leave a small indentation.
Score and Bake
Preheat your oven to 450°F. While the oven is preheating, place parchment paper on your counter. Turn the dough onto the parchment paper seam-side down, and score the dough down the center with a sharp knife or bread lame, about ½ inch deep.
Using the parchment paper as handles, carefully lower the dough into your Dutch oven. Cover with the lid, reduce the oven to 425°F, and bake for 40 minutes. Some recipes call for you to preheat the Dutch oven, but this recipe does not. I have tested it and it made no difference.
After 40 minutes, remove the lid and continue baking for an additional 10 minutes, or until the top is deep golden brown. The internal temperature should be 190-205°F.

Cool (The Hardest Part)
Carefully lift the bread from the Dutch oven using the parchment and place it on a wire rack to cool. Let it cool completely (at least 2 hours) before slicing with a sharp serrated knife. Why wait? Cutting too early traps steam and results in gummy crumb. Cooling "finishes" the bake inside the loaf.

Jeri's Tips for Success
- Measure by weight. Whole wheat flour packs tightly into a cup - a kitchen scale keeps measurements consistent.
- Prevent sticking. Flour the bowl (or banneton) liberally so the dough doesn't stick when turning it out.
- Dough not rising? Your starter may be sluggish - next time, try feeding it twice before baking day.
- Rising too fast? Move it to a cooler spot in your kitchen (68-70°F).
Variations
Overnight Cold Ferment: Once the bread is shaped, refrigerate covered for 8-12 hours. Bake directly from the refrigerator in the morning. This will also give you a stronger sourdough flavor.
Seeded Whole Grain Loaf: Add 2-3 tablespoons of mixed seeds (sunflower, sesame, flax, pumpkin, etc.) to the dough after mixing.
Rosemary Garlic: Add 1 tablespoon of finely chopped fresh rosemary and 2 cloves of minced roasted garlic when you first mix the dough.
Honey Whole Wheat Sourdough: Add 1 tablespoon of honey when you first mix in the water and the starter.
Small Loaves: Rather than one loaf, divide the dough into two smaller loaves or into rolls. Reduce bake time by 10-15 minutes for small loaves, or 20-25 minutes for rolls.
Cracked Wheat or Multigrain: Soak ¼ cup cracked wheat, rolled oats, or a multigrain mixture in warm water for 30 minutes, then drain and add to the dough.
How To Store Your Whole Wheat Sourdough Bread
Room temperature: Store in a paper bag or wrapped in a kitchen towel for up to 3 days.
Freeze: Slice first, then place in a Ziploc bag and freeze for up to 3 months. Reheat in the toaster or oven straight from frozen.
Serving Ideas
This hearty loaf of bread is delicious for:
- Avocado Air Fryer Toast sprinkled with chili flakes.
- Thick slices with butter and honey.
- Sandwiches like Air Fryer Reuben Sandwich, Smoked Grilled Cheese Sandwich, or piled high with Smoked Pulled Pork or Cranberry Pecan Chicken Salad.
- Dipping in soups like Roasted Tomato Soup, Buttercup Squash Soup, Roasted Butternut Squash Soup, Marry Me Chicken Soup, and Instant Pot Ham and Potato Soup.
FAQs
Yes, but the bread will be denser. Add an extra 20-30 g of water to compensate.
Line a large mixing bowl with a well-floured tea towel - it works just as well.
Absolutely! After shaping, cover and refrigerate overnight (8-12 hours). Bake straight from the fridge - score and place directly into the Dutch oven. Flavor will be deeper and slightly more tangy.

More Easy Sourdough Recipes You'll Love
Try one of these reader favorites:
Did you make this No Knead Whole Wheat Sourdough Bread recipe? If you did, can you do me a big favor and leave a rating and review letting me know how you liked it? This helps my website grow so I can continue to publish free recipes. Thank you! 😊
Printable Recipe

No Knead Whole Wheat Sourdough Bread
Ingredients
For the Starter (Night Before):
- 25 grams sourdough starter (about 2 tablespoons)
- 75 grams white bread flour (½ cup + 1 teaspoon)
- 75 grams warm water (90℉) (⅓ cup)
For the Dough
- 100 grams active starter (from above) (heaping ⅓ cup)
- 320 grams warm water (90℉)
- 400 grams whole wheat flour (bread flour if possible)
- 100 grams white bread flour
- 10 grams sea salt (2⅛ teaspoons)
Instructions
- The evening before, combine 25 g of starter, 75 g of bread flour, and 75 g of warm water in a pint jar. Stir well until no dry flour remains. Cover loosely with plastic wrap and let sit at room temperature for 8-10 hours. By morning, the starter should be bubbly, airy, and doubled in size. (A spoonful should float in water.)
- The next morning, add 100 g of ripe starter and 320 g of warm water to a large mixing bowl. Whisk until the starter fully dissolves and the mixture looks milky. Add 400 g of whole wheat flour, 100 g of bread flour, and 10 g of sea salt. Mix until a shaggy dough forms, then use damp hands to gather it into a loose ball. It will look rough.
- Cover the bowl tightly with plastic wrap and place it in a warm spot (like the oven with the light on). Let rise for 5-6 hours, or until the dough is noticeably puffy and doubled. When the bowl is gently moved, the dough should jiggle slightly.
- Dust your counter lightly with flour. Turn the dough onto the counter, smooth side down. Starting with the top edge, gently pull the dough away, then fold to the center. Repeat with the bottom edge, left side, and right side. Pinch to seal, then flip the dough seam-side down. Using cupped hands, rotate and pull the dough toward you until it forms a tight, smooth ball.
- Dust a banneton (or a bowl lined with a floured tea towel) generously with flour. Place the dough seam-side up in the basket, then lightly dust the top and sides with flour. Cover with plastic wrap and return to a warm spot for 2-3 hours, or until doubled in size. When gently pressed, the dough should feel light, airy, and hold a slow-returning fingerprint.
- Preheat your oven to 450°F. Lay a piece of parchment paper on the counter and gently turn the dough onto it seam-side down. Score a ½-inch deep slash down the center with a sharp knife or bread lame.
- Using the parchment corners, lift the dough into your Dutch oven. Cover with the lid, reduce the oven temperature to 425°F, and bake for 40 minutes. (No need to preheat the Dutch oven - this recipe works perfectly without that step.)After 40 minutes, remove the lid and bake for an additional 10 minutes, or until the crust is deep golden brown and sounds hollow when tapped. The internal temperature should reach 190-205°F.
- Remove from the oven and use the parchment paper to lift the loaf onto a cooling rack. Let it cool completely for at least 2 hours before slicing with a serrated knife. Cutting too early traps steam and leads to a gummy interior - cooling lets the inside fully set.
- If you loved this recipe, please leave a 5-star rating and review below!
Save This Recipe 💌
Notes
- Use an active starter: Your starter should be bubbly, doubled, and airy before mixing the dough. If it looks sluggish, give it an extra feeding and try again later.
- Water temperature matters: Warm water (around 90°F) helps jump-start fermentation, especially in cooler kitchens.
- Warm environment = better rise: Sourdough thrives around 75-80°F. If your kitchen runs cool, place the covered dough in the oven with just the light on, or near a warm appliance.
- Don't over-flour the counter: A little flour is good, but too much prevents the dough from tightening properly during shaping.
- No need to preheat the Dutch oven: This recipe has been tested both ways, and preheating didn't make a noticeable difference - skip the extra step.
- Cooling is essential: Sourdough continues to bake internally after it leaves the oven. Cutting too soon will compress the crumb and make the texture gummy. Give it the full 2 hours - it's worth the wait.
- Storage: Store the cooled loaf in a paper bag or wrapped in a clean tea towel for up to 3 days. For longer storage, slice and freeze in a freezer-safe bag.
- Make it ahead: For even deeper flavor, you can shape the dough and refrigerate it for 8-12 hours, then bake straight from the fridge.
Nutrition
The provided nutrition information is automatically calculated. Accuracy is not guaranteed.
Did you love this recipe?
Then please leave a 5-star rating and/or review below! You can also save it! Just tap the heart symbol ❤️ in the lower right corner of your screen, and the recipe will be stored in your own recipe box!📥


Terry says
I tried this recipe and was very happy with how it turned out with a nice chewy crust and a denseness to the bread. Did this one by sitting overnight after shaping and baking the next day which I think with the wheat flour might be the better way. If only these could be cut and eaten right out of the oven lol. Now on to the Sourdough Choc Chip cookies and sourdough focaccia (topped with garlic confit). I think it's great having the step by step pictures with the instructions. Thanks for all your work on these recipes.