

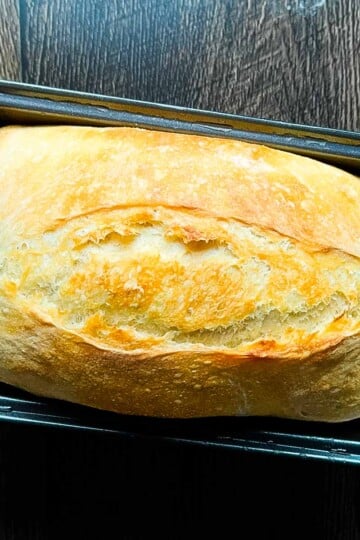
This Smoked Sourdough Bread is a rustic classic made better on the pellet grill. It has a crisp crust, a soft and chewy interior, and just the right amount of smoky flavor - all without burning the bottom!
This recipe is incredibly forgiving. You can adjust the timing to fit your schedule, and it's really hard to mess up. Whether you're a beginner to sourdough or an experienced baker, you'll love how flexible and foolproof this method is.

Want to save this recipe?
Enter your email & I'll send it to your inbox. Plus, get great new recipes from me every week!
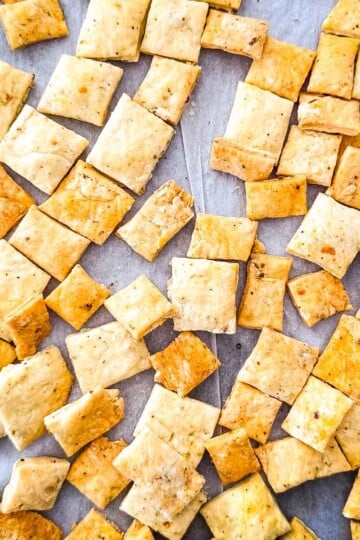
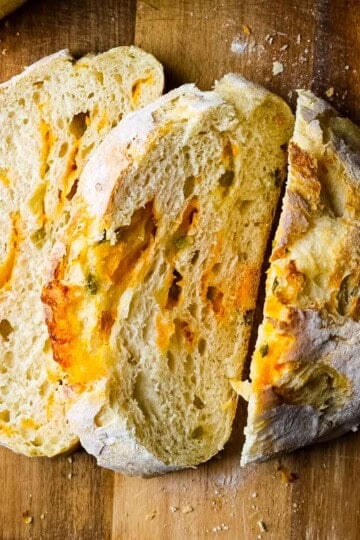
Looking for more easy sourdough recipes? Try my Sourdough Pizza Dough (No Yeast), No-Knead Whole Wheat Sourdough Bread, and No Knead Jalapeno Cheddar Sourdough Bread next!
One of my readers asked if they could smoke sourdough bread on their pellet grill. I loved the idea but quickly learned it wasn't as simple as throwing the bread on the smoker. After burning a few loaves (sorry, Dutch oven!), I finally was able to get that perfect smoky flavor without a charred bottom.
And it is SO good! I love using it to make cucumber sandwiches!
This recipe takes about 24 hours from start to finish, but don't let that scare you - most of it is hands-off time while your dough develops flavor. You'll need about 30 minutes of actual work, spread across mixing, folding, and shaping. Plan to feed your starter the night before, and start the dough early the next morning if you want fresh bread for dinner.
Jump to:
Ingredient Notes
All ingredients for this recipe are shown in the pic below, and special notes are made in the bulleted list to assist you.

- Active Sourdough Starter. This is the heart of your bread. I use 100g of bubbly, active starter from my Easy Sourdough Starter Recipe. I feed it 8-12 hours before baking. It should be at its peak and pass the float test - drop a small amount in water and it should float.
- Water. We need 300g of filtered water at 90°F. The temperature is important here - too hot will kill your starter, too cold will make it sluggish. I use a kitchen thermometer to get it just right.
- Bread Flour. 500g of bread flour gives us that perfect chewy texture. You can also use all-purpose flour if that's all you have.
See the recipe card below for full information on ingredients and quantities.
Equipment
- Pellet Grill. I used my Pit Boss, but any brand works. Just make sure it has enough space for your Dutch oven.
- Dutch Oven. Use a basic cast iron one (5-7 quart) - it will get black from the smoke, so skip the fancy enameled ones.
- Parchment Paper. It makes transferring the dough easy. Don't use wax paper - it'll melt!
- Scoring Tool. While a sharp knife works, I prefer a bread lame (basically a razor blade on a handle).
- Kitchen Scale. This is non-negotiable for sourdough! Volume measurements just aren't accurate enough. I use a digital scale that measures in grams.
- Large Bowl. For mixing and rising.
- Plastic Wrap. For covering the dough while it rises. You could use a damp kitchen towel instead, but plastic wrap gives the best seal.
How to Make It
Here's how to smoke sourdough bread with step-by-step photos. (The full recipe is in the recipe card below!)
- Step 1: The night before baking, feed your starter. You'll need active sourdough starter - either from a friend or purchased online. In a clear quart-sized jar, mix 25g mature starter (about 2 tablespoons), 75g unbleached bread flour, and 75g lukewarm water (90°F - feels warm but not hot to your wrist). Mix until smooth like pancake batter - no dry flour visible. Cover with plastic wrap or a lid set on loosely to allow air flow. Leave at room temperature (65-75°F) for 8-12 hours. Note: Your starter is ready when it's doubled in size and looks bubbly. To test, drop a small spoonful in a glass of room temperature water - it should float. If it sinks, wait another hour and test again.

- Step 2: The next day, in a large mixing bowl, combine 100g of your bubbly starter (about ½ cup) with 300g of warm water (90°F). Add 500g bread flour and 10g sea salt (about 2 teaspoons). Mix first with a wooden spoon until roughly combined, scraping down the sides of the bowl. Switch to using your hand, mixing and squeezing the dough through your fingers until it forms a sticky ball - about 2-3 minutes. Cover the bowl tightly with plastic wrap and place somewhere warm (like your oven with just the light on) for 2 hours. Note: Your hands will get messy - use a dough scraper or butter knife to clean them off. (Use the leftover sourdough starter to make another batch of bread, and store any extra starter (sourdough discard) in a jar in the fridge for up to 2 weeks. Use the discard to make Sourdough Chocolate Chip Cookies, Sourdough Discard Banana Bread, or Sourdough Discard Pancakes).

- Step 3: Time for stretch and folds! Every 30 minutes for the next 2 hours (4 times total), you'll work the dough. Dust your hands with flour, then reach under one side of the dough with both hands. Gently stretch it up about 6-8 inches until you feel some resistance (like stretching a rubber band halfway), then fold it over to the center. Rotate your bowl 90 degrees and repeat on all four sides. The dough will get smoother and stronger with each fold. After your fourth and final fold, let the dough rise undisturbed until doubled in size, about 3-4 hours at room temperature. You'll see small bubbles on the surface. Note: After the folds, you can either let it rise at room temperature or refrigerate for up to 24 hours - just bring it back to room temperature before the next step.


- Step 4: Shaping time! Dust a clean counter with about 2 tablespoons of flour. Gently turn your dough out, being careful not to deflate it. Using floured hands, pull each edge out slightly (like a square), then fold them into the center like you're wrapping a package. Flip the whole thing over so the seams are down. Cup your hands around the dough and rotate it toward you, dragging it slightly on the counter to create surface tension - you'll feel it get tighter. Place seam-side up in a floured banneton basket (with or without the liner) or a bowl lined with a well-floured kitchen towel (use about ¼ cup flour on the towel). Cover with plastic wrap for the final 1.5-hour rise.


- Step 5: Set your pellet grill to 350°F. Cut a piece of parchment paper large enough so that it will overhang by a few inches when placed in your Dutch oven. When the dough is ready, carefully flip it onto the center of the parchment paper. Using a sharp knife or razor blade, score the top about ½ inch deep - a simple "X" or square pattern works great, or get fancier if you like.


- Step 6: Use the parchment paper as a sling to lower the dough into your Dutch oven. Place your room-temperature Dutch oven (4.7-quart or larger) on the side of your pellet grill, away from where the smoke comes out - that's your cooler zone. Cover with a lid and smoke the sourdough bread for 30 minutes. Remove the lid and smoke for another 15 minutes. For a darker top crust, place under your oven's broiler for 2-3 minutes until golden brown.

- Step 7: The hardest part - letting it cool! Use the parchment paper like a sling to carefully lift the hot bread out of the Dutch oven and place it on a wire rack. Now comes the test of patience: let it cool completely for at least 2 hours before slicing. I know the fresh-baked bread smell is tempting, but cutting too soon will give you gummy slices. Your bread is ready when it makes a hollow sound, like knocking on a door when you tap the bottom. Enjoy!

Tips I Learned
- Test your starter. A mature, active starter is crucial. If it doesn't float in water or hasn't doubled in size, your bread won't rise properly.
- Control your temperature. Keep your dough warm (75-80°F) during rising. I use my oven with just the light on - it's the perfect proofing box.
- Score with confidence. Deep, decisive cuts (about ½ inch) allow your bread to expand properly while baking.
- Handle with care. During stretches and folds, be firm enough to develop structure but gentle enough to preserve those precious air bubbles.
- Position matters. Place your Dutch oven away from the fire pot on the cooler side of your grill. I burned several bottoms before figuring this out - the direct heat from the pellet fire is too intense.
- Use mild wood. Use mild fruit woods like apple or cherry, or mild wood pellets like pecan. Stronger woods can overpower the natural sourdough flavor. I typically use cherry - it adds a subtle sweetness without being too smoky.
Serving Suggestions
The subtle smoke flavor makes this bread incredible with just butter, but it really shines in Sourdough French Toast, grilled cheese sandwiches (especially Smoked Grilled Cheese Sandwiches) served with my Roasted Tomato Soup, or my Air Fryer Reuben Sandwich.
It's also perfect to serve on the side of soups and stews (I like it with my Smoked Sausage and Potato Soup).
Storing Your Bread
Store sourdough bread in a paper bag at room temperature for 3 days, or slice and freeze for up to 3 months.

Recipe FAQs
Usually this means your starter wasn't active enough. It should double in size and float in water before using. Feed it again and wait until it's really bubbly before trying again.
Yes! After the stretches and folds, pop it in the fridge for up to 24 hours. Just let it come to room temperature before baking.
This happens when the Dutch oven is too close to the fire pot. Keep it on the cooler side of your grill and remember - don't preheat the Dutch oven!


If you like this Dutch Oven Sourdough Bread recipe, please take a moment to rate the recipe 🌟🌟🌟🌟🌟 and leave a comment below!
Printable Recipe

Smoked Sourdough Bread
Ingredients
For the Starter Feed (Night Before)
- 25 grams mature sourdough starter (about 2 tablespoons)
- 75 grams white bread flour (½ cup + 1 teaspoon)
- 75 grams warm water (90℉) (⅓ cup)
For the Sourdough Bread
- 100 grams active sourdough starter (heaping ⅓ cup)
- 300 grams warm water (90℉) (1¼ cups + 1 tablespoon)
- 500 grams white bread flour (3½ cups + ½ teaspoon)
- 10 grams sea salt (2⅛ teaspoons)
Instructions
- In a clear pint-sized jar, combine 25g mature starter, 75g bread flour, and 75g filtered water (90°F). Mix with a spatula until completely smooth and no dry flour remains. Cover with plastic wrap or a loose-fitting lid and let rest at room temperature (65-75°F) for 8-12 hours or overnight. The starter is ready when it's doubled in size and a small amount floats when dropped in room-temperature water.
- In a large mixing bowl, combine 100g active starter with 300g warm water (90°F). Add 500g bread flour and 10g sea salt. Mix with a wooden spoon until roughly combined, then switch to mixing with your hand, squeezing the dough through your fingers until it forms a sticky ball, about 2-3 minutes. Cover tightly with plastic wrap and place in a warm spot (like an oven with the light on) for 2 hours.
- After the initial rest, begin stretch and folds. With lightly floured hands, reach under the right side of the dough, lift up about 6-8 inches until you feel resistance, then fold toward the center. Rotate the bowl 90 degrees and repeat on all four sides. Cover and rest for 30 minutes. Repeat this process three more times at 30-minute intervals for a total of 4 stretch and fold sessions. After the final fold, let the dough rise undisturbed until doubled in size, about 3-4 hours.
- Dust a clean counter with 2 tablespoons of flour. Gently turn the dough out onto the floured surface, being careful not to deflate it. Pull each edge out about 4 inches, then fold into the center like wrapping a package. Flip the dough seam-side down. Using cupped hands, rotate the dough toward you while dragging slightly to create surface tension. Place seam-side up in a bowl lined with a well-floured kitchen towel (use about ¼ cup flour on the towel). Cover with plastic wrap and let rise for 1.5 hours.
- Preheat your pellet grill to 350°F. Cut a piece of parchment paper large enough to fit in your Dutch oven with some overhang on the sides. When the dough is ready, flip it over carefully onto the parchment paper. Using a sharp knife or bread lame, score the top ½-inch deep in a cross pattern. Use the parchment paper as a sling to carefully lower the dough into a room-temperature Dutch oven (do not preheat). Place the Dutch oven on the side of your grill away from the fire pot. Cover with the lid and smoke the bread for 30 minutes.
- After 30 minutes, carefully remove the lid (watch out for hot steam) and continue smoking for 15 minutes. The bread is done when the internal temperature reaches 190-205°F with an instant-read thermometer. If you want a darker crust, transfer to your oven's broiler for 2-3 minutes, watching carefully to prevent burning.
- Using the parchment paper corners as handles, carefully lift the bread out of the Dutch oven and place it on a wire cooling rack. Let cool completely, about 2 hours, before slicing. The bread should sound hollow when tapped on the bottom. Enjoy!
Save This Recipe 💌
Notes
- Active starter is critical. If it doesn't double in size and float in water, feed it again and wait.
- No banneton? Use a bowl lined with a well-floured kitchen towel.
- With just the light on, your oven provides the perfect temperature (75-80°F) for rising dough.
- When the dough feels too sticky during shaping, dust your hands with flour instead of adding more to the dough.
- The cooler side of your grill (opposite the fire pot) is crucial for preventing a burnt bottom. I learned this the hard way - three burnt loaves!
- Use a basic cast iron Dutch oven, not an enameled one. The smoke will permanently discolor the outside, but this doesn't affect the bread.
- Fruit woods (apple or cherry) add a subtle sweetness. Stronger woods like mesquite or hickory can overwhelm the delicate sourdough flavor.
- Want to prep ahead? After the stretch and folds, refrigerate the dough for up to 24 hours. Just bring to room temperature before baking.
- Store the cooled bread in a paper bag for up to 3 days at room temperature. For longer storage, slice and freeze it for up to 3 months. Never store in plastic - it softens the crust.
Nutrition
The provided nutrition information is automatically calculated. Accuracy is not guaranteed.
Did you love this recipe?
Then please leave a 5-star rating and/or review below! You can also save it! Just tap the heart symbol ❤️ in the lower right corner of your screen, and the recipe will be stored in your own recipe box!📥

David says
The grill temperature is much too low to actually get a good crust. Sadly, I didn't compare this recipe to other smoker recipes that recommend getting the grill to higher temps.
Jeri Walker says
Thanks for the feedback. I totally get wanting a darker crust — that’s why I include the optional broiler step at the end. I tested this recipe multiple times at higher smoker temps, but the bottom always burned before the crust developed properly. Using the smoker for that slow wood-fired flavor and finishing under the broiler gives the best of both worlds. Sorry it didn’t turn out the way you were hoping.