

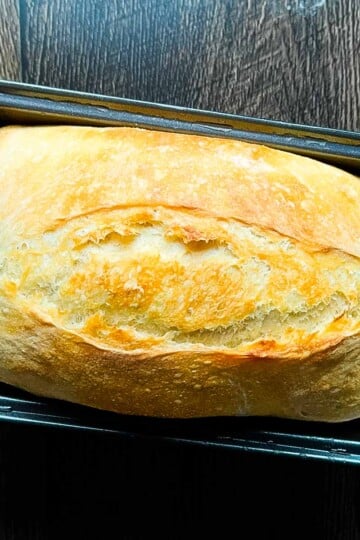
This easy, no-knead sourdough bread creates a perfect artisan loaf in just one day with minutes of hands-on time! You'll get that gorgeous golden crust with a soft, chewy interior and classic sourdough tang. The dough practically makes itself!
Like my homemade dinner rolls and Irish soda bread, this recipe shows you don't have to be an experienced baker to make bread from scratch!

Want to save this recipe?
Enter your email & I'll send it to your inbox. Plus, get great new recipes from me every week!
Remember the first time you walked into a bakery and smelled that intoxicating aroma of freshly baked sourdough? That perfect combination of crispy crust and tender inside that makes you want to spend $8 on a single loaf?
Well, prepare to create homemade sourdough bread in your kitchen - without the hefty price tag!
First off, I want to say that you don't need to go out and buy a whole bunch of special equipment. You can if you want, but you don't need to. And making sourdough is not complicated. It is by far the easiest bread I have ever made.
You'll be shocked at how four simple ingredients can give you the most amazing bread. Don't overthink it, just do it.
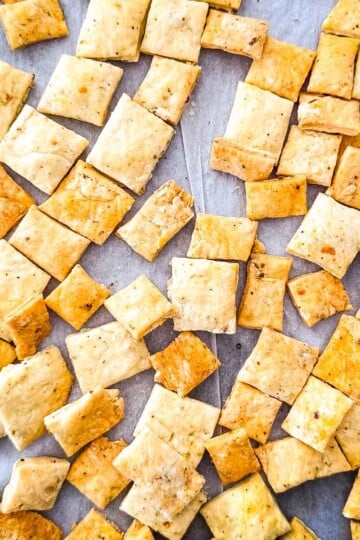
This bread is perfect for making sourdough French toast, a smoked grilled cheese sandwich or air fryer Reuben sandwich, and serving with vegetable pot pie, marry me chicken soup, and roasted butternut squash soup.
Jump to:
- Easy No Knead Sourdough Bread
- Understanding Sourdough
- Baking Schedule
- Recipe Ingredients
- Essential Equipment
- Step-by-Step Instructions for Perfect No-Knead Sourdough
- The Hardest Part: Cooling (2+ hours)
- Top Tips for Perfect Sourdough
- Storing Your Sourdough
- Recipe FAQs
- More Bread Recipes to Try
- Printable Recipe
- Comments
Easy No Knead Sourdough Bread
While other sourdough recipes have you kneading and folding all day long, this one lets time do most of the work. Your hands-on time? Just minutes! The result is a gorgeous artisan loaf with:
- A crackly, golden-brown crust that shatters perfectly when sliced
- A tender, chewy inside with beautiful air pockets
- That complex, tangy flavor that only wild yeast fermentation can deliver
- A texture that makes store-bought bread seem like a distant memory
Once you make this recipe, make my No Knead Jalapeño Cheddar Sourdough Bread and No Knead Sourdough Sandwich Bread next!
Understanding Sourdough
Unlike bread made with commercial yeast, sourdough relies on wild yeasts and beneficial bacteria for natural fermentation. This process:
- Creates complex flavors impossible to achieve with quick-rise methods.
- Makes the bread easier to digest (my husband notices the difference!)
- Saves you money - make bakery-quality bread for pennies at home.
Baking Schedule
This is the timeline I use. You can adjust the times to work best for you! You can also bake it at night and let it cool overnight for breakfast the next morning.
Classic Schedule
Evening Before:
- 9:00 PM: Feed starter (25g starter + 75g flour + 75g water)
- Let rest overnight at room temperature
Next Day:
- 7:00 AM: Mix dough (starter should be bubbly and doubled)
- 7:05 AM: Cover dough, place in oven with light on
- 1:00 PM: First rise complete, shape loaf
- 3:30 PM: Begin baking
- 4:15 PM: Cooling begins
- 6:15 PM: Ready for dinner!

Recipe Ingredients
- Active Sourdough Starter: The heart of your bread, providing natural leavening and that signature tangy flavor. You can make Homemade Sourdough Starter, which takes a couple of weeks, or order sourdough starter from Amazon.
- Bread Flour: Higher protein content creates better structure (all-purpose flour works too).
- Filtered Water: Clean-tasting water at 90°F helps activate the starter.
- Sea Salt: Enhances flavor and controls fermentation. (If you ever want to see what happens if you forget the salt let me know - I took a picture).
See the recipe card below for full information on ingredients and quantities.
Essential Equipment
- Dutch Oven: Creates steam for the perfect crust.
- Proofing Basket (Banneton): Helps maintain the loaf's shape during proofing. Don't worry if you don't have one; a large bowl lined with a well-floured kitchen towel works perfectly!
- Parchment Paper: Makes transferring the dough easy.
- Sharp Knife, Bread Lame: For scoring the top of your loaf. (The bread lame is a razor blade with a handle - be careful!)
Step-by-Step Instructions for Perfect No-Knead Sourdough
Evening Before: Build Your Starter (5 minutes + 8-12 hours rest)
This step develops a strong, active starter to give your bread amazing lift and flavor. Think of it as feeding your tiny yeast helpers!
In a clean jar, combine:
- 25g mature starter
- 75g unbleached bread flour
- 75g filtered water (90°F)
Mix with a spoon until no dry flour remains. The mixture should feel like thick pancake batter. Cover loosely with plastic wrap and rest overnight at room temperature (65-75°F).
Success Check: By morning, your starter should be:
- Doubled in size
- Full of bubbles throughout
- Smell pleasantly sour
- Pass the float test (a small amount of unstirred starter should float in water).

Next Morning: Make the Dough (10 minutes + 5-6 hours fermentation)
Combine 100g ripe sourdough starter with 300g warm water (90°F) in a large mixing bowl. (Use the leftover sourdough starter to make another batch of bread, and store any extra starter (sourdough discard) in a jar in the fridge for up to 2 weeks. Use the discard to make Sourdough Chocolate Chip Cookies, Sourdough Discard Banana Bread, Sourdough Discard Pancakes, and Sourdough Discard Waffles).
Stir with a spoon until the starter is fully dispersed in the water. Add 500g bread flour and 10g sea salt. Mix until a shaggy dough forms, then use your hands to form it into a sticky ball.
Note: The dough will be quite sticky - this is normal and helps create that perfect artisan texture.

First Rise (5-6 hours)
During this time, natural fermentation works its magic, developing flavor and structure:
Cover your bowl with plastic wrap. Place in a warm spot (your oven with just the light on works great!). Let it rest for 5-6 hours until noticeably puffy and doubled in size.
Oven Light Tip: Oven lights vary by brand and wattage. With the light on, the oven should feel barely warm (around 80-85°F). If your bowl feels warm to the touch, crack the oven door or turn the light off after the first hour to prevent over-fermentation.


Shaping Your Loaf (10 minutes)
Proper shaping creates surface tension that helps your loaf rise up instead of out. (Watch the video below on how to do this).
- Dust your counter lightly with flour.
- Gently turn your dough out, smooth side down.
- Shape into a rough rectangle.
- Pull and stretch the dough:
- Top third down to center
- Bottom third up over that
- Left side to center
- Right side to center
- Pinch everything together.
- Flip seam-side down.
- Using cupped hands, rotate and pull the dough toward you. Rotate 90 degrees and repeat until you have a tight, smooth ball.
- Place seam-side up in your floured proofing basket. Dust lightly with flour to prevent the plastic wrap from sticking. Cover loosely with plastic wrap.
Note: If the dough sticks to your hands, dust them lightly with flour. You want the dough tacky but manageable.

Second Rise (2-3 hours)
This final rise prepares your bread for baking. The dough should:
- Nearly double in size
- Feel puffy when gently poked
- Hold an indent from your finger
Return your covered dough to the oven (light on) for about 2-3 hours.


Baking Your Bread (45-50 minutes)
- Remove the dough from the oven.
- Preheat your oven to 450°F.
- Place a piece of parchment paper on the counter and turn dough onto it (seam down).
- Score the top ½-inch deep with a sharp knife or bread lame.
- Using the parchment corners, carefully lower the dough into your Dutch oven.
- Cover with a lid and REDUCE the oven temperature to 425°F.
- Bake covered for 40 minutes.
- Remove the lid and bake for 5-10 minutes more until golden brown.
- Remove from the oven, lift the bread using corners of the parchment paper, and place on a cooling rack.
Note: The internal temperature should be between 190°F and 205°F.

The Hardest Part: Cooling (2+ hours)
I know it's tempting to slice into that beautiful, warm loaf! But waiting ensures:
- The crumb sets properly
- Moisture distributes evenly
- Flavors develop fully

Top Tips for Perfect Sourdough
- Use Active, Bubbly Starter: Test by dropping a small amount in water - it should float.
- Control Your Temperatures: Keep water at 90°F; use oven light for warmth while rising.
- Master the Scoring: Make confident, ½-inch deep cuts. Hesitant scoring leads to uneven expansion. Start with a simple straight line if you're new to scoring.
- Practice Patience: Wait for the bread to completely cool before slicing.
- Use Weight Measurements: A kitchen scale will give consistent results, especially for flour and starter measurements.
- Handle Gently. During shaping, be firm enough to create surface tension but gentle enough to preserve air bubbles.
Storing Your Sourdough
Store your bread at room temperature in a paper bag for up to 3 days. For longer storage, slice and freeze in an airtight container for up to 3 months.

Recipe FAQs
Yes! While bread flour gives better structure, all-purpose flour works well too.
Make sure your starter is active and bubbly before using. Test by dropping a small amount in water - it should float.
Printable Recipe

Easiest Ever Sourdough Bread - No Knead
Equipment
- Dutch oven (5-7 quart)
- Large mixing bowl
- Bread basket or banneton
- Parchment paper
- Sharp knife or bread lame
- Kitchen scale
Ingredients
Starter Build (Night Before)
- 25 grams mature starter (about 2 tablespoons)
- 75 grams unbleached bread flour (or all-purpose flour) (½ cup + 1 teaspoon)
- 75 grams water 90℉ (⅓ cup)
For the Dough
- 100 grams ripe starter (heaping ⅓ cup)
- 300 grams filtered water 90℉ (1¼ cups + 1 tablespoon)
- 500 grams white bread flour or unbleached all-purpose flour (3½ cups + ½ teaspoon)
- 10 grams sea salt (2⅛ teaspoons)
Instructions
- The evening before, combine 25g starter with 75g flour and 75g warm water (90°F) in a clean mason jar. Mix well until no dry flour remains. Cover loosely with plastic wrap and let rest at room temperature for 8-12 hours. By morning, your starter should be doubled in size and full of bubbles.
- The next morning, combine 100g ripe starter with 300g warm water in a large mixing bowl. Stir with a spoon until the starter is fully dispersed. Add 500g bread flour and 10g sea salt. Mix until a shaggy dough forms, then use your hands to form into a sticky ball. The dough will be sticky and rough-looking - this is perfect!
- Cover the bowl with plastic wrap and place in the oven with only the light on. Let rise for 5-6 hours until noticeably puffy and doubled in size. When gently poked, your finger should leave an indent that slowly fills back in. Oven Light Tip: Oven lights vary by brand and wattage. With the light on, the oven should feel barely warm (around 80-85°F). If your bowl feels warm to the touch, crack the oven door or turn the light off after the first hour to prevent over-fermentation.
- Dust your counter lightly with flour. Turn the dough onto the counter, smooth side down. Starting with the top edge, gently pull the dough away, then fold to center. Repeat with bottom edge, left side, and right side. Pinch to seal, then repeat the folds once more. Flip seam-side down and use cupped hands to rotate and pull dough until you have a tight, smooth ball. The surface should feel taut but still soft and pillowy. (Watch the video below on how to do this).
- Dust a bread basket well with flour. Place dough seam-side up in the basket. Dust lightly with flour to prevent sticking, then cover with plastic wrap. Return to the oven with the light on for 2-3 hours until doubled. When gently pressed, the dough should feel light and airy, holding the indentation from your finger.
- Remove the dough from the oven and preheat the oven to 450°F. Note: The Dutch oven does not get preheated for this recipe. Place a sheet of parchment paper on the counter and gently turn the dough onto it (seam side down). Score the top ½-inch deep lengthwise with a sharp knife or bread lame. Your cut should be decisive and deep enough to see the pale dough beneath.
- Using the parchment corners, lift the dough into the Dutch oven. Cover with the lid and reduce the temperature to 425°F. Bake, covered, for 40 minutes, then remove the lid and bake for an additional 5-10 minutes until golden brown. The crust should be dark golden and sound hollow when tapped.
- Remove from the oven using the parchment corners and place on a cooling rack. Let the bread cool completely for at least 2 hours before slicing. The internal temperature should reach 190-205°F. When properly cooled, the crust should be crisp and the inside should be completely set. Enjoy!
- If you loved this recipe, please leave a 5-star rating and review below!
Video
Save This Recipe 💌
Notes
- Active, bubbly starter is crucial for success. If your starter doesn't float in water, it's not ready to use.
- No proofing basket? A large bowl lined with a well-floured kitchen towel works perfectly.
- The dough will be sticky when mixing - this is normal and creates that perfect artisan texture.
- If your kitchen is cold, you may need longer fermentation times. The oven light method provides perfect warmth.
- Score the dough confidently - hesitant cuts can lead to uneven rising. A simple straight line works great for beginners.
- While bread flour is ideal, all-purpose flour can be used with good results.
- Store at room temperature in a paper bag up to 3 days. For longer storage, slice and freeze in an airtight container up to 3 months.
Nutrition
The provided nutrition information is automatically calculated. Accuracy is not guaranteed.
Did you love this recipe?
Then please leave a 5-star rating and/or review below! You can also save it! Just tap the heart symbol ❤️ in the lower right corner of your screen, and the recipe will be stored in your own recipe box!📥


Adrianna Coates says
My first ever sour dough loaf turned out perfectly. I ate 2 slices before my family even got to see it.
Jeri Walker says
Awesome! I'm so glad you liked it Adrianna! And I agree, fresh sourdough bread is hard to resist! 😊
Evelynn says
This is the perfect sourdough recipe! My friend sent it to me with some of her starter. I loved how my loaf turned out and I was shocked at how simple it was. I really want to make whole wheat next— would this recipe hold up with a different flour (like whole wheat or all purpose?) Thank you!
Jeri Walker says
Thank you so much Evelynn! I'm so glad you like it! 😊 I have created the same super easy recipe for whole wheat - you can find it at: https://www.windingcreekranch.org/no-knead-whole-wheat-sourdough-bread/
Sheila says
My sister, who gave me my starter, sent me this recipe. It is now my go-to, we both love it. Also, my adult children are grateful ❤️
Jeri Walker says
Wonderful! This comment made my day Sheila! I'm so glad everyone is loving it! And please thank your sister for sharing it! 😃
Morgan says
Is it okay to let it ferment overnight after the shaping?
Jeri Walker says
Yes, absolutely!
Zhall says
As a beginner, I cannot believe how good my sourdough came out with no stretch and folds! This will be my go to recipe for all sourdough loafs!
Jeri Walker says
Yay! I'm so happy to hear this Zhall! Happy baking! 😊
Rhonda Hutson says
I followed your directions to the T but my dough is not sticky it’s not dry and it didn’t rise after 5-6 hours. Any suggestions on what I could have done wrong? I used King Auther flour too🥺.
Jeri Walker says
I'm so sorry to hear that Rhonda! If the dough wasn't sticky and didn't rise, it's usually one of three things - the starter (was your starter at its absolute peak - doubled and bubbly - when you mixed it? If it was a little sluggish, the dough won't have the strength to rise), the measuring (since it wasn't sticky, it sounds like there may have been a bit too much flour - use a tablespoon or two less next time), or the water temperature (if the water is too hot it can kill the wild yeast). Try this: Give the dough more time for the first rise (sometimes it needs 8-10 hours if the room is cool) or try the 'float test' with your starter next time. Don't give up!
Rhonda Hutson says
Thank you the starter was completely ready it probably was that I could have put too much flour I didn’t level it out I just used the measuring cup 🥺. Thank you for your quick response ❤️
Jeri Walker says
That would definitely do it! 😊 A little extra flour can make the dough feel firm and slow things down. Just give it a bit longer to rise and it should be just fine. Happy baking! ❤️
Rhonda Hutson says
What I mean when I say it’s not sticky but it’s also not dry, it’s shapeable? 🤷🏻♀️ and it’s still not rising a whole lot. My starter was perfect looked just like yours does.
Jeri Walker says
That makes sense - thank you for explaining. 😊 If it's shapeable but not rising much, it usually just needs more time and warmth. Even with an active-looking starter, cooler temps can slow things way down. Let it keep fermenting until it looks puffy and airy rather than watching the clock. Cover it tightly and place it in a warm spot - I like using the oven with just the light on.
Rebecca says
I love this recipe. I’ve made it twice now and it’s come out great. I’m wondering if you have other variations. I’d like to add some flavors to make different loaves. Specifically a cranberry walnut. But I’d love to try other flavors too. Thank you
Jeri Walker says
I'm so happy you love this recipe Rebecca! 😀I do have a jalapeno cheddar version on the blog; if you don't like jalapenos you could leave them out. I have a sandwich bread version coming out this Thursday, and I will start working on a cranberry walnut version and get it published as soon as I can. If you have other variations you would like me to develop, just let me know and I will add them to my TO-DO list. I love creating recipes requested by my readers!❤️
Lara says
Everything was going great until I turned the bread over onto the counter after sitting in the oven for 5 hours. My dough was the consistency of slime! Is it possible it got too warm in the oven? The oven was warm and the bowl was warm to the touch. Any other possibilities?
Jeri Walker says
Hi Lara, I'm so sorry this happened! My guess is your oven light was perhaps too warm. I've tested my oven with just the light on and it holds pretty steady around 80-82°F, but different ovens use different light wattages. The bowl shouldn't feel noticeably warm to the touch; if it does, the dough is likely fermenting too hot, which causes the gluten to break down into that slimy texture.
Next time, I would just let it bulk ferment at room temperature, or turn the oven light off after the first hour. You may also have an extremely active starter, so check the dough earlier - once it's doubled and puffy, it's ready, even if the full time hasn't passed. Don't be discouraged, this is actually a sign that your starter is very strong and healthy!
Robyn Scott says
I’m still very new to sourdough bread baking, but this is the only recipe I’ve tried (and it feels like I’ve tried a lot!) that actually worked out for me. Thank you! This recipe may have saved me from quitting. I was satisfied with finally making a successful loaf and have put sourdough on the back burner since, but I am dying to try jalapeño cheddar, so I think I’m going to follow guidance from a previous comment and try it with this recipe. Thank you!
Jeri Walker says
Robyn, this made my day! Thank you for sharing this! Sourdough can be intimidating at first, so getting that first successful loaf is a big win! Jalapeño cheddar is a great next step with this dough. I'm actually making this version right now and will be sharing it soon (hopefully by next week). Thanks again, and congrats on sticking with it! 😀
Terri Brumleve says
If the starter isn’t full of bubbles does it just need more time or will it not work at all. It sat out for 9 hours
Jeri Walker says
Hi Terri! The starter should have risen to at least double after you feed it. If it hasn't doubled in 12 hours, I would start over and feed it again.
Ken buchner says
How can I adapt this recipe to make sandwich bread in loaf pans?
Jeri Walker says
Great question, Ken! This dough actually works really well in loaf pans. After the first rise, just shape it into a log and put it into a greased loaf pan, seam side down, for the second rise. Right before baking, after I score it, I like to lightly spray the top with water and flip a second loaf pan over it to trap steam. I'm working right now on this sandwich bread version and hope to share it in the next couple of weeks!
Angele says
Wait, no stretch and folds and the Dutch oven isn’t preheated??? This may be one of the easiest recipes I’ve seen
I’m excited to try it
Jeri Walker says
Yup! I hope you like it! 😀
Heather says
Can this recipe support add ins? If so, when since you don’t do stretch and folds? Thank you!
Jeri Walker says
Hi Heather. Yes, you can add extras during the shaping step, but the process will be a bit different. When you turn the dough out onto the counter, gently stretch it into a loose rectangle. Sprinkle the add-ins evenly over the surface. Starting at the top edge, fold the dough down one-third of the way, like folding a letter. Then take the bottom edge and fold it up over that fold, fully enclosing the add-ins. You'll now have a long, layered strip of dough. Starting from one short end, gently roll the dough up into a log. Pinch the sides closed, flip it seam-side down, then use cupped hands to pull the dough toward you, tightening the surface into a smooth, round ball. Then continue as per the recipe. I hope this helps! 😊