

These classic deviled eggs combine creamy Miracle Whip, tangy pickle juice, and perfectly cooked egg yolks for a nostalgic appetizer that disappears fast at every gathering. They're perfect for holidays, potlucks, or any time you crave this old-fashioned favorite!
If you love this recipe, try my old-fashioned potato salad next!

Want to save this recipe?
Enter your email & I'll send it to your inbox. Plus, get great new recipes from me every week!
Why This is the Best Deviled Eggs Recipe
- Perfectly creamy: The combination of Miracle Whip and pickle juice creates that classic, tangy filling everyone loves.
- Make ahead friendly: Prep completely up to 24 hours in advance.
- Budget-friendly: Simple pantry ingredients create an impressive appetizer.
- Never fail: Detailed instructions ensure perfectly cooked eggs and smooth filling every time.
Recipe Ingredients
All ingredients for this deviled egg recipe are shown in the pic below, and special notes are made in the bulleted list to assist you.

- Eggs. Week-old large eggs work best for deviled eggs. Fresh eggs can sometimes be harder to peel, so use ones that have been in your fridge for about a week.
- Miracle Whip. This is what gives classic deviled eggs that distinctive tangy zip. While regular mayo will work, Miracle Whip gives them that nostalgic flavor that makes these eggs special.
- Pickle Juice. My secret ingredient! Just a splash adds the perfect tang and seasoning. You can use dill or sweet pickle juice - both work beautifully. (I like to use pickle juice from my Refrigerator Sweet Dill Pickles, Small Batch Bread and Butter Pickles, or Refrigerator Bread and Butter Pickles).
- Yellow Mustard. Classic yellow mustard is traditional here. There is no need for fancy Dijon or whole grain mustards - the simple, bright flavor of yellow mustard is exactly what you want.
- Seasonings. Simple salt and pepper are all you need to let those classic flavors shine. A sprinkle of paprika on top adds that traditional finishing touch.
See the recipe card below for full information on ingredients and quantities.
How To Make Perfect Deviled Eggs
- Place 6 large eggs in a single layer in a saucepan and cover with cold water by exactly 1 inch. Bring to a full boil over high heat. Once boiling, cover the pan and remove from heat. Let stand for exactly 12 minutes, then transfer eggs to a bowl of ice water. Note: This method ensures perfectly cooked yolks every time. You can also make Hard-Boiled Eggs in the Instant Pot if you have a pressure cooker.


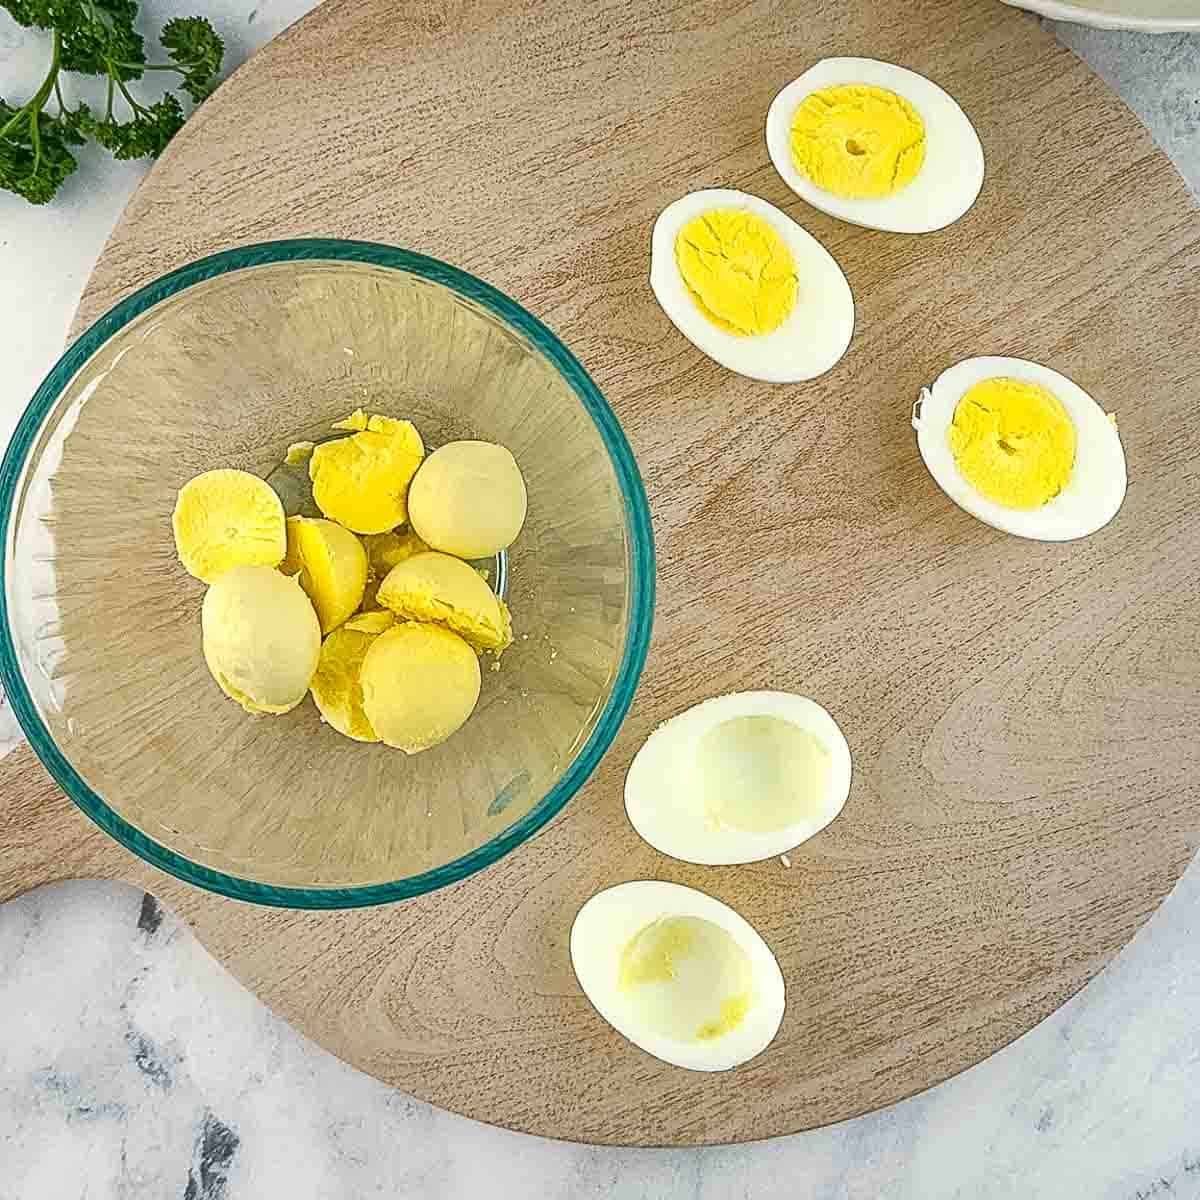
- Once eggs are completely cool, gently crack and peel them under running water. Cut each egg in half lengthwise and carefully remove the yolks to a mixing bowl. Place the white halves on your serving platter. Note: The shell should slip off easily under the cold running water.

- Mash the egg yolks with a fork until completely smooth, then mix in ¼ cup Miracle Whip, 1 teaspoon pickle juice, 1 teaspoon yellow mustard, ⅛ teaspoon salt, and ⅛ teaspoon black pepper. Continue mixing until creamy. You may find it helpful to switch to a hand mixer. Note: Press yolks through a fine-mesh strainer before mixing with other ingredients for the smoothest filling.


- Spoon or pipe the yolk mixture into the egg white halves. Sprinkle lightly with paprika and garnish with fresh parsley or dill if desired. Note: If using a piping bag, a star tip creates that classic deviled egg look.
- Chill filled eggs for at least 1 hour before serving. If making ahead, cover loosely with plastic wrap and refrigerate for up to 24 hours. Note: For easy transport, use a deviled egg carrier to prevent sliding.


Top Tips
- Use week-old eggs. Even with the ice bath method, fresh eggs can be tough to peel. I highly recommend using eggs that have been in your fridge for 7-10 days for perfect results.
- Master the yolk texture. Press the yolks through a fine-mesh strainer before mixing with other ingredients for an ultra-smooth filling. This extra step makes a noticeable difference in texture.
- Perfect the filling. If your filling seems too dry, add Miracle Whip 1 teaspoon at a time until you reach the desired consistency. For best results, the filling should be creamy but still hold its shape when piped.
- Transport safely. Deviled eggs can slide around during transport. I highly recommend investing in a deviled egg carrier if you will be taking these to parties and potlucks.

Ways to Serve Deviled Eggs
These classic deviled eggs are perfect for:
- Holiday parties: Serve alongside Twice Smoked Ham or Pellet Grill Smoked Turkey.
- Picnics & Potlucks: Pair with 321 Ribs and Miracle Whip Coleslaw.
- Game Day: Perfect next to Air Fryer Wings or Smoked Shotgun Shells.
Recipe Variations
- Extra Creamy: Add a splash of heavy cream to the filling.
- Spicy: Mix in diced jalapeños or a dash of cayenne pepper.
- Loaded: Top with crumbled bacon and chives
- Southern Style: Add sweet pickle relish instead of juice.
Make Ahead and Storage
- Make it ahead. Boil and peel eggs up to 3 days in advance, storing in an airtight container in the refrigerator. Prepare filling up to 24 hours before serving. Fill eggs and add garnishes just before serving for the best presentation.
- Storing leftovers. Store leftover deviled eggs in an airtight container in the refrigerator for up to 2 days. Place a paper towel in the container to absorb any excess moisture. Note: Freezing is not recommended as it dramatically affects the texture.
- Transporting. Use a deviled egg carrier for safe transport. If you don't have one, line a baking dish with paper towels and arrange eggs snugly to prevent sliding. Keep chilled until ready to serve.

Recipe FAQs
Yes, but Miracle Whip provides that classic tangy flavor.
Don't overcook, and cool immediately in an ice bath.
Mash yolks thoroughly or press through a strainer for the smoothest results.
More Classic Appetizer Recipes
If you love these deviled eggs, try these party favorites next:
Did you love this recipe?
Then please leave a 5-star rating and/or review below! You can also save it! Just tap the heart symbol ❤️ in the lower right corner of your screen, and the recipe will be stored in your own recipe box!📥
Printable Recipe

Old-Fashioned Deviled Eggs With Miracle Whip
Ingredients
- 6 large eggs
- ¼ cup Miracle Whip or mayo
- 1 teaspoon pickle juice
- 1 teaspoon yellow mustard
- ⅛ teaspoon salt
- ⅛ teaspoon black pepper
- paprika for garnish
- fresh parsley or dill for garnish optional
Instructions
- Hard Boil Eggs: Place eggs in a single layer in a pot or saucepan. Cover with cold water until there's an inch of water above the eggs. Heat on high until the water boils, then cover the saucepan and remove it from the heat. Let the eggs stand in the water for 12 minutes. Transfer the eggs to a bowl of ice water for about 5 minutes until completely cooled. Gently crack the eggshells and peel them under running water. The shells should come off easily.
- Make The Filling: Slice the cooled hard-boiled eggs in half lengthwise. Carefully remove the yolks and place them in a mixing bowl. Place the egg white halves on a serving dish. Mash the yolks with a fork and add Miracle Whip, pickle juice, yellow mustard, salt, and pepper. Mix until creamy and smooth.
- Fill The Egg Whites: Use a spoon or piping bag with a star tip to fill the egg whites with the filling. Sprinkle a bit of paprika over each egg half, and add a sprig of parsley or dill.
- Chill: Chill the deviled eggs for at least 1 hour before serving for the best flavor. Enjoy!
Video
Save This Recipe 💌
Notes
- Add a teaspoon of baking soda to the boiling water with the eggs to make peeling the eggs even easier.
- Add finely chopped pickles, green onion, chives, or hot sauce to the filling for extra flavor.
- These deviled eggs can be made up to 24 hours ahead. Store the whites and filling separately in the refrigerator and assemble just before serving.
- Store leftover deviled eggs in the refrigerator for up to 2 days.
- Transport in a deviled egg carrier to prevent sliding.
Nutrition
The provided nutrition information is automatically calculated. Accuracy is not guaranteed.


Comments
No Comments