

There's nothing like opening a jar of homemade salsa in the middle of winter and tasting summer's garden tomatoes again. This easy Canned Salsa Recipe with Fresh Tomatoes is made with fresh ingredients, the perfect amount of spice, and no tomato paste.
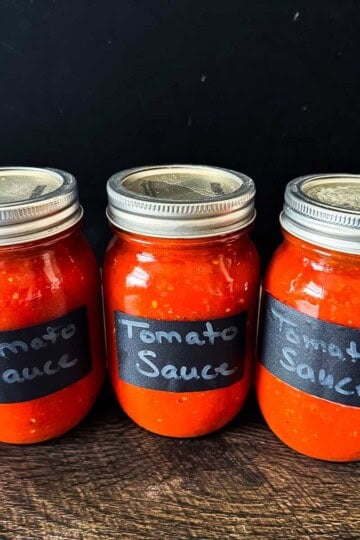
If you love this salsa canning recipe, try my Homemade Canned Spaghetti Sauce, Canned Diced Tomatoes, and Canned Tomato Sauce next!

Want to save this recipe?
Enter your email & I'll send it to your inbox. Plus, get great new recipes from me every week!
Looking for more homemade salsa recipes? Try my Mango Habanero Salsa, Homemade Chunky Salsa, Pineapple Salsa, Black Bean Corn Salsa, Peach Pico de Gallo, and Authentic Pico de Gallo next!
This homemade salsa is perfect for using in Mexican Chicken and Rice, Smoked Queso, and Salsa Con Queso.
Jump to:
- Canned Salsa Recipe with Fresh Tomatoes
- What Readers are Saying
- Salsa Ingredients
- Equipment
- How to Make Homemade Canned Salsa with Fresh Tomatoes
- Canning Safety Tips
- Variations to Try
- Ways to Use Your Homemade Canned Salsa
- Jeri's Tips
- Storage Tips
- Frequently Asked Questions (FAQs)
- Reader Tip
- More Easy Canning Recipes
- Printable Recipe
- Comments
Canned Salsa Recipe with Fresh Tomatoes
I've been tweaking this salsa recipe for years, and now it's just the way I like it. It's easy to customize, and it always gets devoured at family BBQs and taco nights. Here's why it's a keeper:
- Peak-season flavor: It uses fresh, ripe tomatoes when they're cheapest and juiciest.
- Year-round enjoyment: Can it now, enjoy it later.
- Adjust heat to taste: Make it mild, medium, or hot. Your salsa, your rules.
- Perfect for beginners: No peeling required (unless you want to).
- Saves money: Way cheaper than store-bought jars, especially when tomatoes are in season.
- Great for gifting: Add a homemade label to your jar and you have a personalized present that shows you put time and effort into creating something special. (It's the perfect teacher gift.)
What Readers are Saying
I'm not the only one who thinks this is the best salsa recipe:
End result was delicious. I doubled the recipe and got exactly 7 pints.
- Vicky
The best I've found. I'm making another batch this weekend - our gardens tomatoes are bursting.
- Judy
When I first started searching for a salsa recipe, I was looking for something similar to Pace Picante. Tonight I am making my second batch of this recipe. It's better than store bought. It's delicious. It's bright. It's fresh. It's everything I could ask for in canned salsa.
- Yvonne
Jump to:
- Canned Salsa Recipe with Fresh Tomatoes
- What Readers are Saying
- Salsa Ingredients
- Equipment
- How to Make Homemade Canned Salsa with Fresh Tomatoes
- Canning Safety Tips
- Variations to Try
- Ways to Use Your Homemade Canned Salsa
- Jeri's Tips
- Storage Tips
- Frequently Asked Questions (FAQs)
- Reader Tip
- More Easy Canning Recipes
- Printable Recipe
- Comments

Salsa Ingredients
Here's what you'll need to make this garden-fresh homemade salsa recipe.
- Ripe tomatoes. I used my garden tomatoes - any type of tomato will work. I have used Roma tomatoes, Beefsteak tomatoes, cherry tomatoes, and yellow tomatoes. You can even mix different types together, and it will be awesome. I don't peel mine, but you can if you prefer. Use your own homegrown tomatoes or get them at your local Farmer's Market.
- Red onion. Adds just the right amount of sweetness. Yellow or white onions work too.
- Bell peppers. I use whatever is ripe and ready in my greenhouse. I like to use a mix of green bell peppers, yellow peppers, red peppers, and orange peppers for color and flavor.
- Garlic. Fresh garlic cloves add a ton of flavor. The big elephant garlic is much quicker and easier to peel.
- Jalapeño peppers. These ramp up the flavor a ton! Customize the heat by adding less or adding more. Seed them for a milder spice, or leave them in for more heat. I seeded all of mine because not everyone in my family is a fan of spicy food. You can also use other hot peppers.
- Lime juice. Use bottled lime juice instead of fresh. Bottled lime juice has a standardized acidity level that keeps the salsa safe for long-term storage. If you're making the refrigerator salsa variation, you can use fresh lime juice.
- Vinegar. Essential for safe acid levels in water bath canning, don't skip it or reduce it. If you prefer, you can use bottled lemon juice instead.
- Sugar. This balances the acidity of the tomatoes. I used cane sugar, but you can use white sugar or a sugar substitute.
See the printable recipe card for quantities and a complete list of ingredients.
Equipment
Here's what you'll need to safely can fresh tomato salsa:
- Large pot: Use a heavy-bottomed pot (at least 6-quart capacity) for simmering the salsa.
- Food processor or blender: Speeds up prep and helps get the salsa to your preferred texture and consistency.
- Cutting board and sharp knife: For chopping tomatoes, onions, peppers, and garlic.
- Measuring cups & spoons: Accuracy matters when you're canning, don't eyeball it.
- Canning jars: Use pint-sized glass canning jars with snap lids and screw bands. Quart jars also work but will require extra processing time.
- Canning funnel: A wide-mouth funnel makes it easy to ladle hot salsa into jars without spills.
- Jar lifter: Keeps your hands safe when moving hot jars in and out of the canner.
- Bubble remover tool or spatula: Releases trapped air bubbles before sealing. A chopstick or handle of a wooden spoon will also work.
- Water bath canner: A deep pot with a canning rack used to safely process your jars and create a vacuum seal.
- Clean kitchen towels: For wiping jar rims and placing under hot jars as they cool.
How to Make Homemade Canned Salsa with Fresh Tomatoes
This tomato salsa recipe makes about 3 pint jars (500 mL). You can easily double, triple, or even quadruple it, but you will have to plan for more simmer time as your batch size increases.
The actual amount of jars you get will depend on how much you boil the salsa down and how watery your vegetables are.
Prepare the Vegetables
Start by washing your tomates and removing the stems. I like to soak them for a few minutes in a sink filled with cold water first. If you like a smoother salsa, you can peel the tomatoes first by cutting a small "X" at the bottom of each tomato. Then, blanch them in a large pot of boiling water for 45-60 seconds, then transfer them to an ice bath. Once cool, peel the skin from the "X" towards the top. The skins should slip right off.
Once prepped, chop tomatoes (peeled or unpeeled) into halves or quarters and pulse them in a food processor in small batches until chunky but not pureed. Pour the processed tomates into a large stockpot.


Next, use a food processor with the shredding blade to prepare the onions, bell peppers, jalapeños, and garlic cloves. You can also shred or chop by hand, it just takes a lot longer.
Add the sliced onions, peppers, and garlic to the pot with the tomatoes, along with bottled lime juice, paprika, sea salt, sugar, and the first amount of white vinegar. Mix everything together with a wooden spoon.
Jeri's Tip: If you're using jalapenos and want a mild salsa, remove the seeds and membranes before shredding. For spicy salsa, leave them in or add extra peppers.


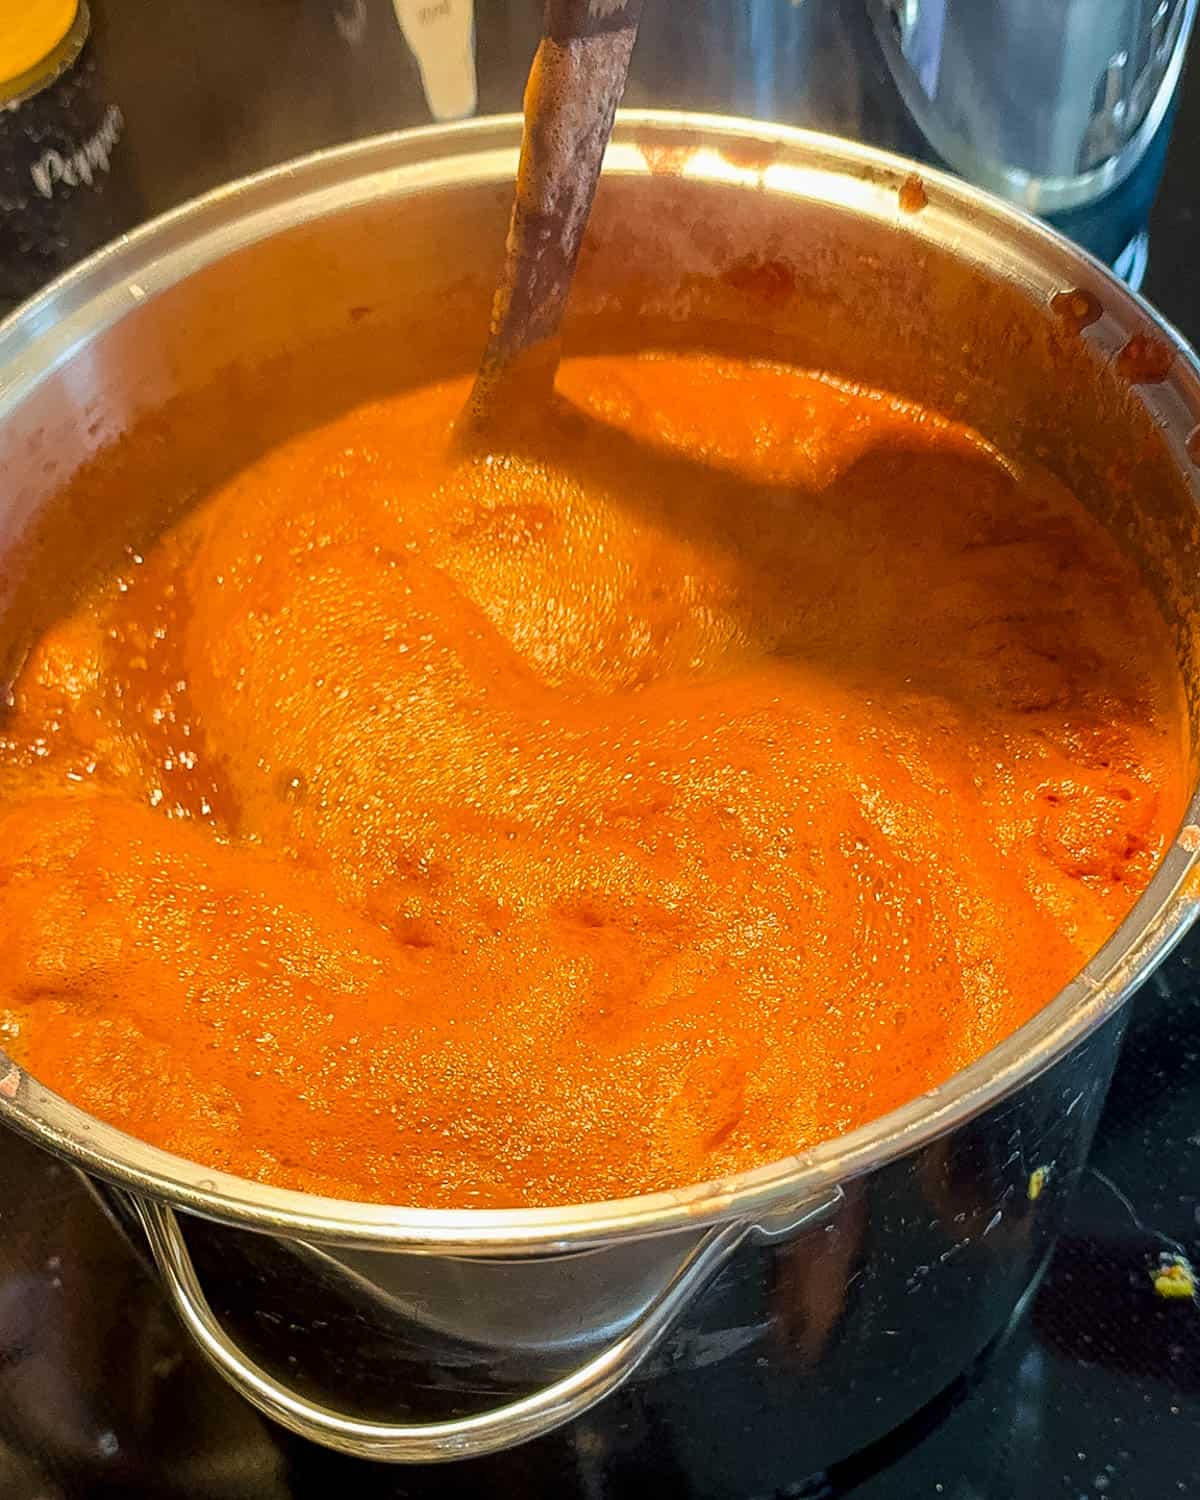
Simmer the Salsa
Place the pot on the stove over medium heat and bring the mixture to a gentle boil. Reduce the heat and let it simmer on a low boil for one hour, uncovered, stirring occasionally, to reduce excess liquid and concentrate the flavors.
After 1 hour, stir in the remaining vinegar and let it cook for another few minutes while you prep the jars.
Sterilize the Canning Jars
While the salsa is simmering, prepare your canning jars. Wash them with hot, soapy water, rinse well, and place them upside down in a water bath canner filled with simmering water (about 180°F). Keep jars hot until ready to fill.
Wash lids and screw caps as well. Place snap lids in a small saucepan with hot water to soften the seal until ready to use.
Shortcut: Use your dishwasher's sterilization cycle to sterilize jars. Keep the door shut after the cycle finishes to trap the heat until you're ready to use them.
Fill the Jars
Once the salsa has simmered and the liquid has reduced, it's time to transfer it to the prepared canning jars. Working with one jar at a time, carefully remove a hot jar using a jar lifter and place it on a clean towel on your counter.
Insert a canning funnel and ladle in the hot salsa, leaving ½ inch of headspace at the top.
Slide a spatula or bubble remover tool around the inside edge of the jar to release any trapped air bubbles. Wipe the rim on top of the jar with a clean, damp cloth to ensure a proper seal.


Place the snap lid on top, then screw the band on until fingertip tight. Return the filled jar to the rack in the water canner. Repeat the process with the remaining salsa.


Process the Jars in Water Bath Canner
Once all the jars are filled and sealed, place them into the rack of your hot water bath canner. Lower the rack slowly to make sure the jars stay upright and don't touch each other.
The jars should be fully submerged with at least 1 inch of water above the lids. Add more water if needed.
Cover the canner with a lid and bring the water to a full rolling boil. Once it's boiling, process the jars for 15 minutes for pints.
When the time is up, turn off the heat and let the jars sit in the water for 5 minutes. Carefully lift up the rack and remove the jars with a jar lifter. Place on a kitchen towel on your counter. DO NOT tilt the jars or tighten the screw bands.
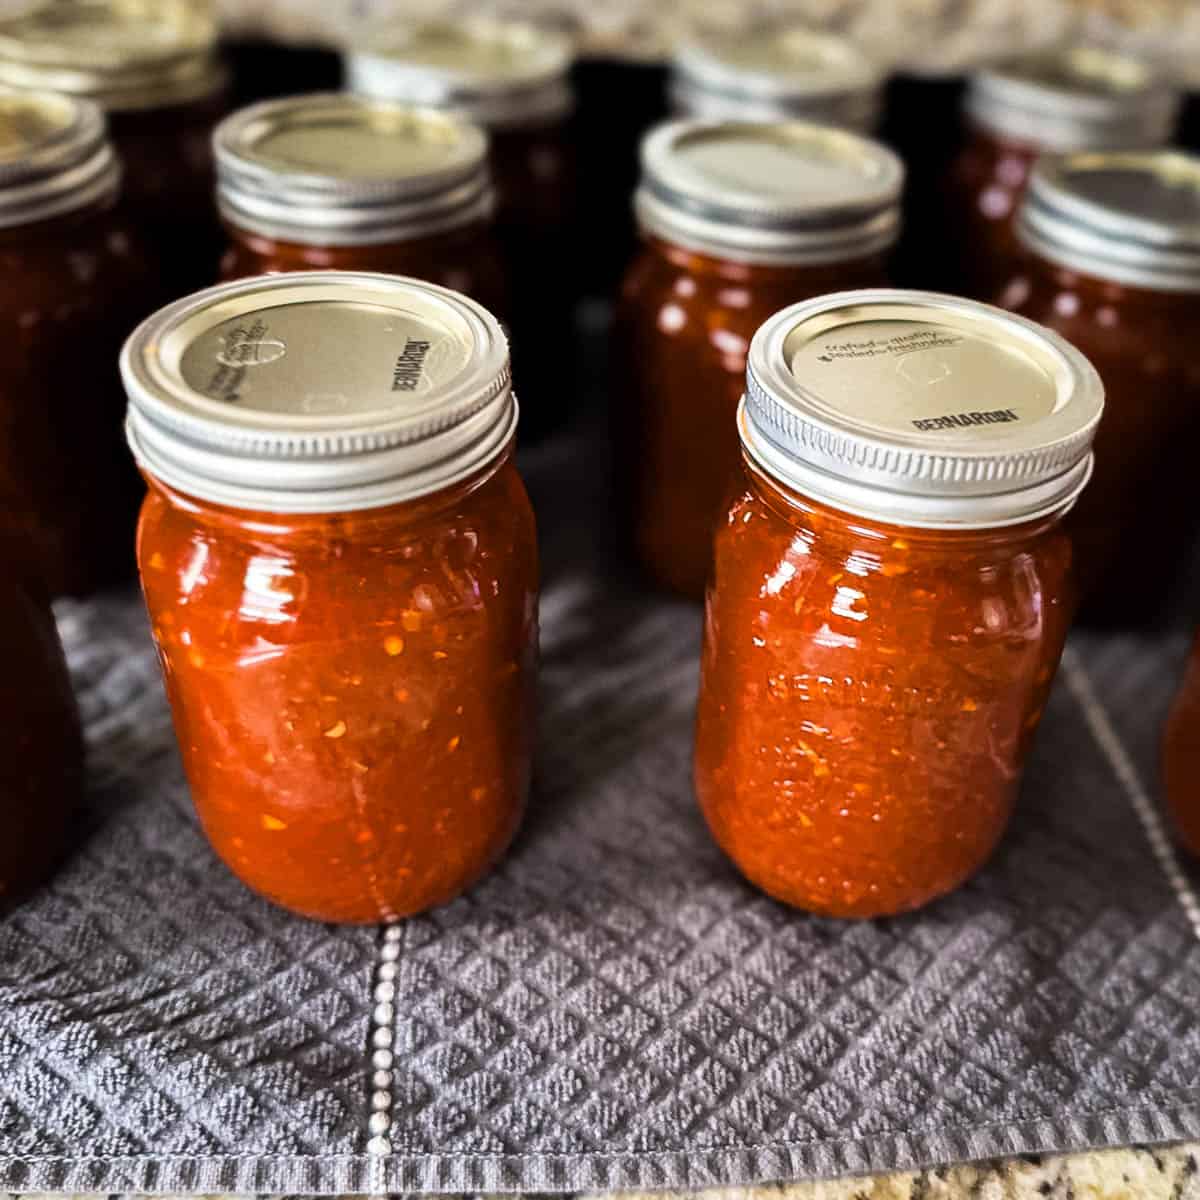
Let Cool and Check Seals
Let the jars cool undisturbed at room temperature for 12 to 24 hours. You will likely hear a loud "POP" as each jar seals as it cools down.
Once they've cooled completely, check the seals by pressing in the center of each lid. If the lid doesn't flex, the jar is sealed. A sealed lid will curve down in the center. If the lid pops back, it means the jar is not properly sealed and should be refrigerated and consumed within a week.
Remove the screw bands and wipe the jars clean with a damp cloth. Replace bands back on the jars loosely, or leave them off. Label and store the salsa in a cool, dark place.
And that's it! If you have any leftovers that don't fit in the jar, scoop it up and enjoy right away, or use it in my Salsa Con Queso or Smoked Queso Dip.

Canning Safety Tips
- Use bottled lime juice: Bottled juice is standardized for acidity, which guarantees your salsa is safe for water bath canning. Fresh lime juice can vary too much in pH, so save it for refrigerator salsa.
- Always use vinegar with 5% acidity: This is non-negotiable; it's what makes the recipe safe for canning.
- Don't change ingredient ratios: Reducing the vinegar or adding extra low-acid veggies (like peppers or onions) can make the salsa unsafe to store.
- Leave ½ inch headspace: This ensures the salsa processes properly and seals well.
- Adjust for altitude: If you live above 1,000 feet, increase processing time according to local extension office guidelines.
- Check seals before storing: Any jar that didn't seal should be refrigerated and used within a week.
Always follow the National Center for Home Food Preservation guide for safe water bath canning practices.
Variations to Try
Refrigerator Salsa: Want to skip the canning process? Follow all the same steps to prepare and simmer the salsa, but instead of processing it in a water bath canner, let the salsa cool slightly, then ladle it into clean jars or containers. Seal with a lid and store in the refrigerator for up to 1 week. Perfect for small batches or when you just can't wait to dig in.
Roasted Salsa: Roast the tomatoes, peppers, and onions in the oven before blending for a smoky, caramelized flavor.
Ways to Use Your Homemade Canned Salsa
- Chips and Dip: Keep it classic, grab a bag of tortilla chips and dive in.
- Tacos and Burrito Bowls: Spoon salsa over my Smoked Chicken Tacos, burritos, or bowls.
- Eggs: Stir a few spoonfuls into scrambled eggs or fold into my Baked Omelette Casserole.
- Casseroles and Enchiladas: Mix into my Walking Taco Casserole with Doritos, or layer inside enchiladas or my Taco Bell Crunchwrap recipe.
- Grilled Meats: Use as a topping for Pellet Grill Chicken Breast, Steak on Traeger, or my Smoked Salmon recipe.
- Soup Base: Stir a jar into Smoked Chili, Taco Soup, or Vegetable Soup for a quick flavor boost.
- Party Dip: Stir into melted cheese or Salsa Con Queso for an easy appetizer.
Jeri's Tips
- Control the spice: If you're making salsa for a crowd, start with fewer jalapeños. You can always stir in more heat when you open a jar, but you can't take it out once it's canned.
- Texture tricks: If you like a thicker salsa, don't over-process the veggies in the food processor. Pulse just until chunky; otherwise, you'll end up with tomato soup.
- Time-saver: I don't peel my tomatoes. The skins soften while cooking, and once everything simmers together, you barely notice them.
- Cilantro caution: Fresh cilantro loses its punch in the canner. I keep it out and add a handful of chopped cilantro when serving.
- Batch planning: A double batch fits nicely in my 12-quart stockpot and makes six pint jars. Any more than that, and you'll need to simmer a lot longer to reduce the liquid.
- Altitude adjustments: If you're over 1,000 feet, tack on extra processing minutes. Consult this canning guide for specific instructions.
Storage Tips
- If the jars are sealed properly, they can be stored in a cool, dark place, like a pantry or cellar, for up to one year.
- Once a jar is opened, keep it in the fridge and try to use it within a week.
- If you don't want to can the salsa, you can also freeze it. Spoon cooled salsa into freezer-safe containers, leaving about an inch of headspace for expansion. Frozen salsa will keep well for up to 3 months.
- Before using any salsa, always check for signs of spoilage, such as an unsealed lid, off smells, mold, or bubbling. If you notice anything unusual, it's safest to throw it out.
Frequently Asked Questions (FAQs)
Yes, you can use canned tomatoes if fresh tomatoes are not available. However, fresh tomatoes will give you the best flavor.
When properly canned and stored, the shelf life of homemade salsa is a year or more.
Absolutely! You can adjust the spiciness of the salsa by adding more or fewer jalapeno peppers.
While it may be tempting to reuse store-bought jars, it's not recommended for canning. Store-bought jars are not designed for canning and may not provide a proper seal.
Yes, you can adjust the recipe up or down. Keep in mind that larger batches will take longer to cook down than smaller batches. For example, if you quadruple the recipe, it will take approximately 4 hours to boil down instead of 1 hour.
Yes, but increase the processing time by 5 minutes for quart jars.
Reader Tip
One reader suggested using a mix of hatch and poblano chilis and switched out 1 teaspoon of the paprika for 1 teaspoon of ground cumin.

Did you love this recipe?
Then please leave a 5-star rating and/or review below! You can also save it! Just tap the heart symbol ❤️ in the lower right corner of your screen, and the recipe will be stored in your own recipe box!📥
Printable Recipe

Homemade Salsa For Canning Recipe (with Fresh Tomatoes)
Ingredients
- 6 cups blended tomatoes (about 4 pounds)
- ¾ cup red onion, chopped
- 2 cups bell peppers, chopped
- ¼ cup garlic, minced
- ½ cup jalapeno peppers, chopped
- ¼ cup bottled lime juice (not fresh - see Notes)
- 2 teaspoons paprika
- 2 teaspoons sea salt
- 3 tablespoons granulated sugar
- ⅔ cup white vinegar, (5% acidity) (divided)
Instructions
- Prepare the Vegetables: Wash the tomatoes and remove the stems. If you prefer peeled tomatoes, score an "X" on the bottom of each, blanch in boiling water for 45-60 seconds, then plunge into ice water. Slip off the skins once cooled. Cut into quarters and pulse in a food processor until chunky (not puréed). Transfer to a large pot. Chop the onions, bell peppers, jalapeños, and garlic, then add them to the pot along with the bottled lime juice, paprika, salt, sugar, and ¼ cup of vinegar. Stir well.
- Simmer the Salsa: Place the pot over medium heat and bring to a gentle boil. Reduce the heat and simmer uncovered for 1 hour, stirring occasionally to prevent sticking. During the last few minutes of cooking, stir in the remaining vinegar (⅓ cup).
- Prepare Canning Jars: To sterilize your jars, wash them with hot, soapy water and rinse well. Place them upside down in a simmering water bath canner (180°F) until ready to fill, or run them through the dishwasher on a sterilize cycle and keep them warm until use. Wash snap lids and screw bands as well. Place clean snap lids in a small saucepan with hot water to soften for 5 minutes before using.
- Fill Jars: Using a canning funnel, ladle hot salsa into jars, leaving ½ inch of headspace. Remove any air bubbles with a bubble removing tool or spatula, wipe rims with a clean damp cloth, and secure lids and bands until fingertip tight.
- Process Jars: Place jars upright in the rack of your water bath canner, making sure they are fully submerged with at least 1 inch of water above the lids. Add more water if necessary. Cover with a lid and bring to a full rolling boil. Process pint jars for 15 minutes (increase time if you live above 1,000 feet).
- Cool and Store: Turn off the heat and let jars rest in the canner for 5 minutes before removing with a jar lifter. Place jars on a towel-lined counter and cool, undisturbed, for 12-24 hours. Check the seals by pressing the center of each lid - if it doesn't flex, the jar is sealed. Label and store sealed jars in a cool, dark place for up to 1 year. Refrigerate any unsealed jars and use within 1 week.
Save This Recipe 💌
Notes
- For the best flavor, use ripe, firm garden tomatoes. A mix of tomato varieties works well.
- If using quart jars (1 L), increase processing time by 5 minutes.
- Always use bottled lime juice and vinegar with 5% acidity for safe water bath canning.
- Refrigerate any jars that don't seal properly and use them within 1 week.
- Properly sealed jars can be stored in a cool, dark place for up to 1 year.
- If you live at a high altitude, you may need to adjust the processing times to ensure proper canning. Consult this canning guide for specific instructions.
Nutrition
The provided nutrition information is automatically calculated. Accuracy is not guaranteed.
** This post was originally published in August 2023. I recently updated it with more information, photos, helpful tips, and the addition of bottled lime juice to be up to date with safe canning practices.

Harriet says
can you use 8oz jelly jars instead of pints and if so how long is the water bath.
Thanks
Jeri Walker says
Hi Harriet! Yes, you can use 8-ounce jelly jars. I would still process them for the full 15 minutes (plus any altitude adjustments). They make a perfect smaller size for salsa! 😊
Vicky says
end result was delicious. I doubled the recipe and got exactly 7 pints. I did however, forget the first measure of vinegar. I hope that won't shorten the shelf life. now only time will tell. Also, I blanched and peeled the tomatoes. Start to finish it took 5 hours.
Judy says
The best I’ve found. I’m making another batch this weekend - our gardens tomatoes are bursting. Upped its spices for my hubby - added hatch and pablono chilies and switched out 1 tsp of the paprika for 1 of cumin. It was perfect. Only frustration was / it would be helpful to show how many pints this makes. FYI I got 3 1/2 pint jars from one batch.
Yvonne Wood says
When I first started searching for a salsa recipe, I was looking for something similar to Pace Picante. Tonight I am making my second batch of this recipe. It’s better than store bought. It’s delicious. It’s bright. It’s fresh. It’s everything I could ask for in canned salsa.